RSS Feed
  1. Conservation Conversations // An Additional Form of Documentation

    August 26, 2014 by Lauren Schott

    No one likes to think about all the little things (or, heaven forbid!, big things) that can go wrong as we work on our conservation projects. We are trained professionals. Our hands are steady. Our minds are sharp. And yet, as we work, any number of things could go wrong. A hand may slip as we lift adhered materials; a fragment may fall to the floor and crumble into a thousand irretrievable pieces. It’s sometimes intimidating to think about, but we all know in the back of our minds the myriad things that could go wrong.

    This, of course, is why we take the preliminary photos so often considered as “simply routine.” With them, we preserve a record of what the book once was. Imperfect though they may be, photographic evidence is better than no evidence at all. But what if a photograph doesn’t show just what we were hoping?

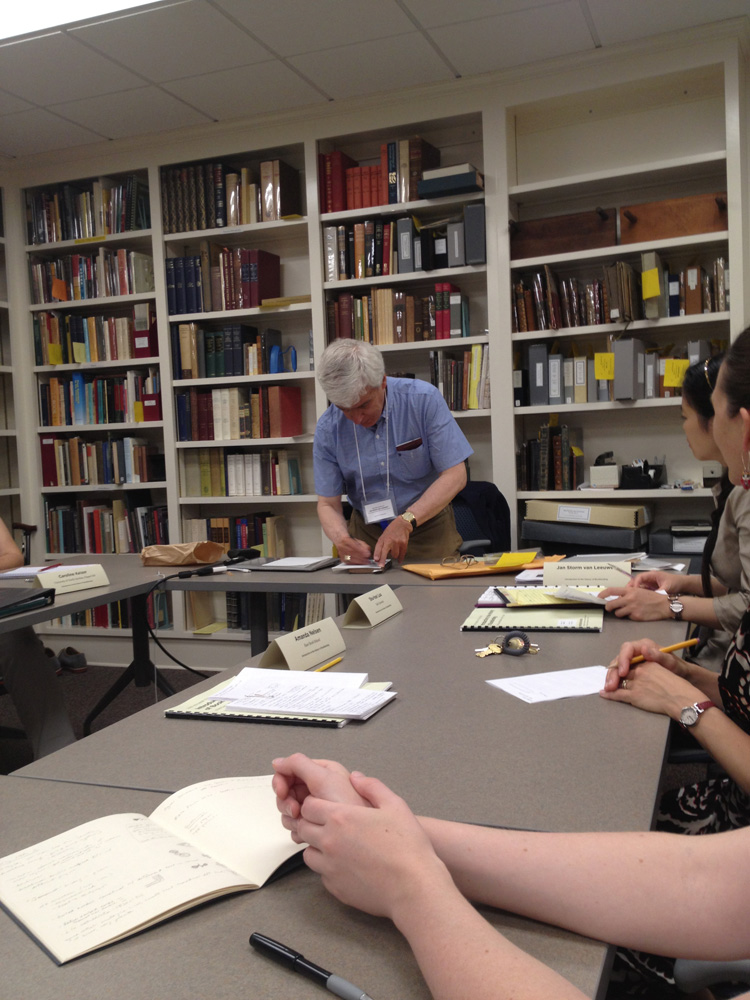
    I recently had the opportunity to fulfill the role of the William Reese Fellow at Rare Book School in Charlottesville, VA. The fellowship provided a week of class for a week of service to RBS. In my case, specifically, I acted as an on-site conservator for some of their most in-need collections. The class I took was Jan Storm Van Leeuwen’s “Introduction to the History of Bookbinding,” which coincidentally was the same class attended by Erin Fletcher, the proprietor of this blog. The conservation projects were wide and varied, as RBS’s large collection is intended for teaching students of the book with countless focuses and interests.

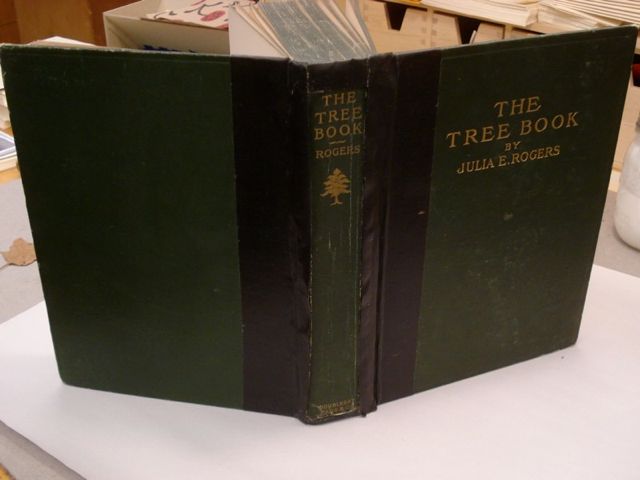
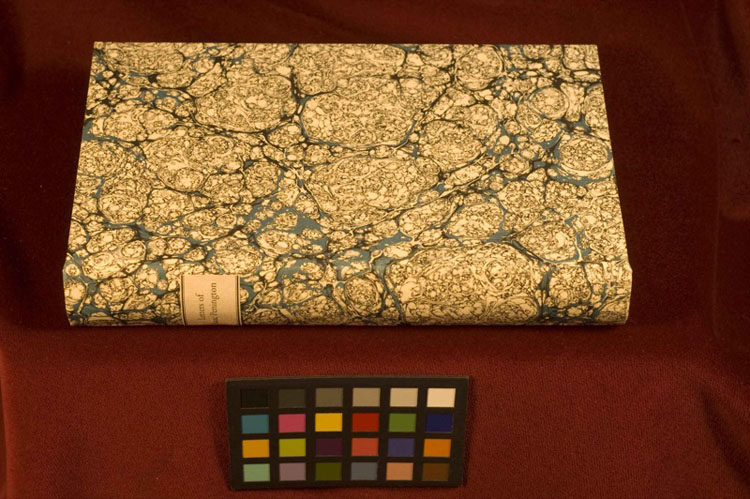
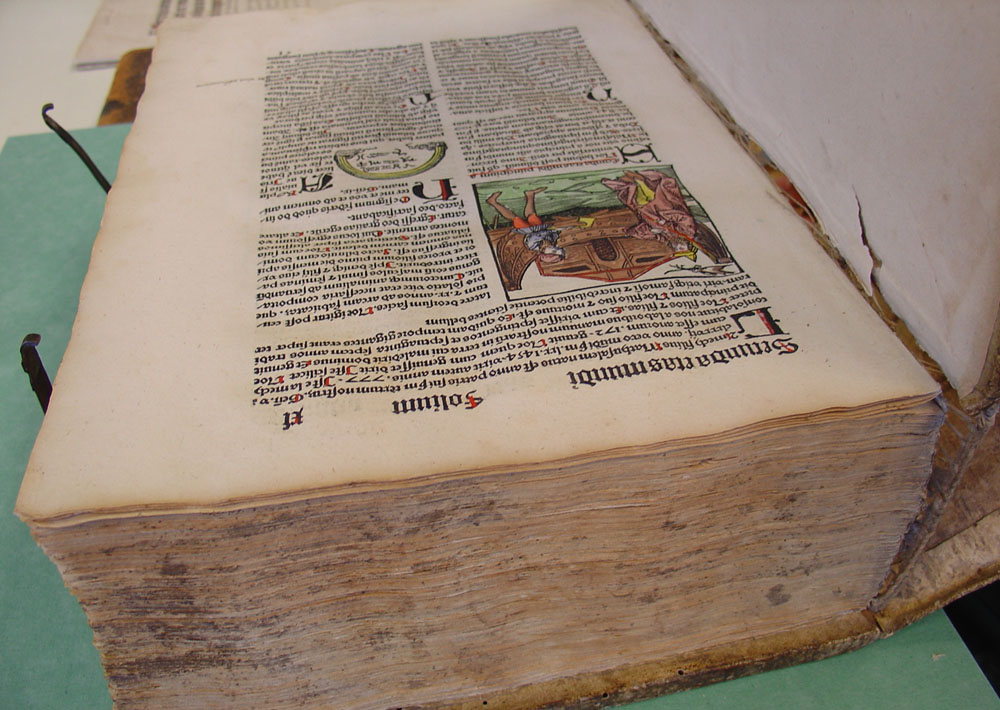
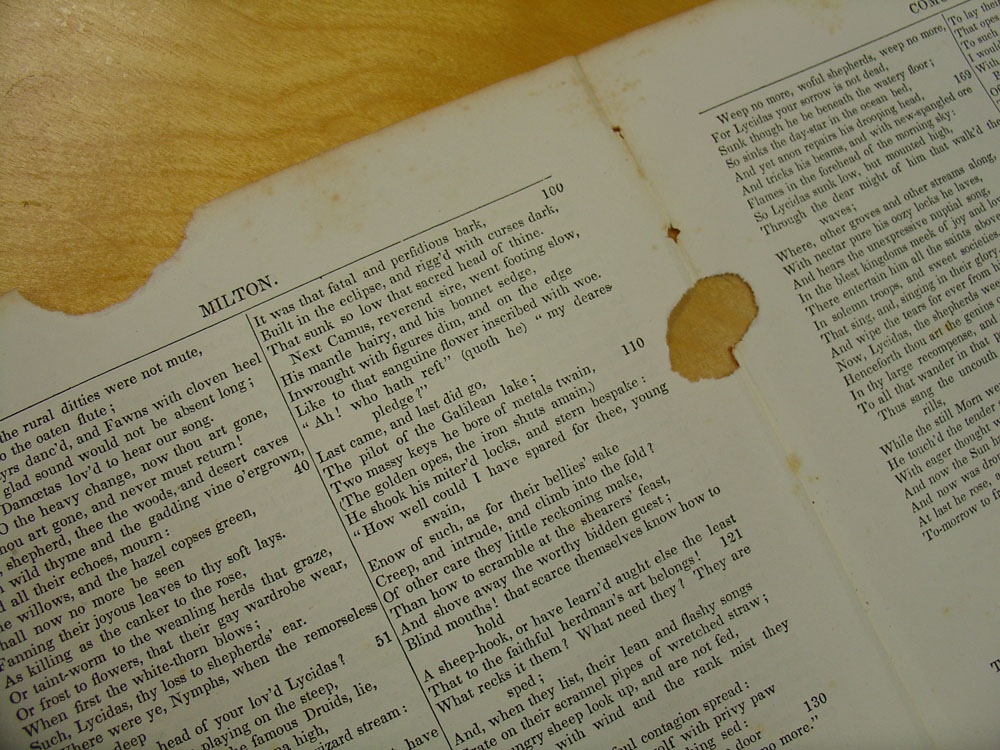
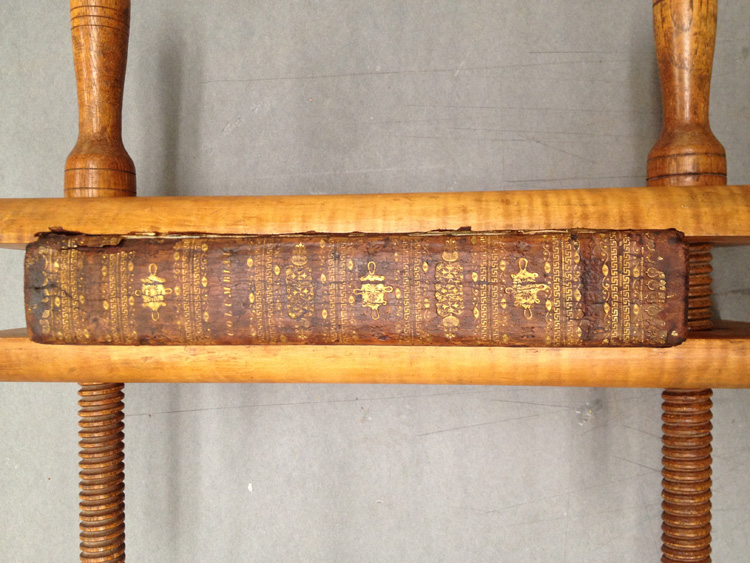
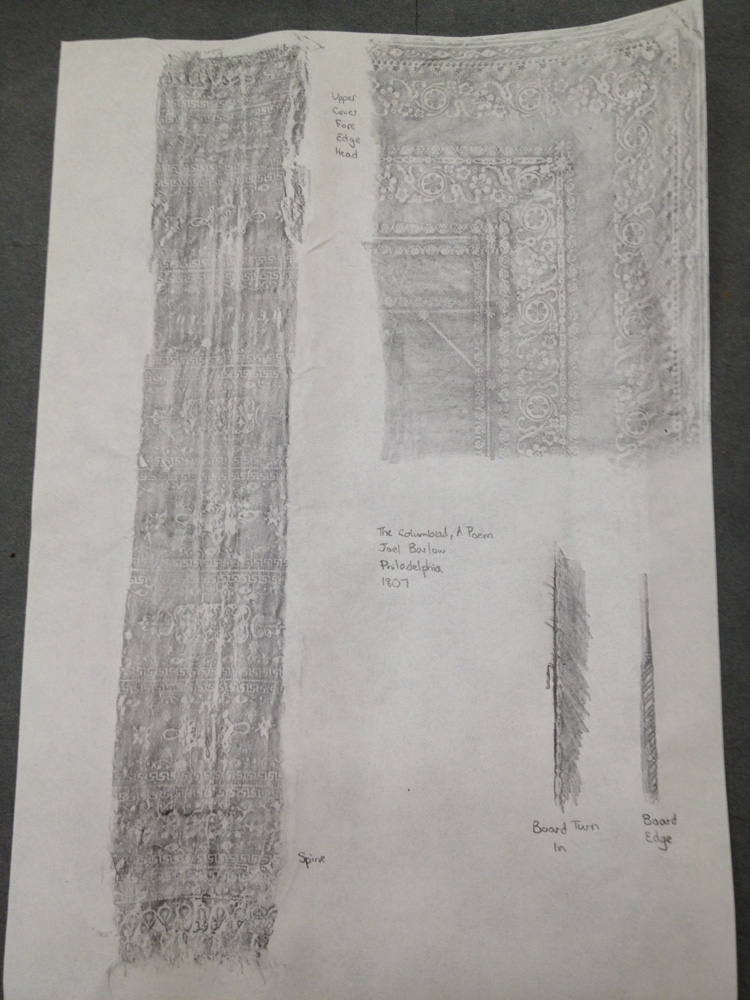
    One of the books I was presented with was a first edition of Joel Barlow’s The Columbiad—A Poem. Of course, RBS valued this copy not only for its edition, but for its binding. The binding was original; in full calf, decorated in gold and blind tooling, it was an exquisite example of early American deluxe binding.

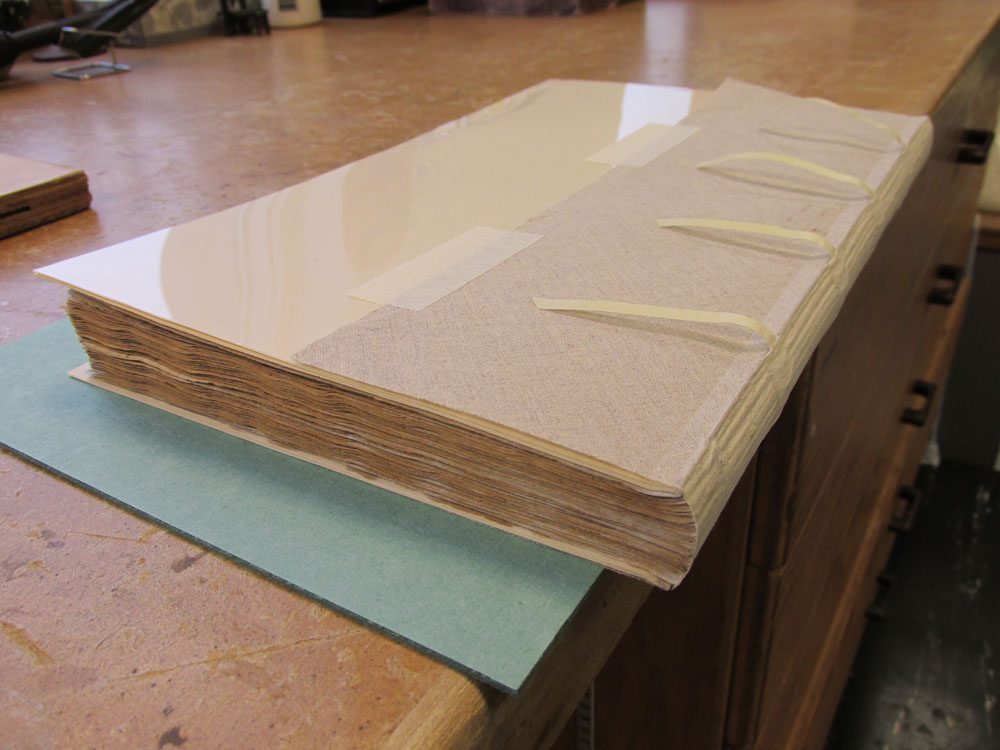
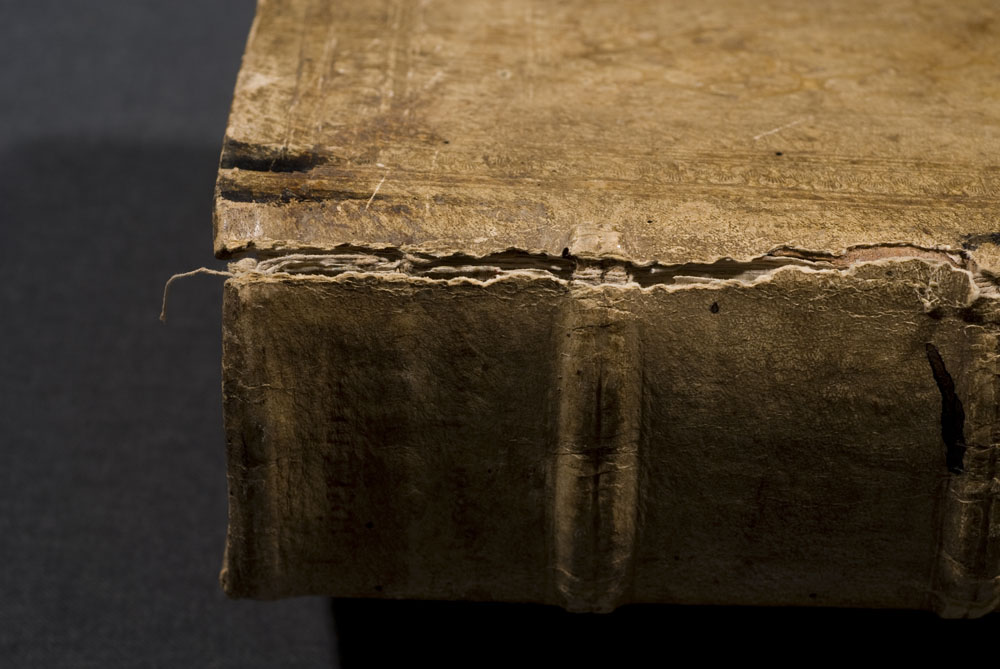
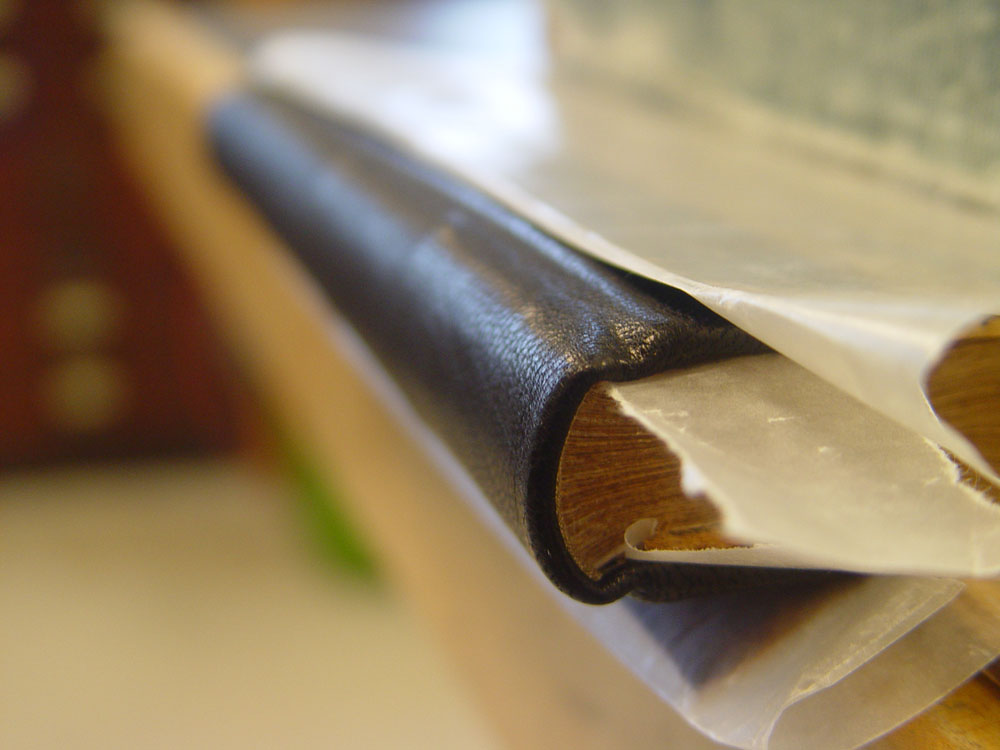
    The upper board was entirely detached, and the bottom was in imminent danger of becoming so. The tight back spine was cracked and suffered redrot, and it was evident that a leather reback was necessary to preserve the book’s utility to the school. The danger of this treatment, of course, is that, should anything go wrong with lifting the spine, its beautiful panel tooling might be lost.

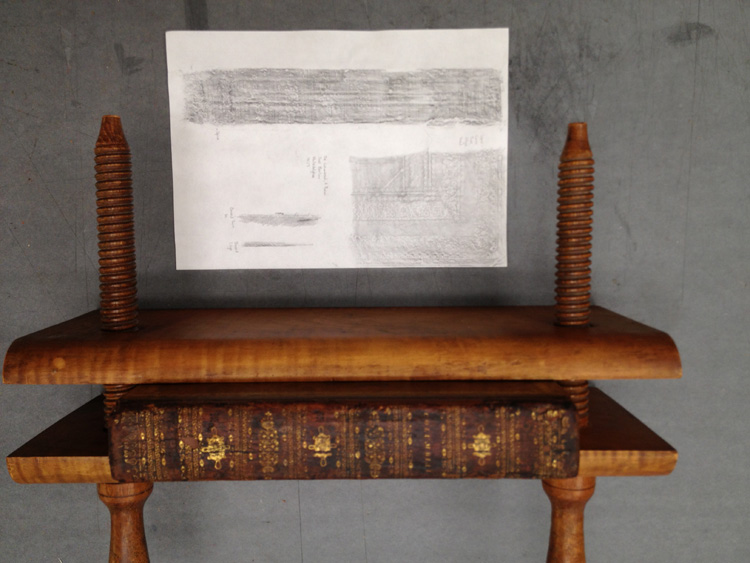
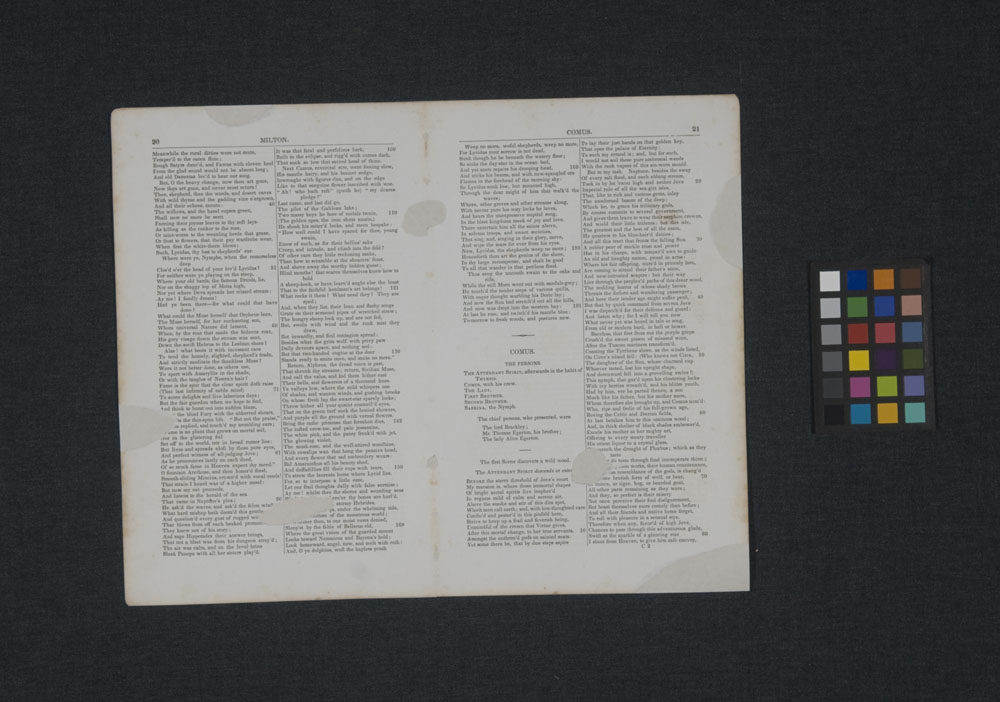
    I photographed the book before commencing work, documenting individual tools as well as the overall patterns in which they were used, and then I began.

    First, of course, was consolidating with redrot cocktail, a combination of SC6000 and Klucel G. This in and of itself revealed a new element to the book. With the darkened leather characteristic of redrot cocktail, blind tooling was revealed on the spine where originally it had appeared as an empty intermediary panel. I re-photographed the spine to document this tool, but it was difficult to make out even with a naked eye, let alone through the lens of my camera.

    Documentation-LaurenSchott

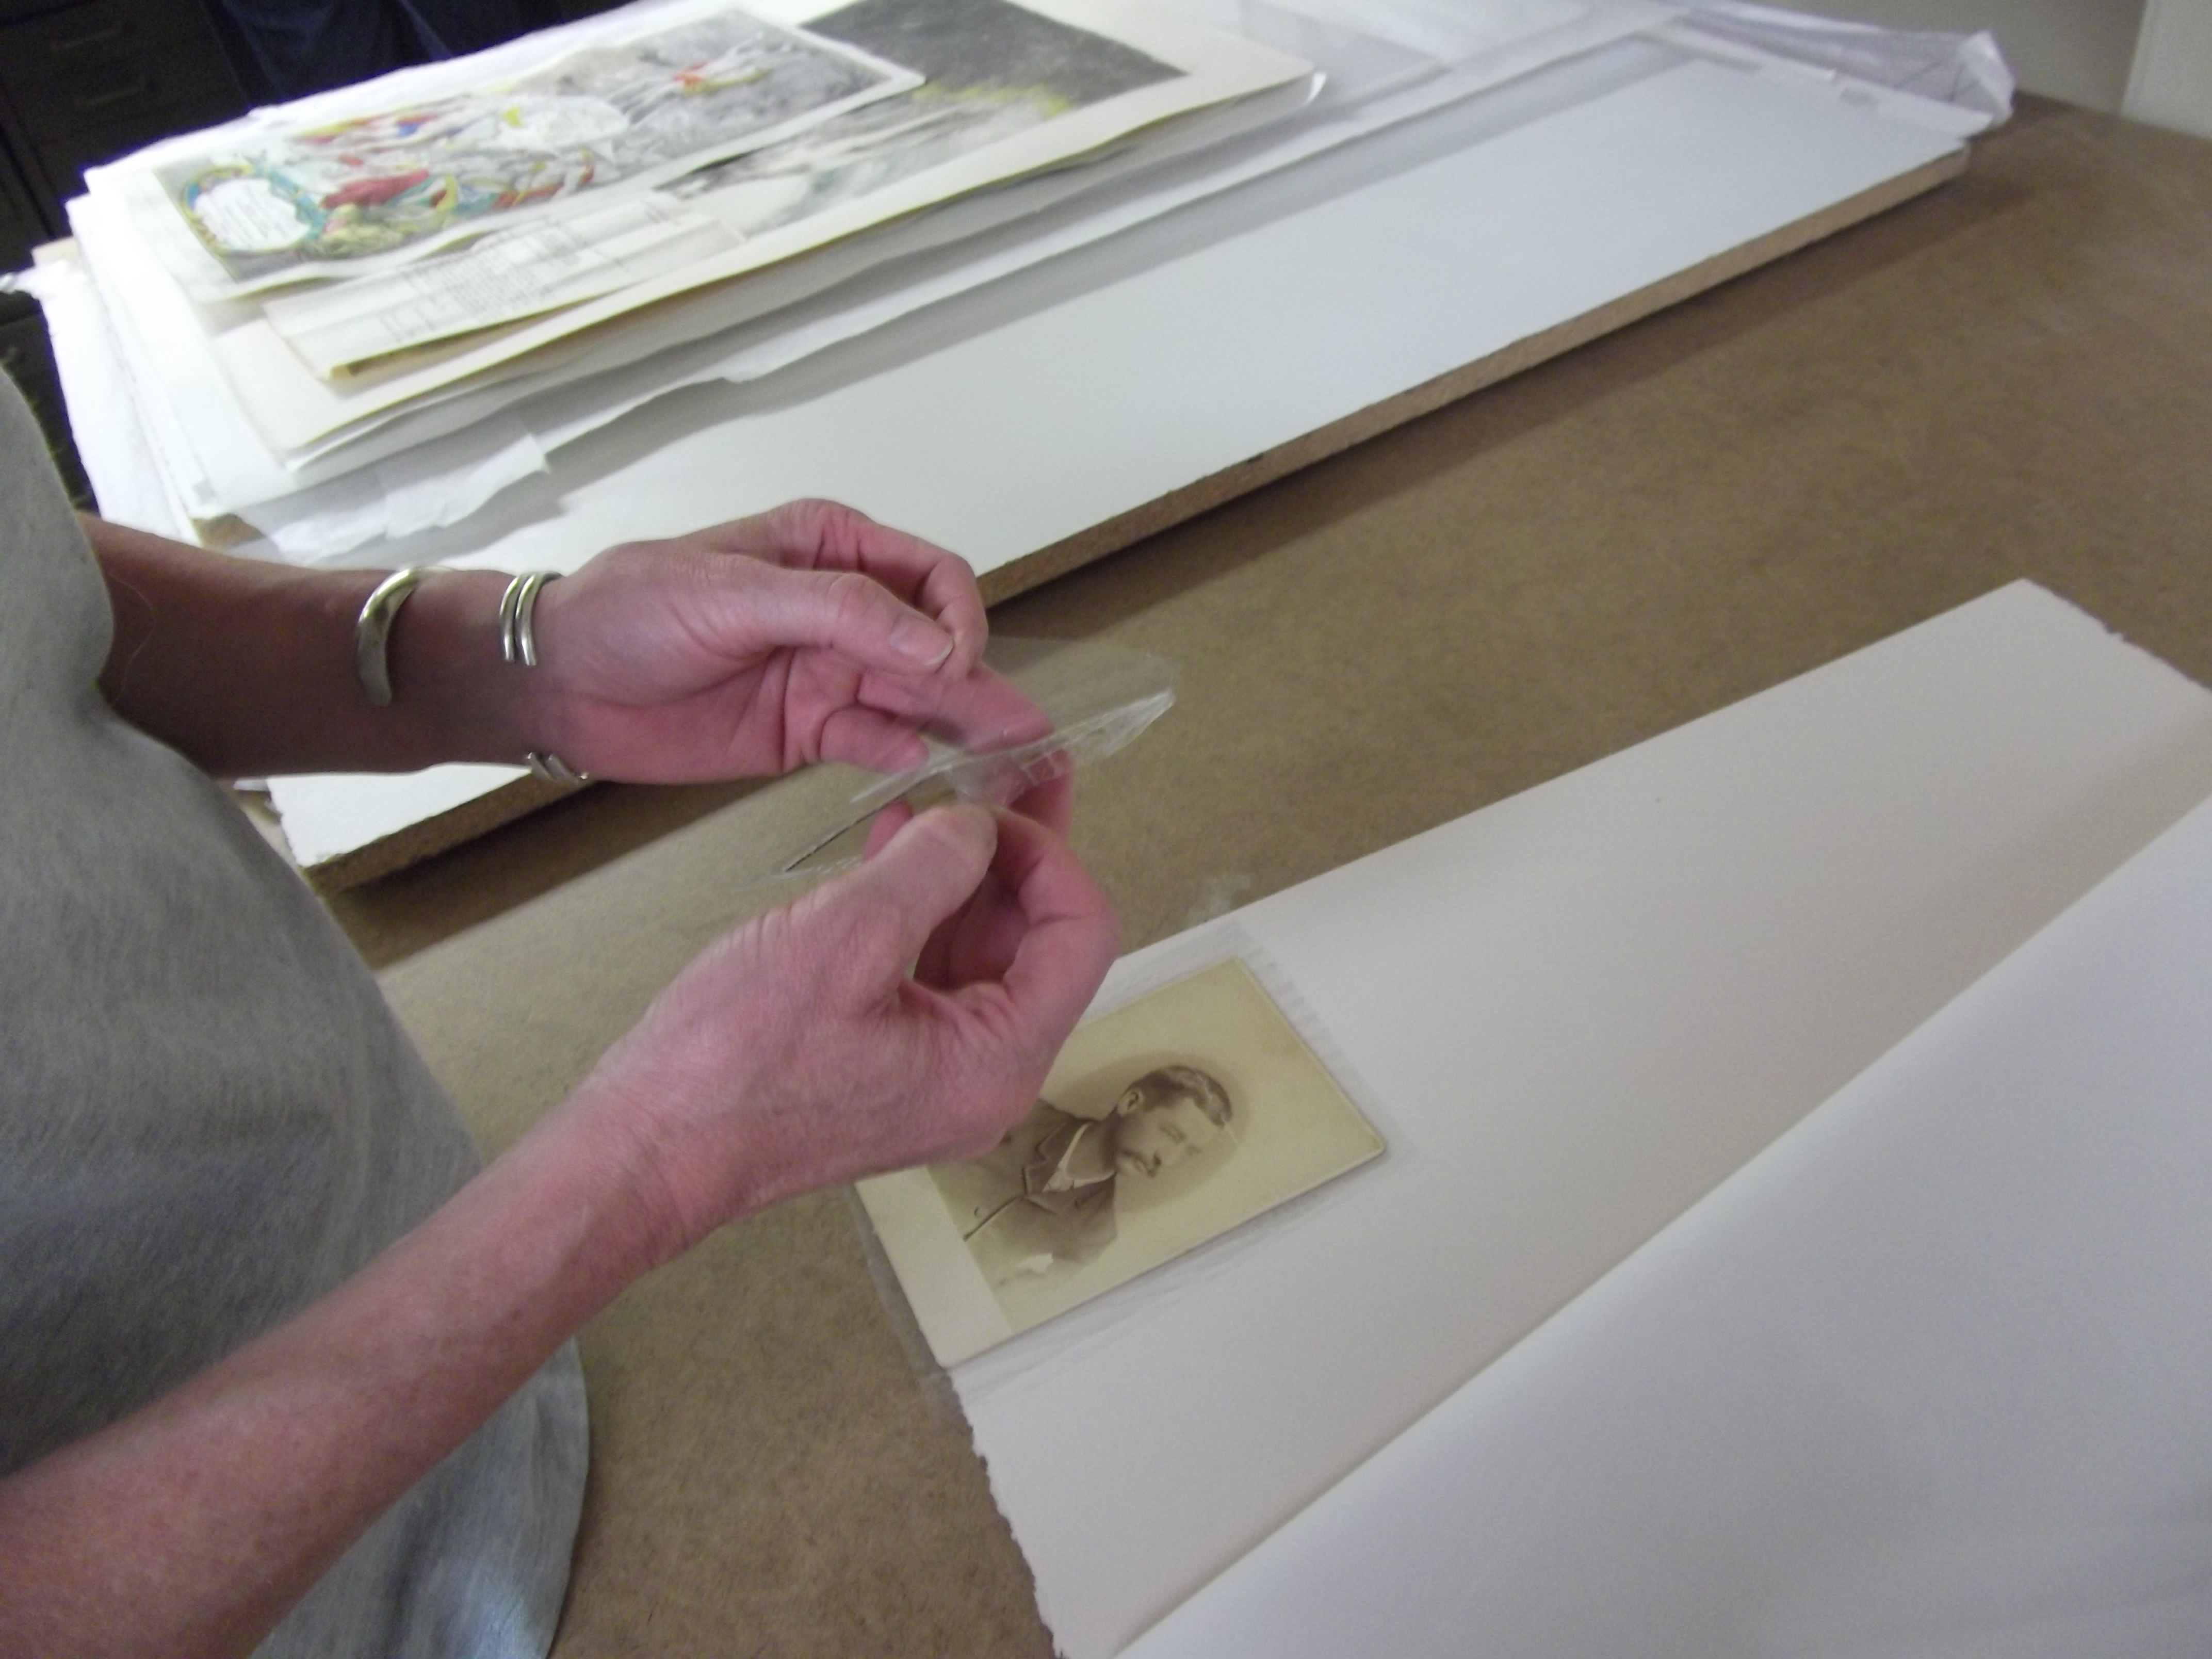
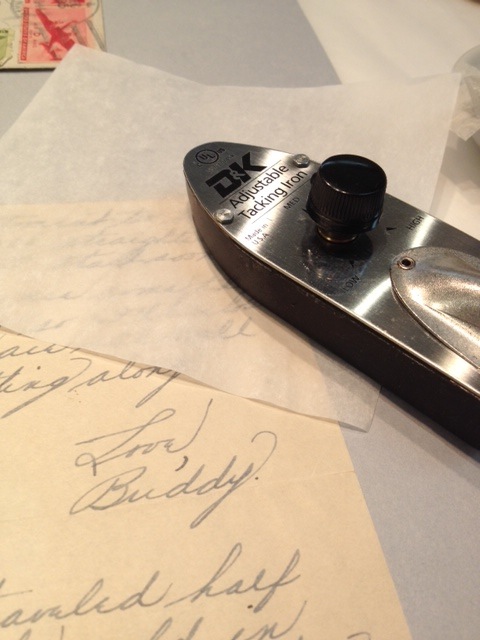
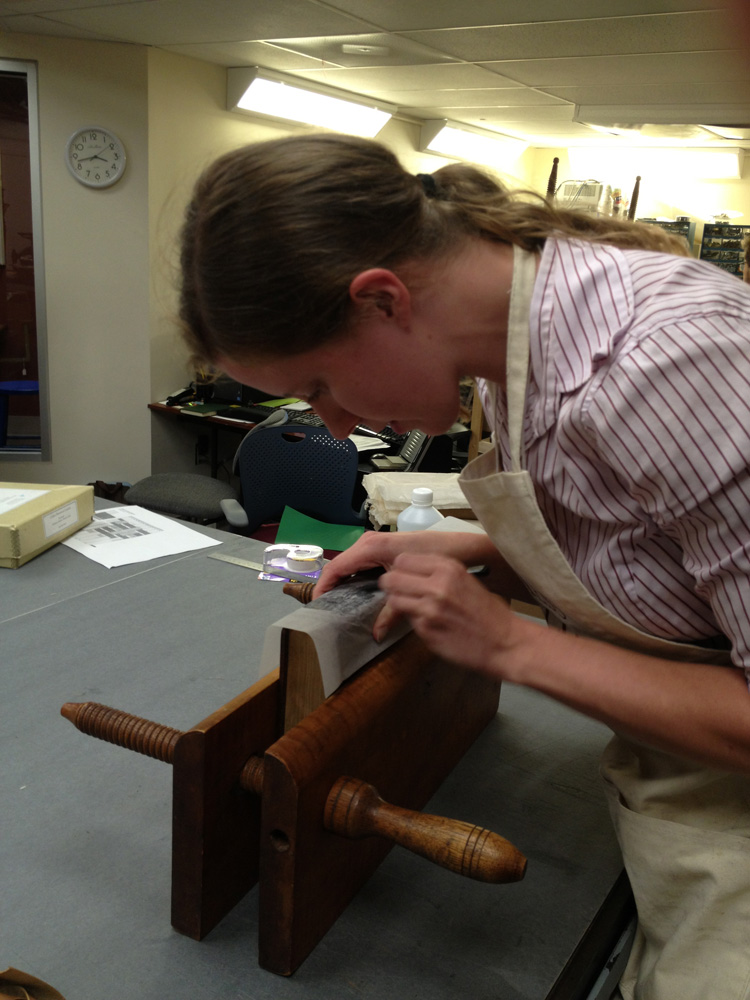
    I then realized I could make use of one of the techniques taught to me in Van Leeuwen’s class. This is something Van Leeuwen made use of frequently in his time as Keeper of the Book at the Dutch Royal Library in the Hague, and which I now hope to employ more regularly in my documentation. In short, he took rubbings of the decorative covers of the library’s books.

    Van Leeuwen uses an artist’s soft graphite pencil and a light wove paper he commissioned specially for the practice. He lays the paper over the area to be documented, plants one hand firmly to keep the assembly in place, and begins his work. Holding the pencil at a nearly 45 degree angle, he rubs gently horizontally, vertically, and to every angle. He changes the angle of the pencil as he works to capture the specific aspects he wishes to be revealed in the tooling, sometimes circling the pencil, sometimes pressing harder or softer. Varied depths and lacework lines reveal themselves in great detail as he works, rendering a copy in shades of black and white of the book’s decoration. Van Leeuwen takes care to note the book being documented, to what portions of the book each image belongs, as well as the date and the taker of the rubbing to provide a good record for researchers.

    Documentation4-LaurenSchott

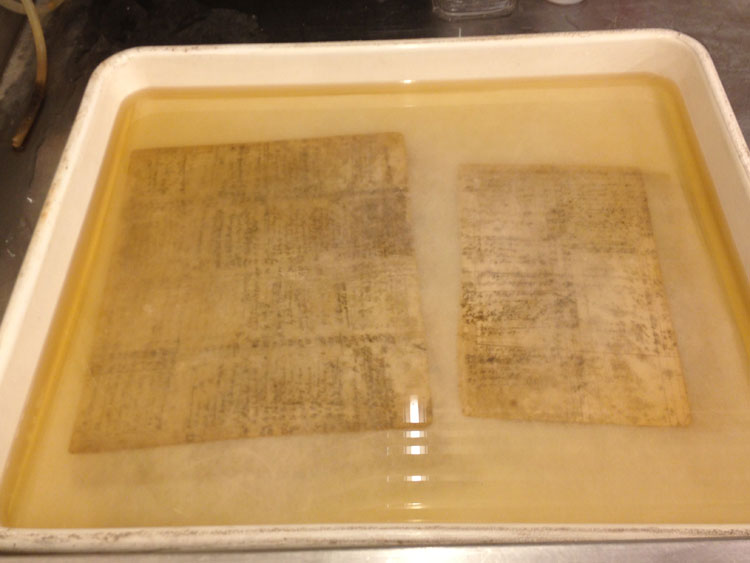
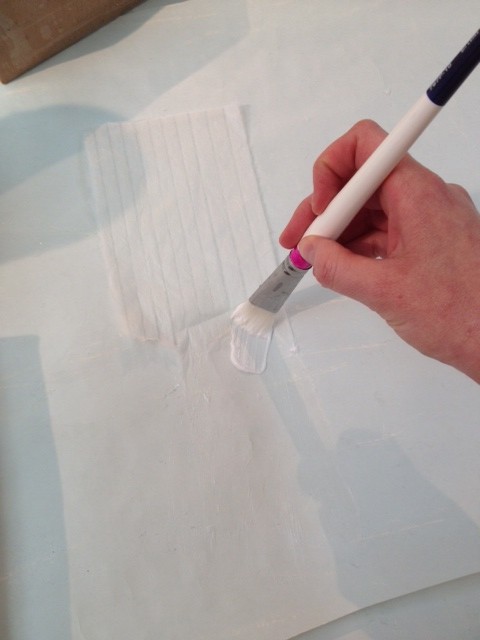
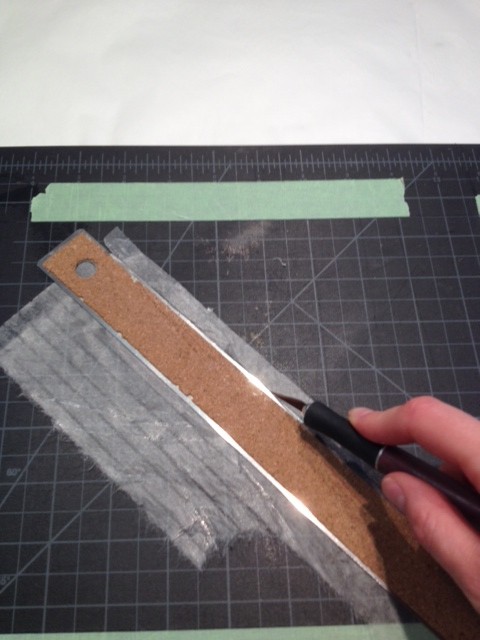
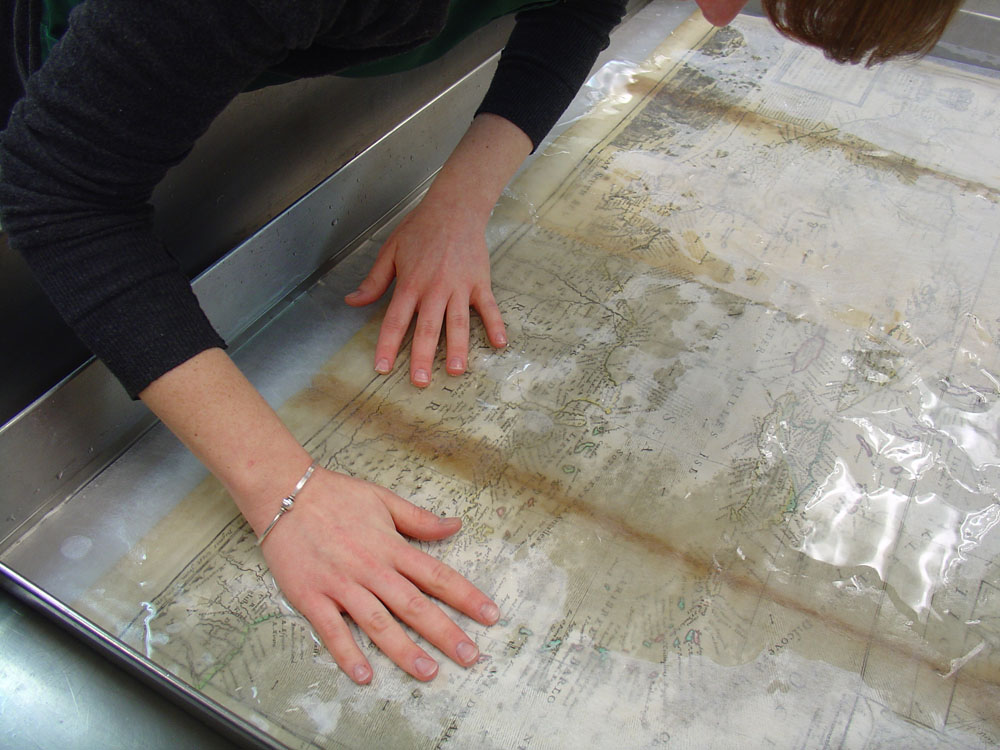
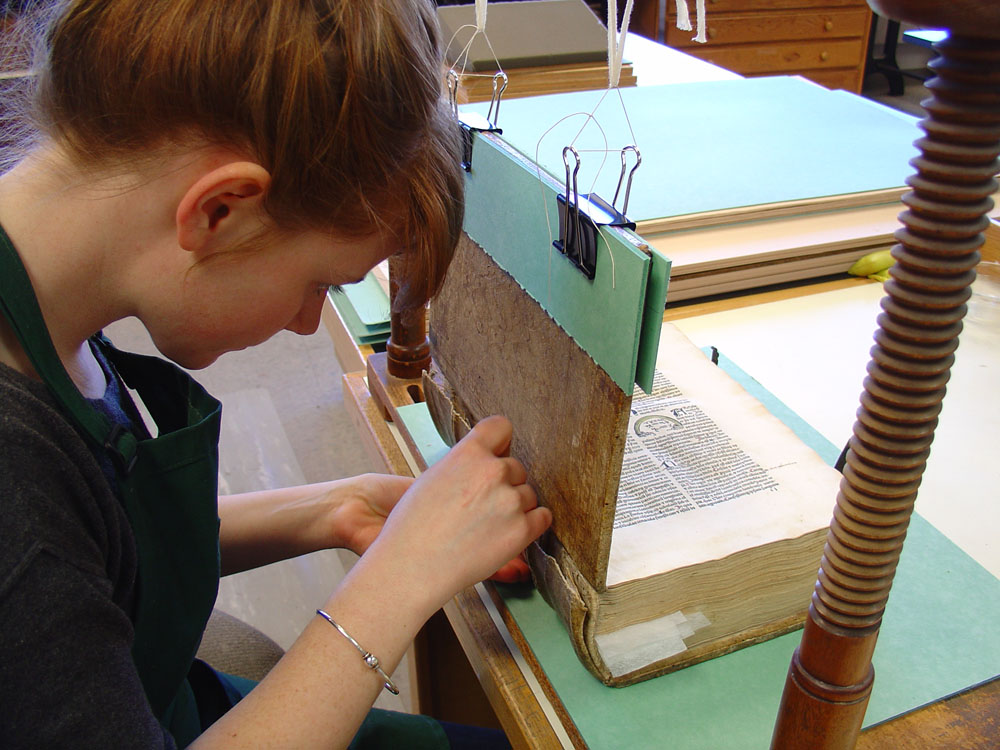
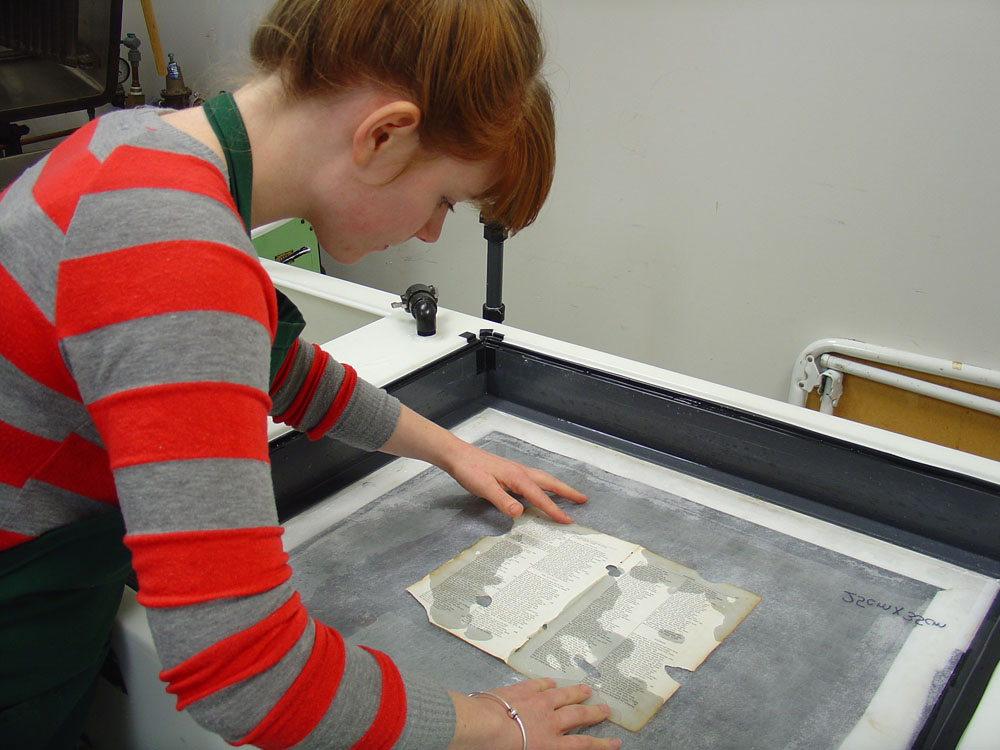
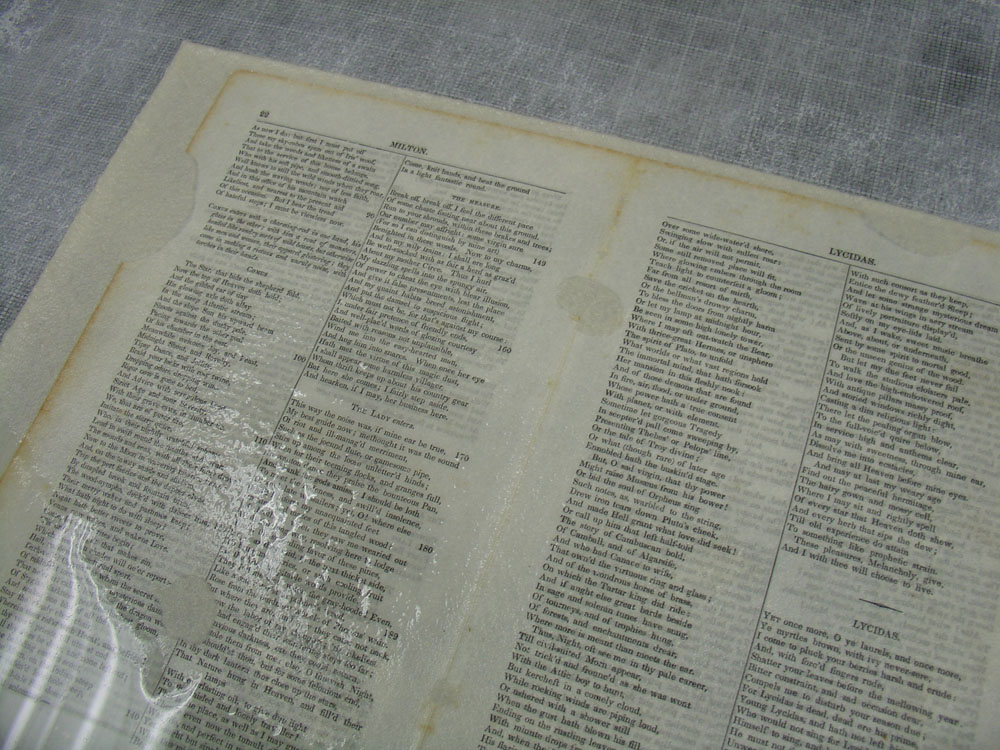
    It was with great excitement that I was able to use this technique in a real-life situation so shortly after having learned it. I experimented with various tissues intended for repair. Their soft texture and flexibility offered a good medium for capturing the imagery of the tooling that the camera would not. It took several trials to find a suitable paper that would provide the suppleness to sink into the tooling, yet not tear with the use of the graphite pencil, but once the proper paper was found and the rubbing taken, the image of the tool was revealed in greater detail even than could be seen simply by the eye. A satisfying result indeed!

    Documentation5-LaurenSchottDocumentation2-LaurenSchott

    Having taken the rubbing, I faced the spine with solvent set tissue, lifted it in one solid piece, performed the reback, readhered it, and once again removed the tissue. In all, the added precautions of taking the rubbing were not strictly necessary, but it was a reassuring way to expiate the danger of losing this piece of early American tooling in its entirety.

    Documentation3-LaurenSchott


  2. Conservation Conversations // Su-Su

    July 29, 2014 by Lauren Schott

    Everyone who washes paper is familiar with the dramatic color transformation that takes place on the page after it is removed from its final bath. The evidence is left in the washing tanks; the water turns an unsavory yellowed color, and the paper is, to a degree, returned to its former glory.

    SuSu-LaurenSchottSuSu9-LaurenSchott

    The concept of su-su is to harvest this colorant and use it to dull the often glaring white of repair tissues. It helps the eye transition over repairs to appreciate the elements of the original object, rather than the work that’s been done.

    My first introduction to su-su was a brief mention during a paper repair workshop. My instructor, while addressing a question concerning blending and color matching to make repairs less obvious, told the class about this paper color extract. “Dirt paint,” she casually called it. It sounded like something slightly magical and a little counterproductive, though she assured us it was effective and safe for the paper. (For more information on the science behind su-su, check out the article by Peirs Townsend titled “Toning with ‘Paper Extract’” in The Paper Conservator, Vol. 26 (2002) 21-26.)

    The concept of su-su lingered in my mind. It came up in conversation at my bindery every once in a while, so it seemed it was on everyone else’s minds, too. “Hey, you remember that su-su coloring? How does that work again?” and “Have you tried to make it yet?” But for one reason or another, it wasn’t until a few years later that I actually got to produce it myself.

    The first step in creating su-su is to gather acidic papers that won’t be missed. Scour what your library is discarding for those telltale brittle yellow pages. The conservation department where I was working when I made my su-su had been saving discarded covers, endpapers and other scraps for years just for this occasion.

    SuSu8-LaurenSchott

    We filled a half gallon pot with acidic paper, breaking it up into small pieces as we went to increase surface area. After the pot was about three quarters full, we added water.

    SuSu7-LaurenSchott

    We set the concoction on high heat over our small stove until it came to a boil. Once it was hot enough, we turned it down to a low simmer and let it cook for several hours, stirring occasionally. The water took on first that yellow color, then started to darken as it concentrated.

    SuSu6-LaurenSchott

    After a few hours, we used tongs to remove the large pieces of pulp, and poured it through a strainer to remove the smaller particles. Then it was back to the stove for more simmering.

    SuSu5-LaurenSchott

    The dark brown liquid soon cooked off to create a viscous syrup, which we stirred regularly to prevent burning, just as you would while cooking chocolate.

    SuSu4-LaurenSchott

    We siphoned off the syrup into various shallow containers so the last bit of moisture would evaporate quickly. We mostly used the lids of small mason jars and some watercolor trays.

    SuSu3-LaurenSchott

    Since several of our containers were made of plastic, we couldn’t put them back over the stove at this point. By this time, making the su-su had taken several hours of work, though often with on-and-off attention. We elected to allow nature to take its course and let the small cakes dehydrate on their own while we worked on other projects, although we did occasionally take a moment to help them along with the assistance of a hairdryer.

    This is the result.

    SuSu2-LaurenSchott

    Though Townsend’s article claims that the resulting colorant is non-acidic, it’s always best to be sure of your medium before you use it on actual repairs. Test out the acidity of your result by painting the tint over a pH strip, and then take appropriate measures to balance out the pH of the tint before applying it to tissue. This batch was fairly neutral when tested, so I can use it without alteration.

    Su-su has become a regular part of my repairs. Whenever I pack a tool roll for conservational trips, it’s one of the first things to go in, right alongside my favorite bone folders and lifting knives. From my experience, a little goes a long way, and I anticipate this batch lasting me for quite a while.


  3. Conservation Conversations // BEVA 371 film

    June 28, 2014 by Becky Koch

    One product we’ve started using in the studio on a regular basis is BEVA 371 film. BEVA is a type of liquid adhesive used mostly in paintings conservation, but it can also be purchased as a thin sheet of film used to back items to paper or board. BEVA is heat activated, is completely reversible with heat or solvents, and creates a strong, archival bond between papers.

    BEVA film comes as a sheet of Mylar, which the BEVA film itself is adhered to, and a sheet of release paper over that. The backing process occurs in two steps – first the release paper is removed and the object to be backed is placed on top of the thin layer of BEVA (which is still adhered to the Mylar at this point). Heat is then applied to activate the BEVA, you can use a tacking iron or if you’re lucky to have a heat/vacuum press like we do, that works ever better!

    These photos have been attached to the BEVA film but the Mylar backing hasn't been removed yet.

    These photos have been attached to the BEVA film but the Mylar backing hasn’t been removed yet.

    When the piece has cooled down you will have your object attached to a piece of Mylar. Now is the time to trim the BEVA so it is flush with the object – remember to cut out any interior areas where there are holes or losses. The Mylar can then be peeled away and the back of your object is covered with a thin layer of BEVA, like a sort of heat activated sticker. Place your BEVA-coated object on your backing paper or board and apply heat. And now you have a perfectly backed object!

    Removing the Mylar backing

    Removing the Mylar backing

    Finished!

    Now this couple is backed to acid free board

    I like BEVA a lot because it’s great for low-stress, no-mess backing. When backing things with Lascaux the adhesive gets a bit “gooey” with heat and things can shift slightly. When backing with paste you need to move quickly before it dries and even while using the most care a bubble can sneak in every once and awhile, not to mention that some objects can’t handle the moisture involved with a paste backing. BEVA isn’t time sensitive (you can start the backing process one day and finish it a week later), I haven’t noticed any “shifting” as of yet, and since it is a dry process there is no mess whatsoever.

    If you’re interested in learning more about how to use BEVA film, I recommend this page by Talas: Basic Instructions for using BEVA 371 Film


  4. Conservation Conversations // Removing Tape with an Air Pencil

    June 6, 2014 by Becky Koch

    For those of you that don’t know, tape is bad for paper and books! Tape eventually stains paper it comes in contact with (the length of time it takes to do this depends on the type of tape and environmental conditions), and the vast majority of the time this staining is non-reversible. Removing the tape itself is a high-risk activity, as there’s a chance that the top layer of paper can peel away, or fragile paper can tear during the process. If you want to keep anything for the long term, it’s just safer to keep the tape far, far away from it!

    DSC_3868

    Tape didn’t help this marriage certificate!

    There are lots of different ways to remove tape – some tape is so old and desiccated it almost falls off by itself, some types of tape easily come off in a water bath or with a poultice, and sometimes heat or solvents have to be used.   In our studio we try to avoid strong solvents as much as possible just for our own health, so our usual tape removal techniques involve heat.

    DSC09749

    Don’t fix your books with electrical tape!

    My go-to method has always been warming the tape up with a tacking iron to reactivate the adhesive and then picking at it with a microspatula or scalpel. After the carrier (the plastic or paper part of the tape that the adhesive is attached to) is removed, the sticky residue that remains can be picked up with a crepe eraser. Sometimes this method works great, but sometimes that tape just does not want to move! In those cases I get out the air pencil.

    photo 1

    The air pencil is something I had never seen before starting my job here. It is a soldering tool that generates a hot, concentrated stream of air. While it’s made to melt wires together, we use it to heat up tape.

    It’s a good alternative to the tacking iron because you’re never applying pressure directly to the tape, which can make the tape just adhere more securely to the paper rather than helping to lift it. The air pencil reactivates the adhesive without actually touching the tape itself, making it much easier to slide a scalpel under the carrier!

    photo 3

    Be aware that the air pencil can get really hot – remember that it’s made to melt wires! It’s easy to not only burn yourself but also burn the paper or even melt the tape carrier. We keep the temperature between levels 1 and 2 which seems to work on most tapes and has yet to damage any paper.


  5. Conservation Conversations // Lascaux 498

    May 16, 2014 by Becky Koch

    I’ve worked in a lot of library conservation labs throughout my training and when I was finally looking for a “real” job I thought I knew more or less what kind of supplies and tools were out there. But then almost two years ago I became the book conservator at a paper restoration company and I suddenly learned about all these new things I had never heard about before. I don’t know if it’s because paper people just use different techniques, or it’s just how my coworkers learned to do things, but I’ve discovered a lot of new things over the past two years! Over the next few weeks I thought I’d share some of the new products I’ve encountered at this job, and maybe you’ll learn something new as well!

    The first new thing I encountered on my first day was Lascaux 498 HV. I’d seen it in a few conservation labs before, but it was always used as one of those “extra” adhesives that you’d only take out on rare occasions when you’d run out of all other options. But we love it and use it all the time!

    photo

    Lascaux looks a lot like PVA, except thicker. You can use it like PVA too, as a wet adhesive, but the fantastic thing about Lascaux is that you can use it as a heat-activated, reversible, dry adhesive.

    We make our own heat-activated mending paper by covering one side of a sheet of tissue with Lascaux and allowing it to dry. If you’re using a thin tissue note that some of the Lascaux is going to bleed through to the other side and cause the sheet to glue itself to whatever it’s drying on! To avoid this, move your glued up tissue onto a piece of silicone release, a drying rack, or hang it up to dry. When the tissue is dry, cut into strips. You now have your very own heat activated tissue!!

    photo 1-1Gluing up some tear strips

    photo 3-1Cutting strips after drying

    photo 4Heat activated mending strips!

    While it works in the same way as Crompton’s Tissue, that being you cut a piece out and then adhere it with a tacking iron, making your own heat-activated tissue gives you a lot more versatility. You can use any tissue weight or color, and sometimes we paint up whole sheets of paper if we need to back a brittle print.

    photo 5Even after drying the strips remain slightly tacky, so store them away from dust and dirt.  I suggest a Disney-themed ziploc bag.

    Lascaux is both heat and alcohol activated, that means if your tacking iron dies you can use a bit of isopropyl to activate the adhesive on your strips, and you can also use alcohol to remove anything you’ve already stuck down. You can also remove any tissue by activating the adhesive with a little bit of heat from your tacking iron.

    This adhesive is especially helpful for use with water-soluble pigments. If you have something that is very fugitive or very prone to tide lines, repairing or backing something with wheat starch paste can cause real problems or even permanent damage. Since Lascaux is a dry process there is no risk to pigments, and any mends or backings that are applied can be removed with heat or in an alcohol bath.

    I’ve painted up both sides of the tissue and used it as a kind of archival/reversible double-sided tape. I just finished repairing a scrapbook – I reinserted everything into a new book with my double sided Lascaux pieces and I didn’t have to worry about the pages cockling with moisture, and if I messed anything up they were easy to pop off and re apply.

    photo 2

    photo 3

    I’m sure there are lots of different applications for Lascaux, but this is how we use it where I work. If you want to give Lascaux a try, make sure to use Lascaux 498 HV, there are lots of different Lascaux out there, but this is the kind to use to make mending strips.


  6. Conservation Conversations // Book Conserva-Binder

    May 1, 2014 by Athena Moore

    I’ve been asked before whether I consider myself a book conservator or a bookbinder, or whether I consider myself to be one or the other first. While I don’t think you need to be both to be either, I find that for me the two are inextricably linked. 

    005

    When I started at North Bennet Street School in 2008, I wanted nothing more than to learn everything I possibly could about making books. I was amazed and delighted by just how much we did at the bench during those two years and how far I’d come in my skills and knowledge in that time. I was also sort of overwhelmed by just how much I had felt I had left to learn upon graduation. Every facet of book history we discussed or structure we tackled gave me a view into what a complex world books inhabit.

    5168227844_9387a3e0a5_o

    The desire to better grasp the intent and progression of bindings over time is what steered me towards conservation. During my first internship at Haverford College’s Magill Library, I started to understand how much this field can make one feel like a detective. The hand skills I had been learning at NBSS gave me the confidence to handle a range of objects – even those made with materials I might not have encountered yet. Learning to bind books from the very beginning stages had really aided in my ability to assess how a binding was constructed and, to a greater extent, why it was constructed that way.

    DSC03932

    110144B

    Athena Moore - 2.jpg

    Upon my return to school for the second year, I used the hands-on collections knowledge I gained that summer to help direct myself. I was equally interested in learning fine and design binding (leather! gold! yes!) and conservation, so I did my best to focus on both. I took on opportunities to do small repair projects that came through the school and worked part time at the Hayden Library at MIT. I was filled to the gills with information, but felt more and more like the two paths of this craft I was learning truly informed one another.

    Copy of P1060647

    120115B

    While the program at NBSS is not heavily conservation-based, the hand skills and binding history I was imbued with during my time there is invaluable to the work I do as a book conservator. After graduation, I interned at the Frances Loeb Library at the Harvard Graduate School of Design and was a fellow at the Boston Athenaeum. Through both of those experiences and in my current position at Northeast Document Conservation Center, I’ve contineed to be surprised by just how many structures I learned at NBSS that I’ve either treated or re-bound.

    5285797761_01b75bbe5d_o

    More of the hand work that I do these days is conservation focused, but I still love bookbinding and take on custom work or projects of my own with a fair amount of regularity.

    004

    c6d18df0acbb11e397651270abe28de5_8

    I find that the way my brain operates when I approach conservation really helps me in approaching my own outside work. I encounter so many seemingly similar bindings that turn out not to be exactly what they appear that it gets easier and easier over time to approach the creative challenges of new structures.

    031 (2)

    bb0956968b3e11e2a19522000a9f126b_7

    The need to be efficient and deliberate in my day to day work really feeds into my ability to effectively plan my time and, in doing so, give fair and accurate estimates to friends and clients. Finding time to work outside of a full time job isn’t the easiest thing to do, but being steeped in a form of work that uses so many of the same skills makes it all the more possible. For every part of my book work, I know I need input from binders and conservators alike and luckily, I’m more or less surrounded by both.


  7. Conservation Conversations // Not Just What, But Why

    April 10, 2014 by Athena Moore

    DSC03420

    In conservation, there are an endless number of questions to ask oneself on a daily basis. Is this binding contemporary with the text? Should I size this paper? How am I going to reback this mess? The reality is that in this field, it often has less to do with how you’re going to treat an object and more to do with why

    110151B

    As a book conservator at the Northeast Document Conservation Center, it’s difficult to predict what might come across my bench from week to week. NEDCC is not a collecting institution and as a result, the objects that come in and treatments we perform can vary pretty widely. Despite the fact that certain treatments might not come up with great frequency, it’s crucial for us to keep our broad skill set sharp. In addition to knowing how to execute these treatments, it’s of equal importance for us to know what the most appropriate approach is. 

    025

    When a client approaches us about a volume or collection of volumes, one of the first things we work to establish are the goals of that client and/or their institution. This helps to inform our recommendations and gives both us and the client a sense of what is possible. 

    110144B003DT010

    If the intent is to put a volume on exhibit, it may be decided that we should improve its appearance by surface cleaning and stabilizing the binding to make it safe for display. If the volume will be used for teaching, we have to be more thoughtful about its ability to function – this might mean reattaching loose material, reinforcing or replacing sewing, or rebacking. If the volume is considered important because of its content but the binding isn’t necessarily special to the client, we may change the binding altogether or decide just to digitize it. Particularly fragile items that will be used for research or otherwise handled will often be digitized and returned with handling instructions or if they’re in particular bad condition, may be encapsulated and post bound. Objects that are considered artifacts are generally approached in the most conservative manner and may only be boxed. We often remove damaging materials, but not always – if it is considered part of the history of the object, it might be necessary for us to leave them.

    DSC03932

    As a general rule, our intent is never to treat an object in a manner that is unnecessary. We aim only to perform treatments that are responsible and, to the extent possible, reversible. A large part of our job is to educate clients and help them to make the best decisions for their collections. We often aid in prioritizing – if an institution only has a certain budget for the year but aims to treat a set part of their collection, we’re able to guide them in those decisions.

    09381B

    At any given point, it’s not unusual for us to have two very similar volumes that receive very different treatments. This depends largely on the object’s intended use and the goals of the institution, but may also have to do with timeline and budget constraints. As challenging as it may be, it’s extremely important for us to balance working efficiently with treating each volume on its own and being thoughtful about what we hope to see as an end result. 


  8. Conservation Conversations // Leafcasting

    March 20, 2014 by Athena Moore

    DSC03802

    Leafcasting is magic. Well, it at least LOOKS like magic. A not-oft-used conservation method, leafcasting helps to strengthen paper by filling areas of loss with pulp. Experimentation with this treatment began by hand in the 1950s, but was made considerably easier and more efficient with the advent of the leafcasting machine in the following decade.

    There are only a small number of institutions that have leafcasting machines and an even smaller number that use them. At the Northeast Document Conservation Center, where I work as an assistant book conservator, we’re lucky enough to have one (on semi-permanent loan from the North Bennet Street School – thanks, Jeff!). Before coming to NEDCC, I had no idea what this machine was or what it did. Kiyoshi Imai, who has been with NEDCC’s book laboratory for over 20 years, is something of an expert on this treatment. He was kind enough to teach me the process (and re-train my brain on the intricacies of arithmetic) and I’ve been somewhat obsessed ever since.

    The leafcaster is essentially a paper-making machine. A document or folio (or multiple folios, as is sometimes the case) with losses is measured to determine the weight and full size dimensions. The areas with losses are measured and subtracted from that. There are a few more math steps in there, but essentially what you come up with is one number – this is the amount of pulp needed to fill the losses in grams. Leafcasting pulp can be made out of cotton and/or hemp fiber pulp or handmade paper. It is often necessary to use a combination of both, as one of the issues a conservator is attempting to address in the process is finding a good color match for the object.

    DSC03807

    The material that is chosen is blended with water to form a slurry. The object is placed on a sheet of spun polyester (which makes for easier handling and allows water to pass through) in the “casting area” of the machine and is held down by a screen while water is poured in. The pulp slurry is added to this water, distributed evenly and finally removed from the casting area by a pump located below. The pulp is pulled to the areas in the object with losses. If the conservator has done their job well, the new material will appear even and well matched in thickness and color.

    DSC03811

    The cast object is removed from the leafcaster with a second sheet of spun polyester and can be sized on a suction table, which helps to improve the strength of the original object and the adherence of the new cast material to the original material. The object can be dried either in a press or under blankets, depending on the intended result – drying it in a press can often augment the size, so in the case of casting just a folio or two from a bound volume, it may be best to allow for a slower, more gentle form of drying. If the object is a one-off, it can be slightly faster to dry it in the press.

    000002

    While it isn’t the appropriate treatment for all items, leafcasting can be a great option for some. Volumes that have large amounts of insect damage, for instance, often require a huge amount of mending time. Attempting to hand fill losses at that scale is daunting. Because the damage is usually fairly consistent, it is relatively easy to use the same math on large sets of folios. It’s also very likely that the same pulp would be used, so the biggest time commitment is just the initial set up. When an object is well cast, the strength and stability of it is greatly increased. Objects that have been cast are protected against further damage in weak areas and can be handled much more safely. Because it is essentially just handmade paper pasted to the object, it is also reversible.

    It’s easy enough to create your own losses in sample materials, so if you’ve got access to a leafcaster, try it out!

    leafcasting illustration

    I am currently working with Helen Bailey, Library Fellow for Digital Curation and Preservation at MIT, to develop software that can use digital images of objects with losses to determine the amount of pulp needed and will be leading a leafcasting demonstration and lecture for SUNY Buffalo’s art conservation graduate students this spring. I have also created a user’s manual for the Model 0901 Leafcaster, so if you have any related questions, please feel free to send them my way! 


  9. Conservation Conversations // Lab Coat Daydreams, Part II

    February 6, 2014 by Anna Shepard

    Something I have been thinking about a lot lately, as I while away hours at the bench, is the question of accessibility, specifically within the context of conservation. Recently there was a big hullaballoo at the H when a young woman, who fashioned herself as a “performing artist,” kissed a statue, smearing her dark lipstick across its pristine marble face. For this grand act of vandalism, she was fined a great sum and was required to spend an hour or so touring our conservation lab to get a feel for how complex and careful the work that goes into preserving books and flat paper objects actually is. Clearly the act is not socially acceptable and I think this young woman knew better than to leave such a noticeable mark on a statue, but it made me question the ways in which we are encouraged to engage with beauty and the ways in which we are not. Is there a right and a wrong way to experience beauty? Without proposing anything all that anarchical, I would like to address the parts of my work that break my heart and those that give a greater feeling of purposefulness.

    anna-part2a

    I was discussing the statue-kissing incident with a good friend and she pointed out that there is an element of embarrassment in the situation that I had not thought of before. As she understood it, the fact that the young woman performed a passionate act, a very active response to the beauty she was encountering, was the root of the evil. She was selfish in her act because it was an uninhibited response that many of us might have liked to perform ourselves if we only felt so free as to do so. It is this recognition of an unharnessed human response to beauty that makes the act inappropriate. In some ways I completely agree with this logic and it makes me consider the role of any museum or gallery space in exposing us to historically important and beautiful cultural relics and new forms of expression. On the other hand, if we all went around touching oil paintings and leafing through the most delicate books, they wouldn’t be around for long for us to enjoy. 

    Much of the work I have been doing lately deals directly with this same issue. I have been working with a book conservator to iron out the wrinkles in a “permanent” library exhibit–the main issue being that most of the books currently on exhibit have been sitting in their display cradles for five plus years. The continual stress on the bindings, in addition to the damage from light exposure to the displayed pages, is now something needing immediate attention. I wonder if it will make any difference to the visiting public that many of the books and original documents will be scans and facsimiles of the originals? Will they perceive this stand-in for what it is and be disappointed or will they be oblivious of the switch? One of the unique perks of working in a conservation lab is that we handle some very interesting and valuable pieces with our bare hands (well-washed, of course) and, though it is possible to gain access to virtually all of our collection by applying to be a scholar, I still wish that everyone could hold these rare books close enough to smell their paper and feel the smooth leather and frayed cloth with their own hands and it’s that part of my work that troubles me the most.

    anna-part2b

    The privilege of having such intimate experiences with these books and paper objects is the great joy of those working in the field and much of what we do in the lab is done solely for the purpose of making items more available and ready for use. The questions of functionality and usefulness and the longevity of an item are things that must be taken into consideration when dealing with each individually. It is that question: whether to change the structure of something to allow for greater access or to preserve it for undisturbed, safe keeping, that calls us to employ the keenest discernment. Being able to share these pieces of history and culture are what make it all worth while.


  10. Introducing a New Column: Conservation Conversations

    January 16, 2014 by Erin Fletcher

    Over the course of the year, you’ll see a collection of posts written by other people. I’ve wrangled up a few of my friends and colleagues whose work is predominately centered around conservation. Under the title Conservation Conversations, each author will present three posts over two months on a topic of their choice.

    In the following post, my friend Anna starts off the series. Anna graduated with me at North Bennet Street School in 2012 and since then she’s landed a position at the Huntington Library in Pasadena. Anna is no stranger to the blog. We collaborated on the Daily Glimpse project together on the first and final months. This was a year long project, where images were exchanged daily at the same random moment. Below is an image from the series showing off my binding work on the left and Anna’s work at the Huntington on the right. 

    day2_meanna

    I hope you really enjoy this series and I encourage the posting of questions and comments. 


  • My name is Erin Fletcher, owner and bookbinder of Herringbone Bindery in Boston. Flash of the Hand is a space where I share my process and inspirations.
    The StudioNewsletterInstagramEmail me
  • Archives