RSS Feed

Posts Tagged ‘tomorrow’s past’

  1. Manipulating Stone Veneer with Coleen Curry

    April 22, 2016 by Erin Fletcher

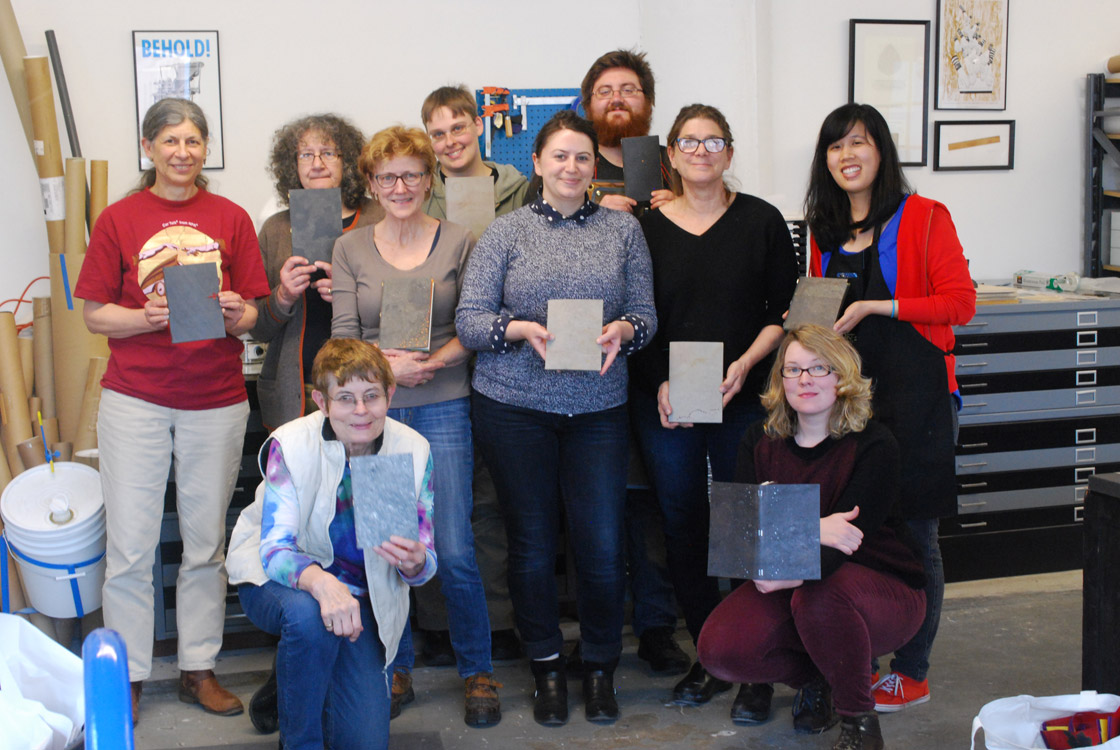
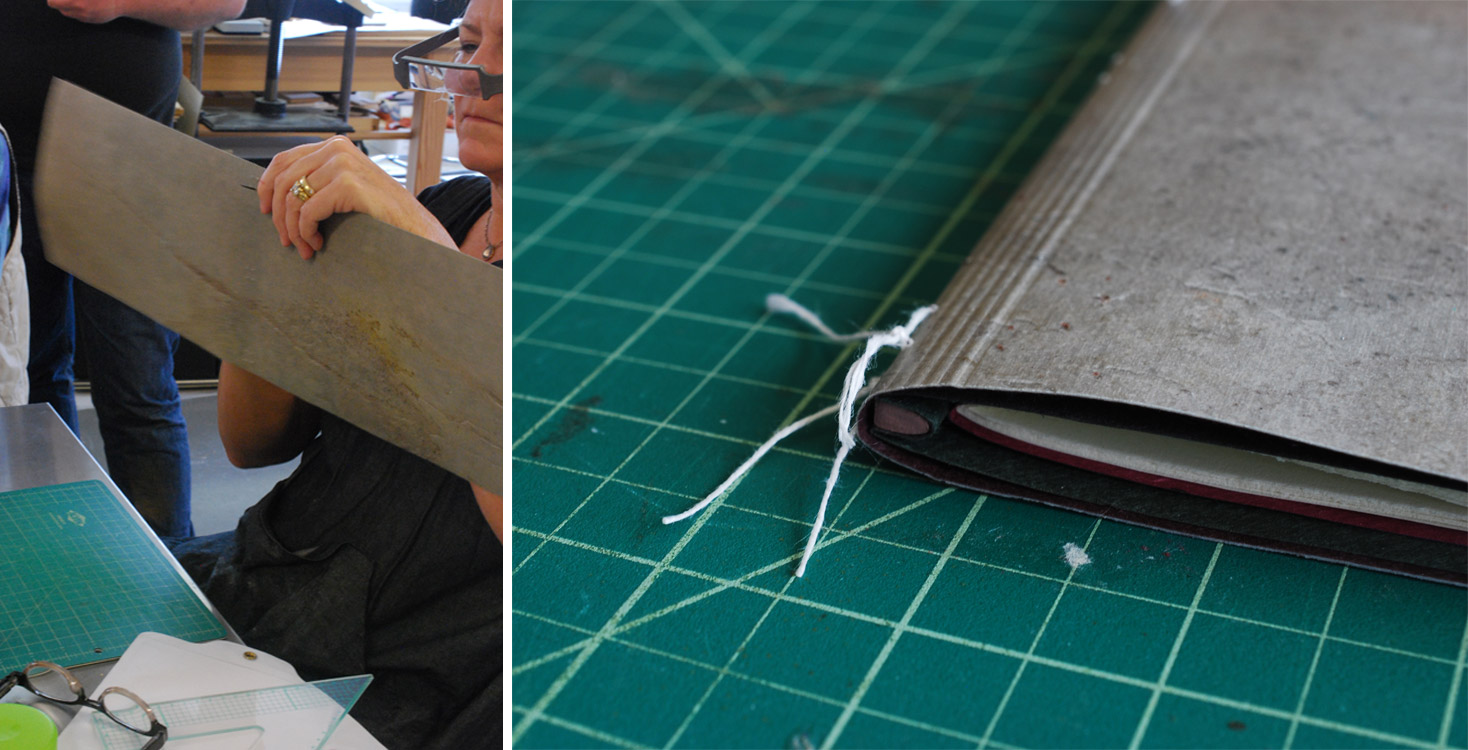
    Over the first weekend in April, Third Year Studio hosted a workshop organized by the New England Chapter of the Guild of Book Workers. Third Year Studio is located in Boston and is run by Colin Urbina, who just so happens to be my friend and studio mate (Herringbone Bindery is run out of Third Year Studio). This was the first workshop we hosted and Colin was so gracious to opened his space to members of NEGBW and to our guest instructor Coleen Curry.

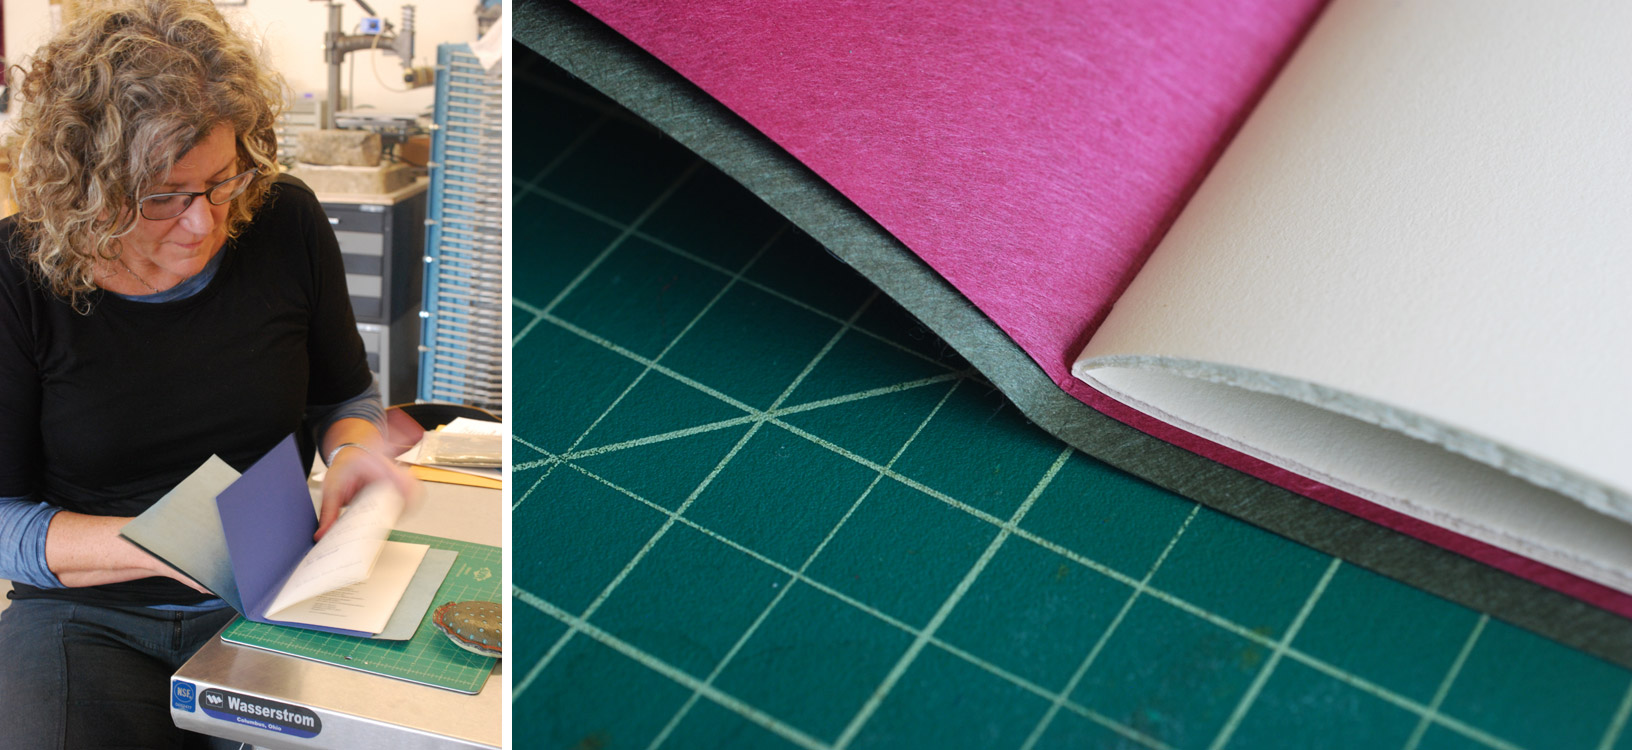
    Coleen traveled to a unseasonably warm, then snowy Boston to teach 10 local New England binders, book artists and conservators Staple Binding in Stone Veneer. Coleen learned this innovative structure from Sün Evrard, who developed this binding as a conservation solution under the Tomorrow’s Past ideology. We began the first day of the workshop by handing around models of the Stone Veneer binding while introducing ourselves and learning about the structure and its history. The stone veneer comes from a place in Italy where it is cut to a veneer-thickness by use of lasers. This process puts an adhesive coating on the surface, while the back is coated with a cotton-fiberglass layer. The veneer comes in two varieties: slate or quartzite. Yet within these two categories you can find a range of textures, patterns and tones.

    StoneVeneerWksp-ErinFletcher

    left: Dorothy Africa and Coleen Curry | right: detail of  Toad Poems

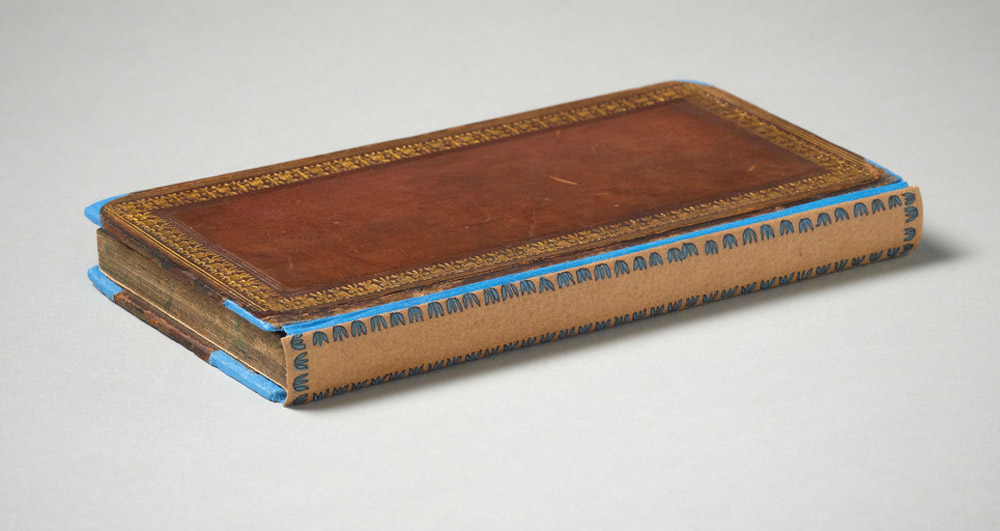
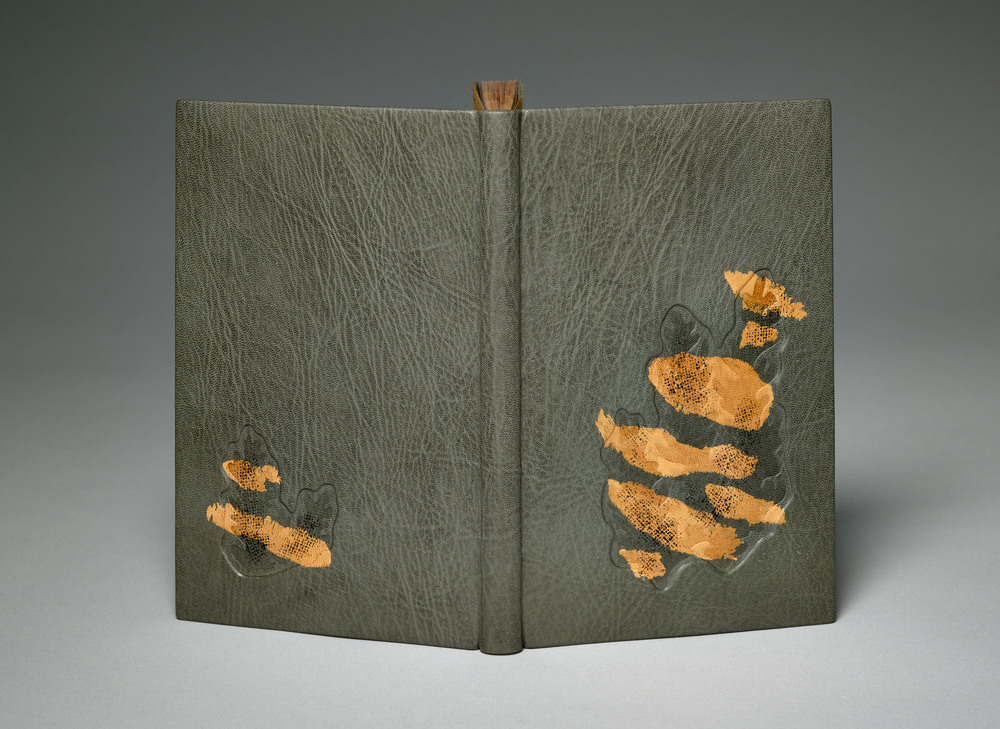
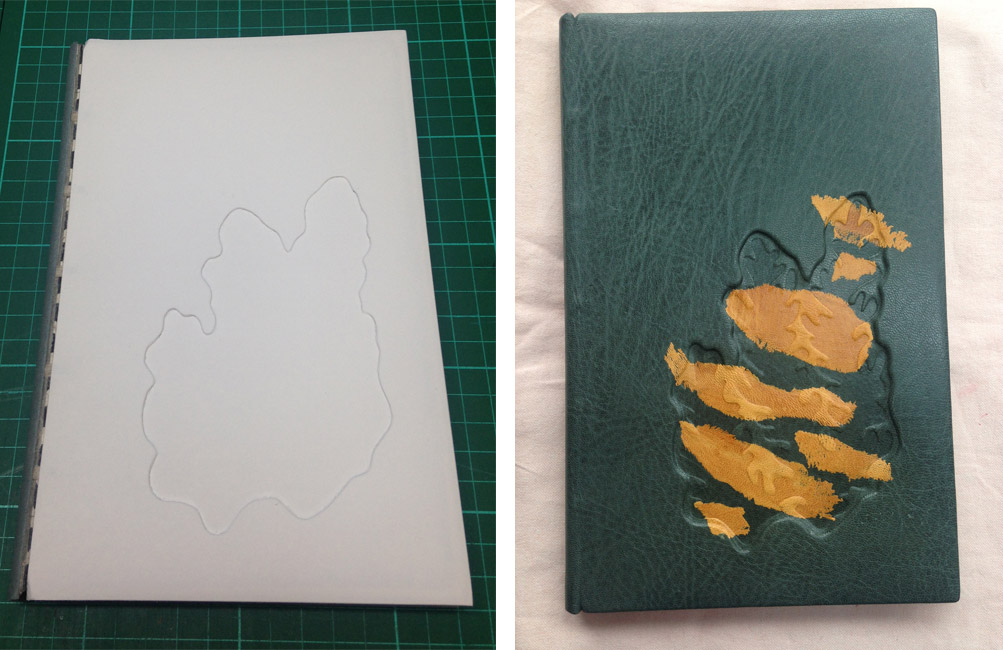
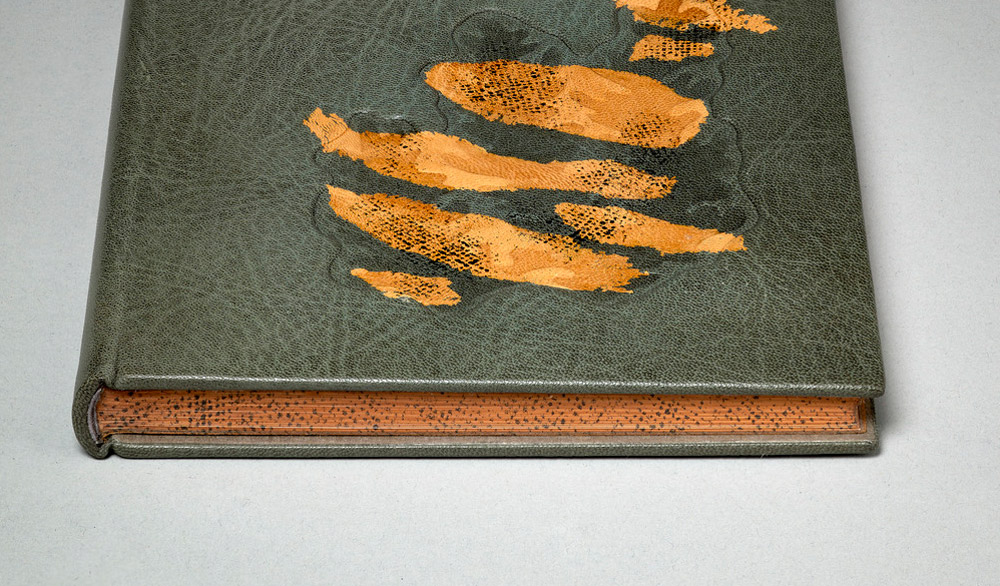
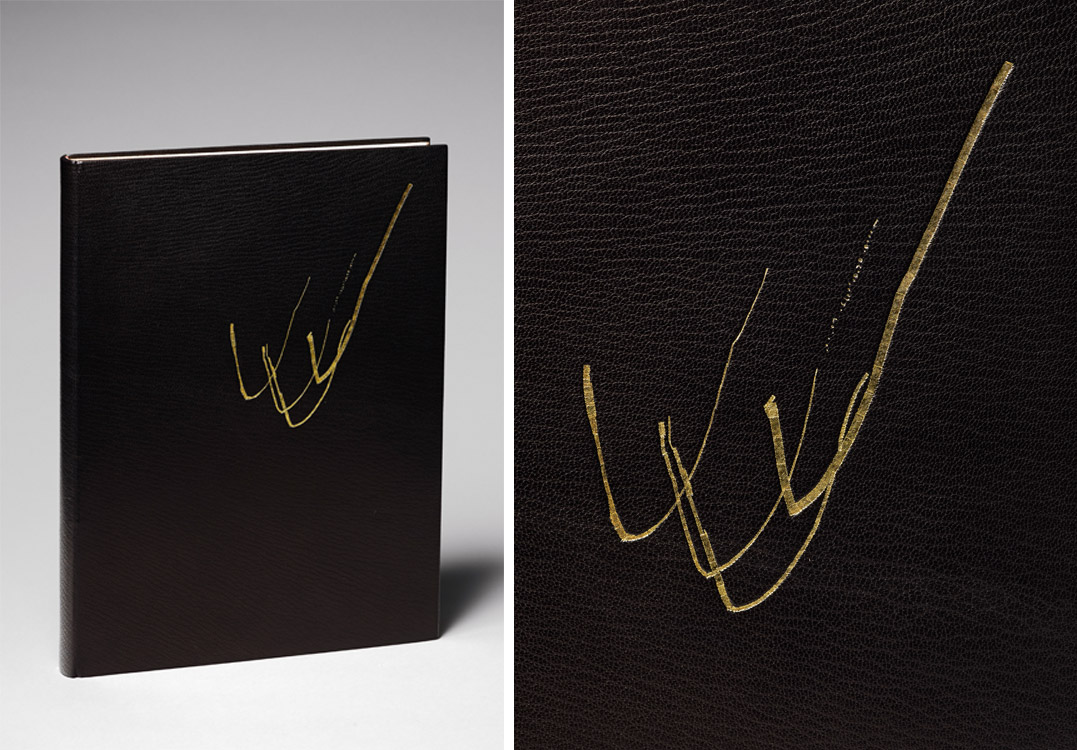
    The decoration on the slate stone veneer binding of Toad Poems above was achieved by placing a gilt piece of paper behind a cut-out in the covers. The windows are aligned with the staples, an example of how to incorporate the layout of the staples with the overall design.

    StoneVeneerWksp2-ErinFletcher

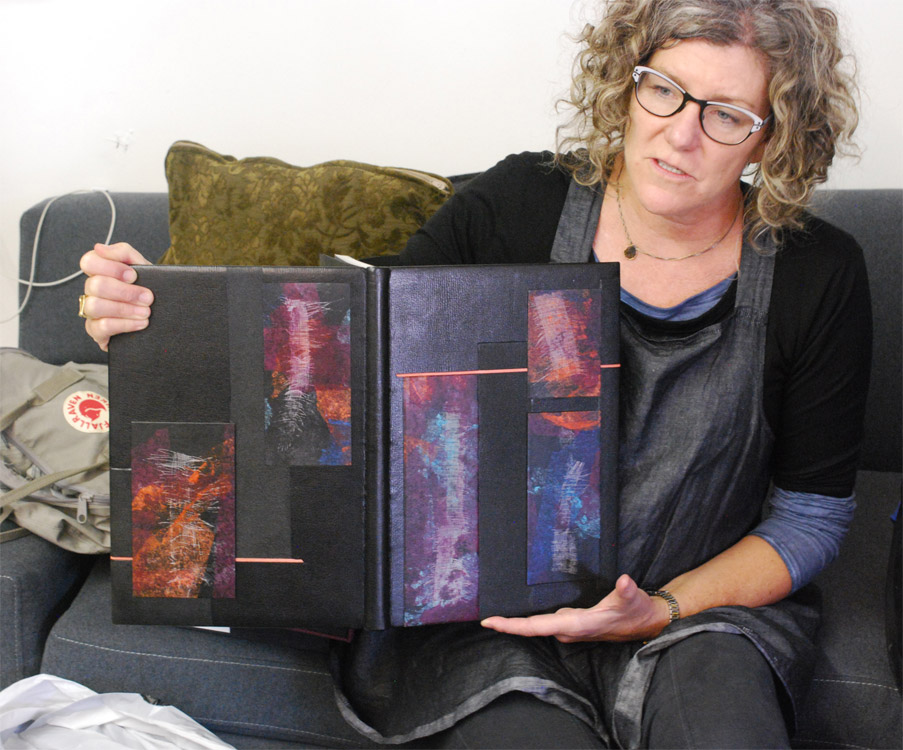
    The details of the binding above are of the blank model that Coleen made during the workshop with Sün, where she learned this structure. The covers were decorated using a Japanese screw punch. The circular cut-outs were backed with various colored Japanese tissues, offering a small pop of color against the grey slate. The image on the left shows part of the interior construction.

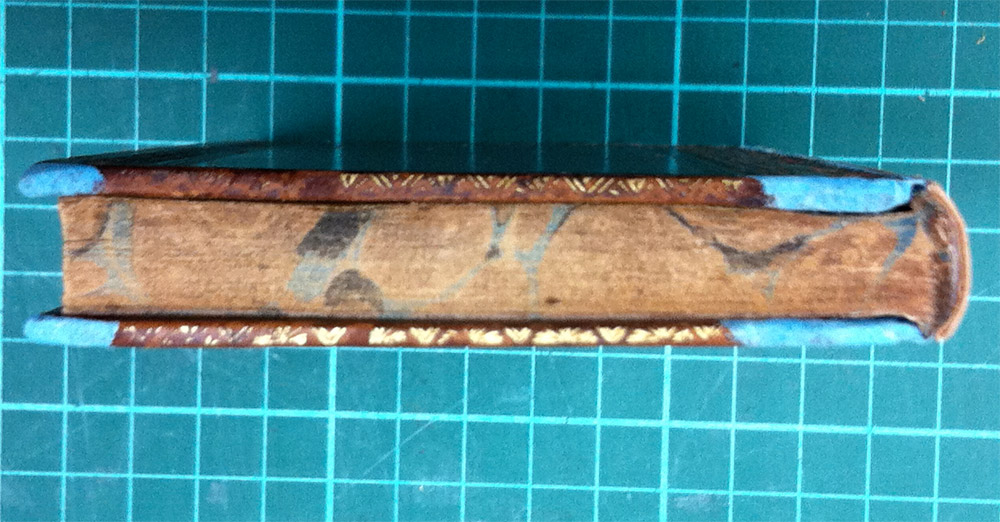
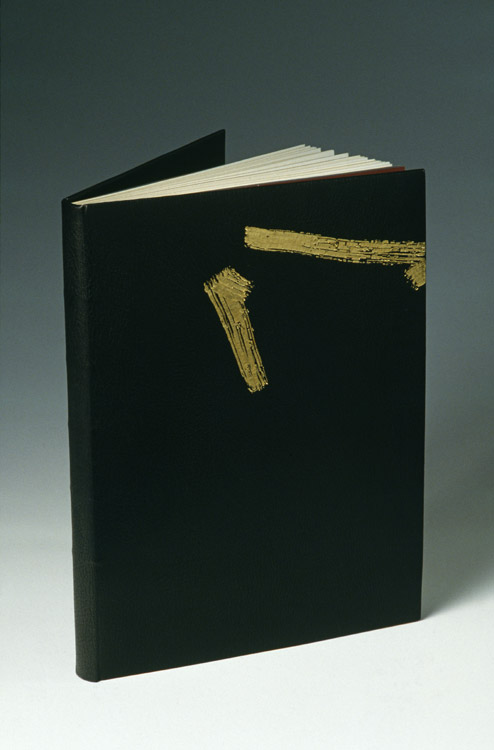
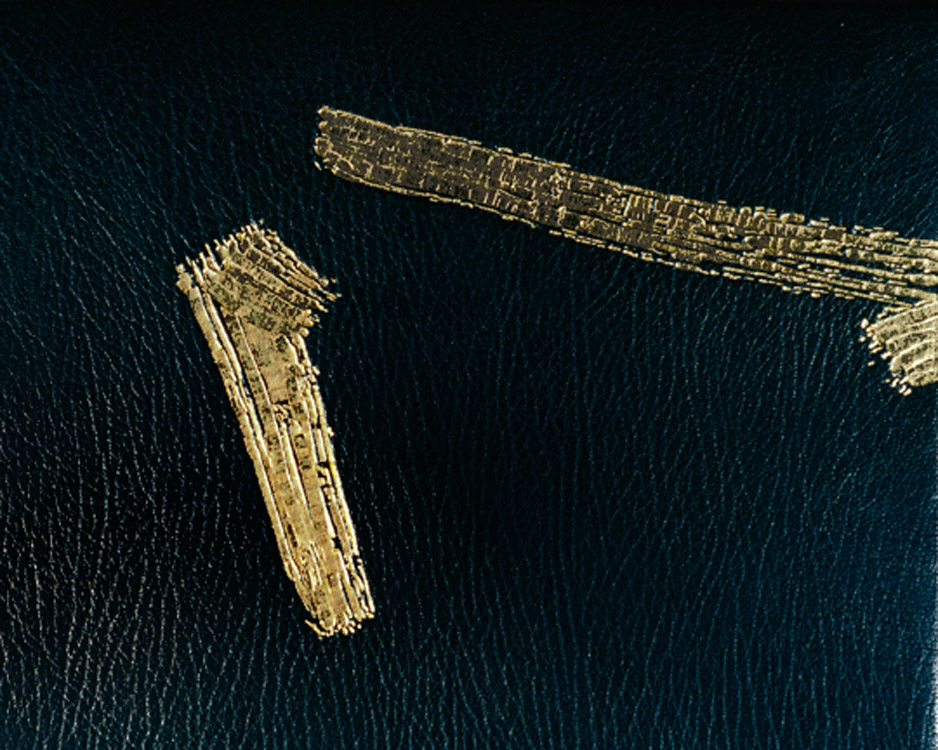
    Another example binding that Coleen shared with us, is this binding of Jabberwocky by Lewis Carroll. It was a great example of how well the stone tools and how it can handle embroidered decorations.

    StoneVeneerWksp4-ErinFletcher

    I especially loved the playfulness of the patched endpapers and use of embroidery to mend the edges.

    StoneVeneerWksp3-ErinFletcher

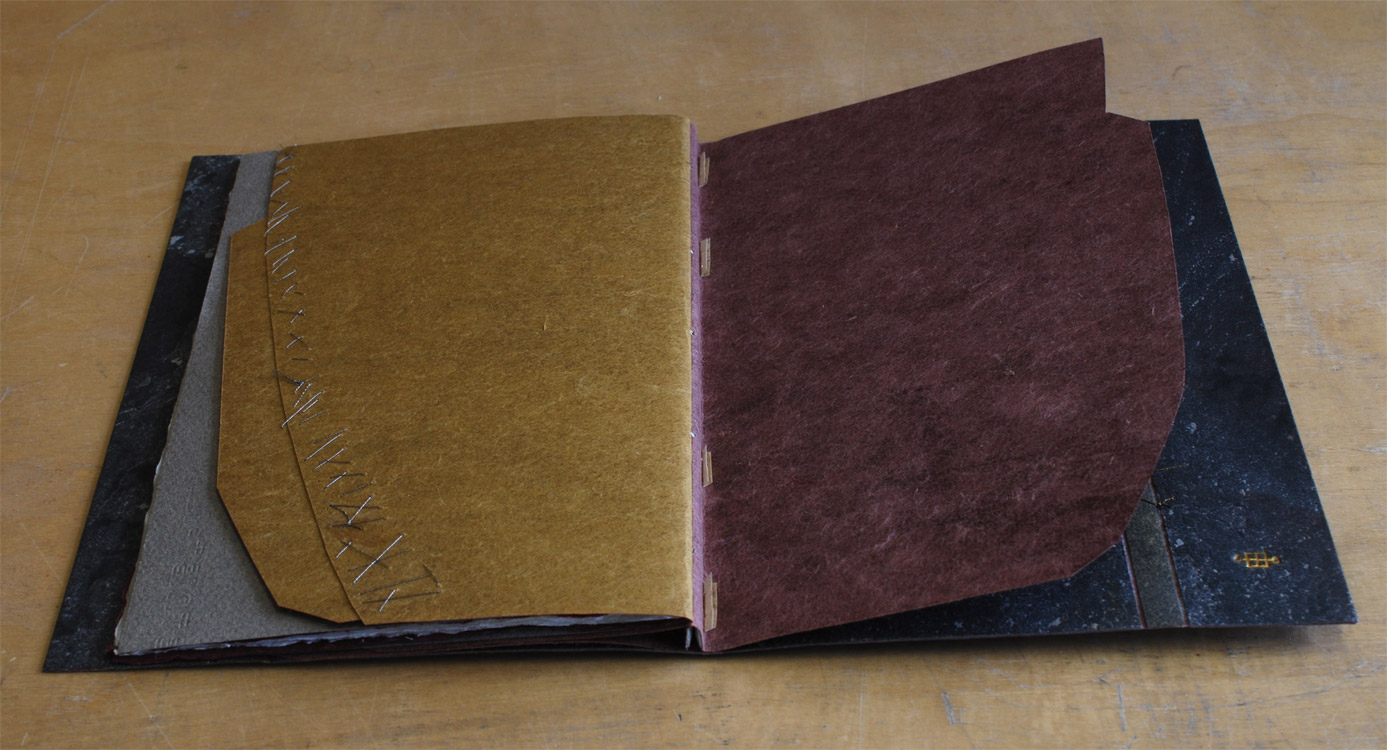
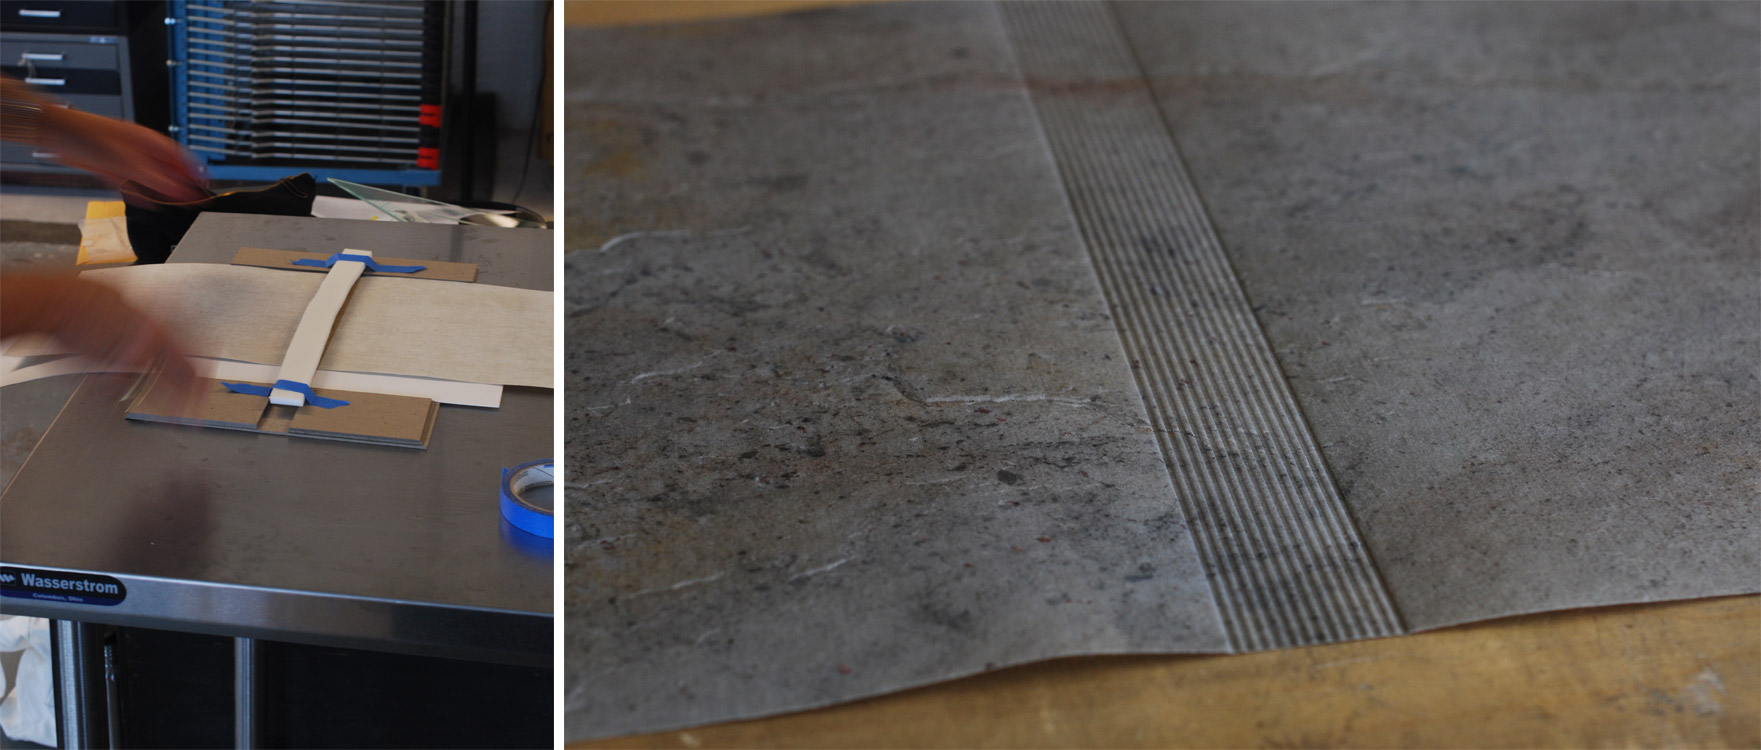
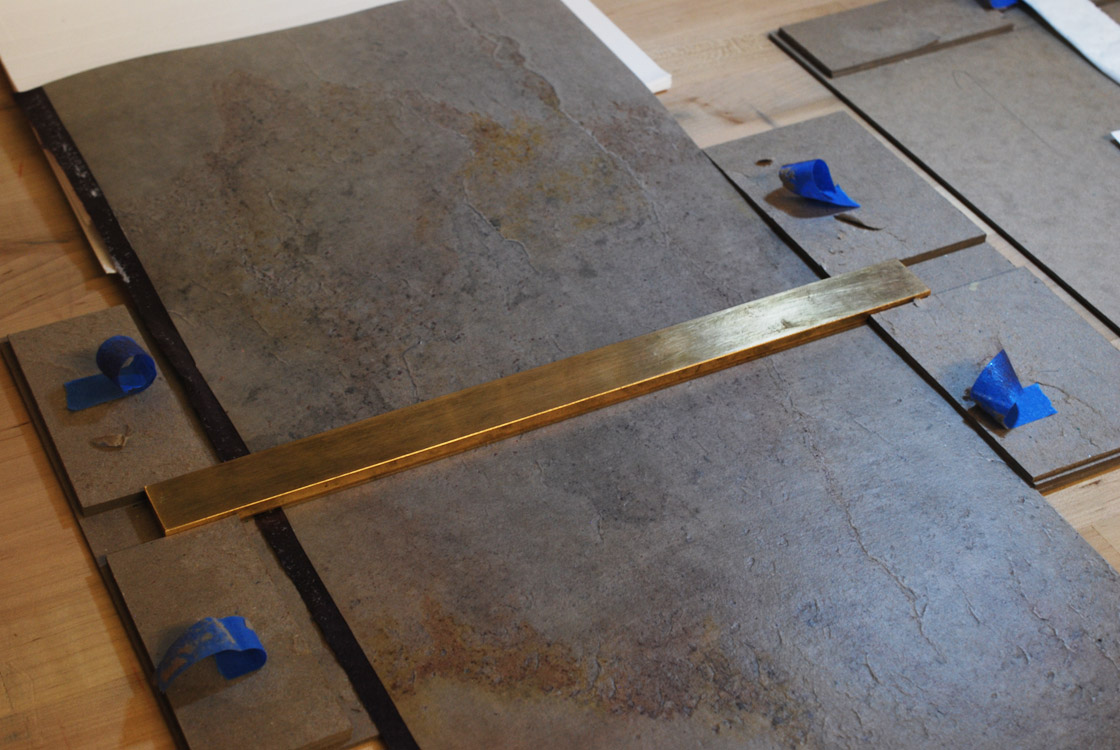
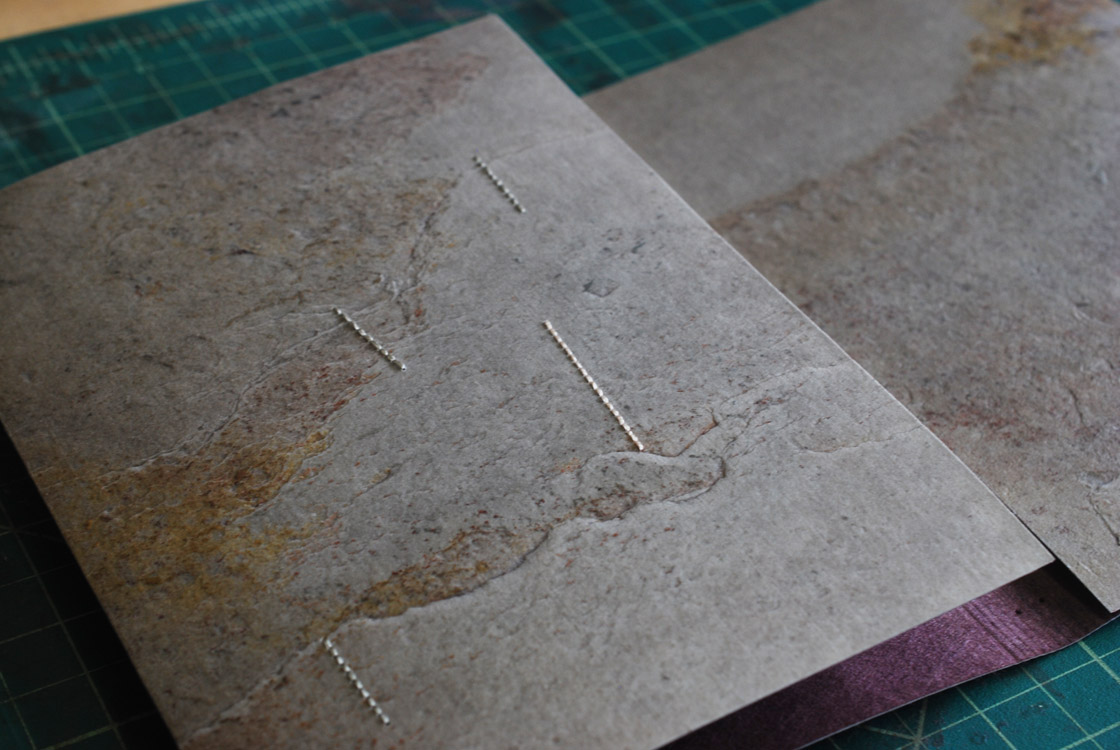
    After looking through Coleen’s examples, it was time for us to make our own model. After choosing our unique piece of stone (I chose a lovely light colored slate with splashes of yellows, pinks and purples), we were instructed to stamp a series of parallel lines into the center (or spine) of the stone. We did this by strapping our stone and a heated brass rule into a contraption and keeping it under the weight inside our large press. Afterward, we laminated a second layer of Japanese tissue to the backside of the stone. While that was put to bed, we laminated together pieces of colored Japanese tissue that would ultimately become our endpapers.

    StoneVeneerWksp5-ErinFletcher

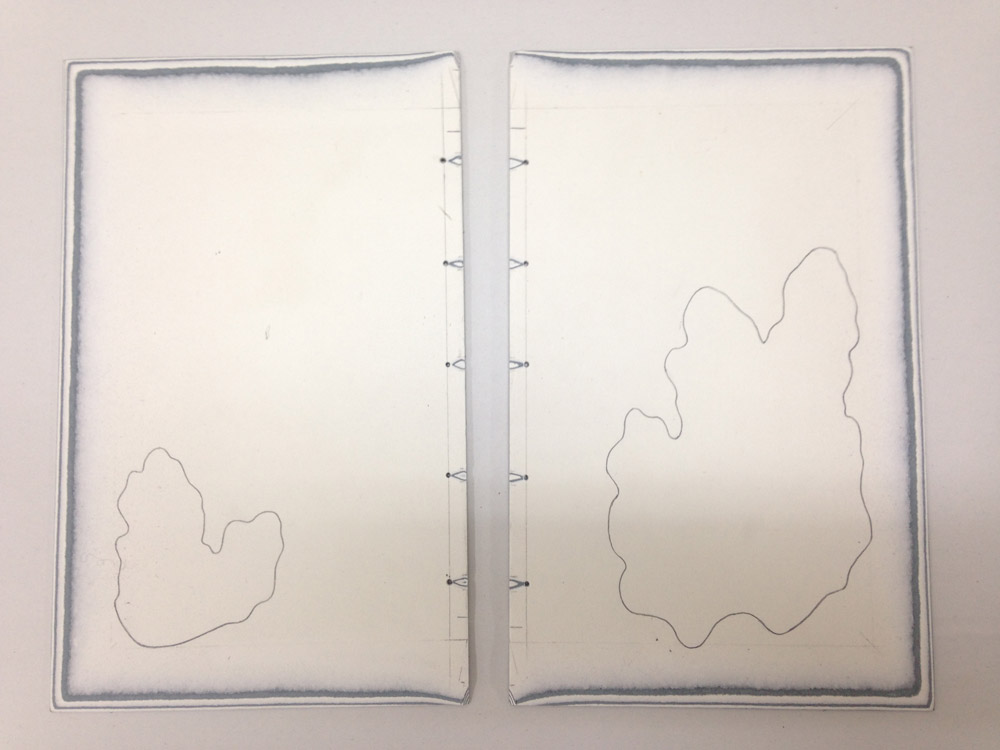
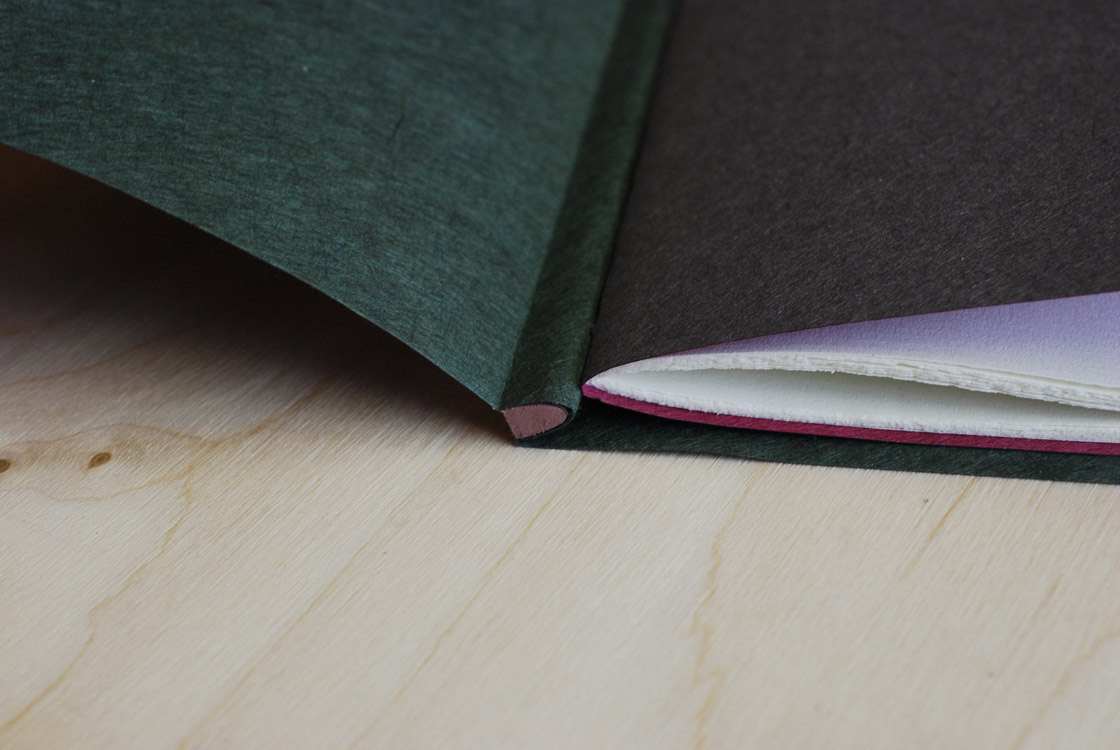
    While our stone continued to dry, we trimmed down our endpapers to either match our text block or extend slightly behind the edges. The image below shows Coleen demoing the pamphlet stitch that we would use on the text block. The image on the right shows how I trimmed my endpapers. In the end I didn’t like how much of a square I gave the outer (green) endpaper. With the additional square from the stone, the overall square became to large for the size of the text block.

    StoneVeneerWksp6-ErinFletcher

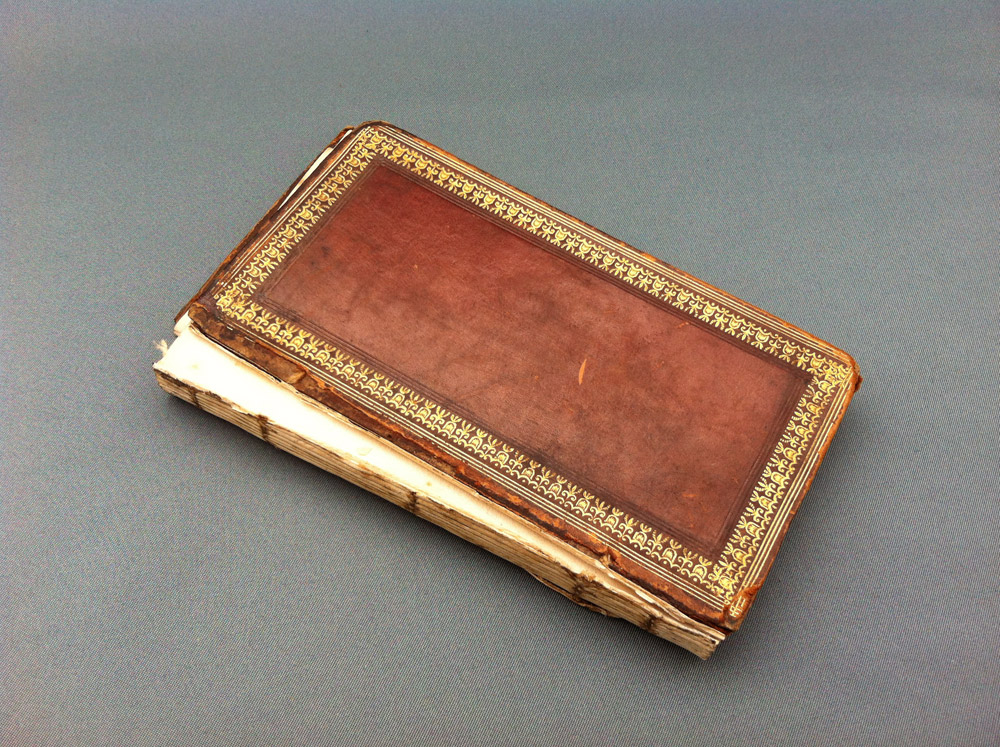
    At the end of day one, Coleen shared with us two fine bindings on loan from a local collector. It was an unexpected and delightful treat to handle and speak with Coleen about her bindings and decorative techniques.

    StoneVeneerWksp7-ErinFletcher

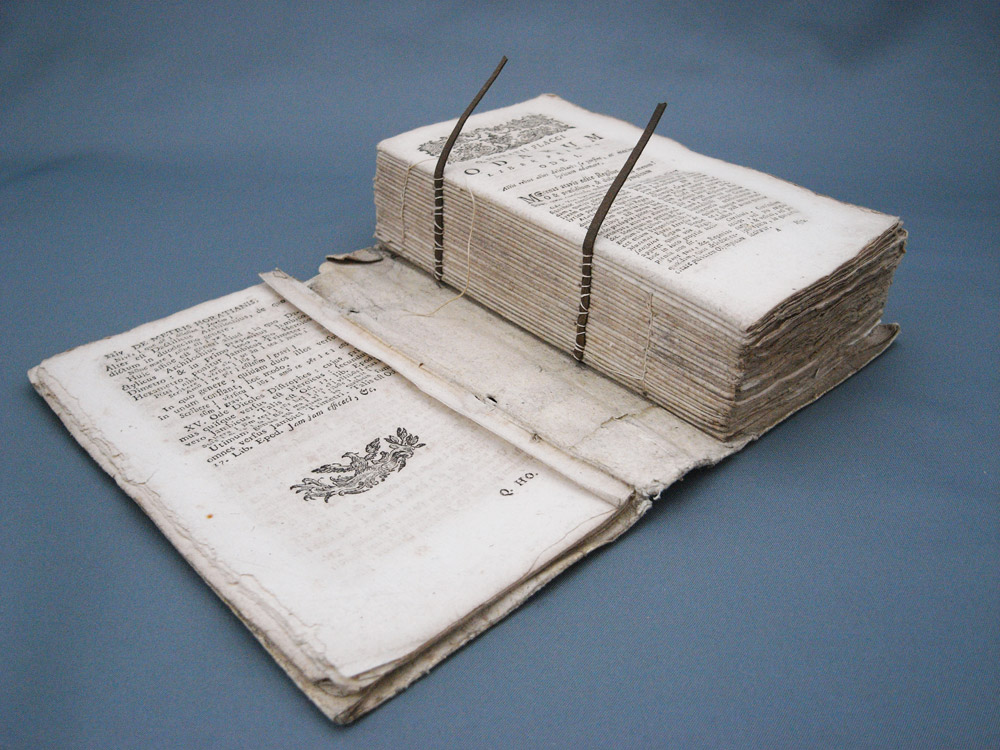
    On day two of the workshop, we were all reunited with our backed stone veneer. We went through the unnerving task of stamping our veneer with the brass rule three more times to redefine the lines and make sure we had an even amount on the outside and odd number on the inside. It was very important to register the brass rule correctly each time, so that our lines stayed crisp and parallel to one another. I snapped a photograph at the very end when I was ready to take the brass rule and stone out of our jig.

    StoneVeneerWksp8-ErinFletcher

    We also advanced on the text block by attaching the wooden spine stub piece. This stub could be made from a number of materials, but we choose from a selection of basswood pieces that were cut down and laminated to match the height of the outer endpaper and thickness of the text block. The wooden piece was also shaped to match the roundness of the folded signature. I painted the ends of my spine piece to offer a bit of decoration to the head and tail. After trimming, shaping and painting, the spine piece was affixed to the outer endpaper and the fore edge was finally trimmed to the final width.

    StoneVeneerWksp9-ErinFletcher

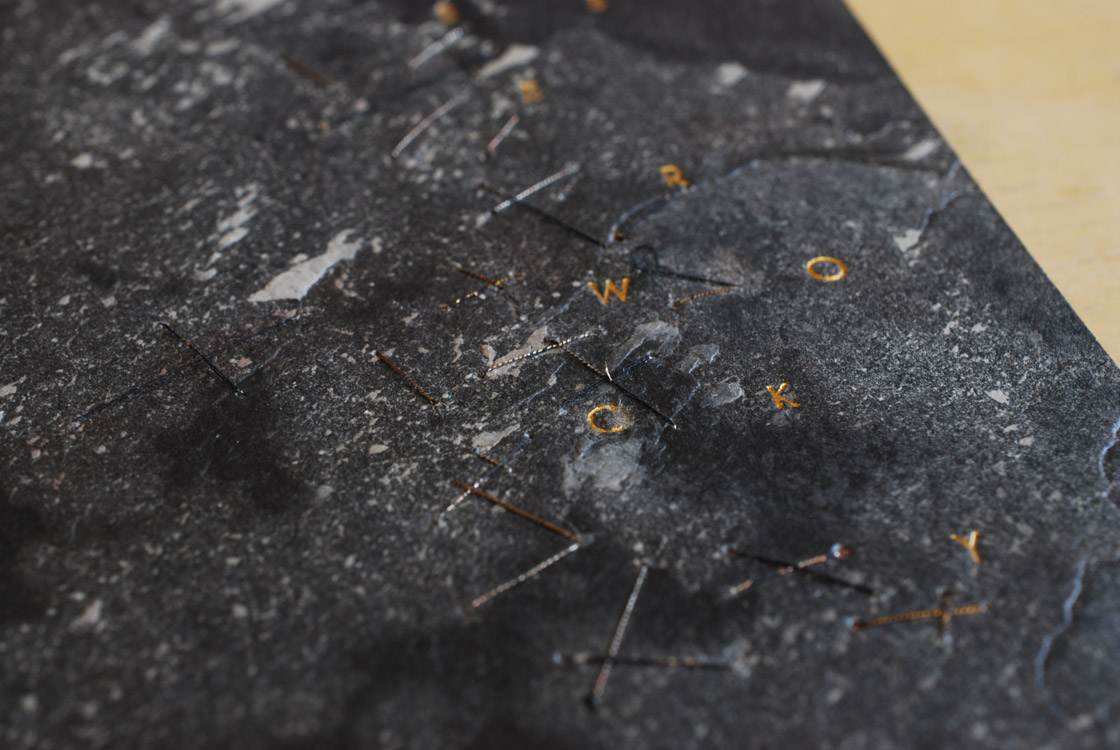
    At this point, we were ready to attach our text block to the stone veneer. The first steps were to create a punching jig to guide our awls to punch holes in the folds of the outer endpaper and in the stone cover. The stone was easy to pierce, once you felt it was in the right place, I simply used an awl to poke through the stone. We laced our text block temporarily into the stone covers in order to fold the fore edge and trim off any excess.

    StoneVeneerWksp10-ErinFletcher

    Before laminating the folded stone onto itself, you have the opportunity to add any decorative elements such as cut-outs, sewing, tooling, etc. Due to time constraints (I had to remake a painted wooden stay that I dropped on the floor), I chose to add some simple embroidered stitches just to see how well I could sew through the stone. This was mostly done on the inside of the front cover.

    StoneVeneerWksp11-ErinFletcher

    With a pile of stays (wooden, metal and vellum) and metal staples in hand, I was ready to securely attach the text block to the stone veneer covers. In the image on the right below, Coleen is demonstrating how to use plastic tubing to make it easier to insert the staples and stays.

    StoneVeneerWksp12-ErinFletcher

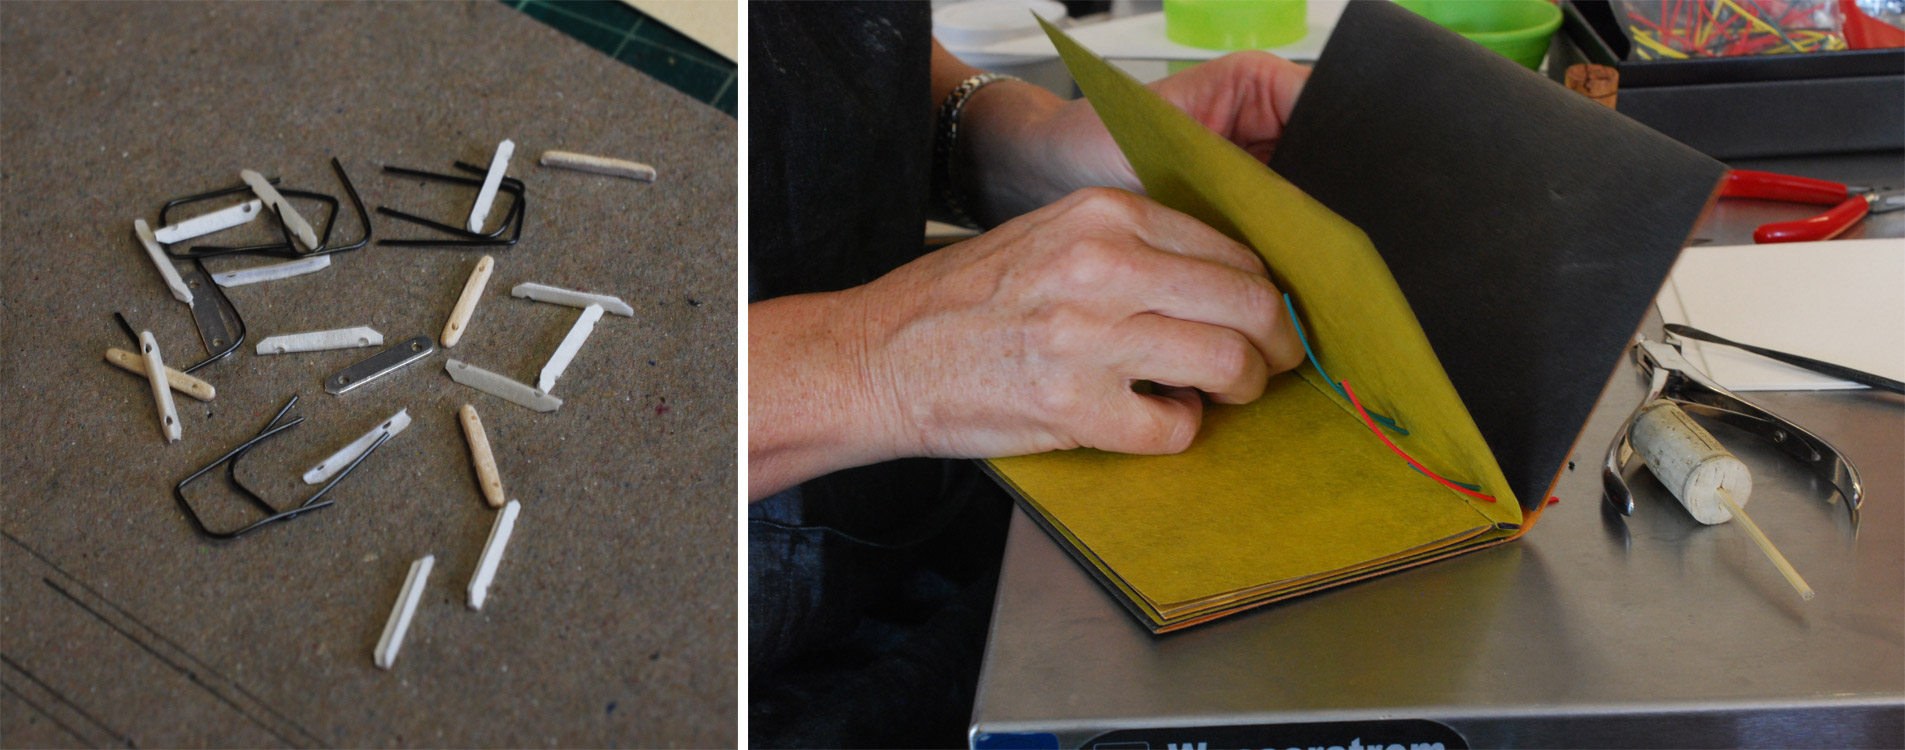
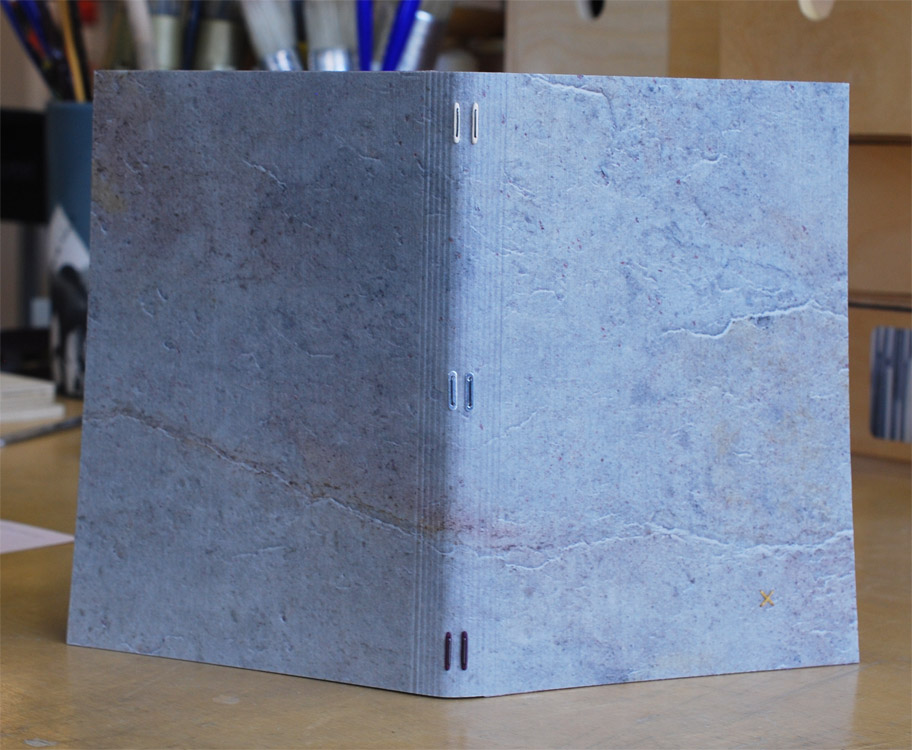
    For my binding, I chose to use both metal connectors and wooden stays. I painted one set of wooden stays to match the dark purple laminated to the backside of my stone. The staple is inserted through the stay and the vellum catches the legs of the staples on the inside of the endpaper. We stuck an orange stick into a piece of cork, this strange looking tool (seen above) aided in folding over the legs of staples. And viola! The binding is complete. At this point I could still add tooling, but I loved the look of my stone, that I chose to leave it untouched.

    StoneVeneerWksp13-ErinFletcher

    We had a great workshop with Coleen, she brought so much experience and knowledge to the workshop. Her patience and persistence ensured that everyone walked away satisfied and with a finished binding.

    StoneVeneerWksp14-ErinFletcher


  2. Bookbinder of the Month: Kathy Abbott

    December 13, 2015 by Erin Fletcher

    In the interview at the beginning of the month, I asked Kathy Abbott about Tomorrow’s Past, an exhibit inspired by Sün Evrard’s article in The New Bookbinder, Volume 19. The idea is to rethink the approach of repair work in a contemporary and more visible way. In this post Kathy explains the treatments for two bindings and why she chose to do these repairs in an unconventional way.

    I’ve chosen a selection of bindings from your Tomorrow’s Past portfolio. I find the treatments to be delightful yet still respectful to the bindings historic value.
    Thank you. I could never undertake this sort of conservation treatment if I hadn’t worked for 9 years as a book consevator and bindery manager at the antiquarian booksellers: Bernard Quaritch Ltd. I learned so much there about antiquarian books and from working on such a wide variety of them, each with very individual needs. I continue to conserve antiquarian books as well as Islamic manuscripts, where I constantly have to stretch my skill base in order to do the right thing for the book in my care. This allows me to have a lot of tacit knowledge at my fingertips when I approach my Tomorrow’s Past work.

    SacredDramas-KathyAbbott

    In the treatment of Sacred Dramas (1818) you’ve included this brightly hand-colored tissue that is quite a stark contrast from the original covering material. What was the prior condition of the book and why did you choose, what could be perceived as an unconventional route of conservation?
    I made this work for a Tomorrow’s Past exhibition at the Aram Gallery, London, in 2013.

    SacredDramas2-KathyAbbott

    I found the book with both boards detached and no spine, and I spent a lot of time looking and handling the book before I decided on the course of action. The book’s sewing was intact and each edge was marbled, so I didn’t want to disturb it by re-sewing. The book didn’t open well, so I reattached the boards with linen and they now open right back and touch each other at the spine. I didn’t want a heavy spine that would impede the book’s opening even more, so decided on a sort of hollow, made from handmade paper but the head and tail of the spine has a little flap which tucks down inside the hollow, so that it doesn’t have a vulnerable cut edge. The decoration on the spine is hand drawn with acrylic inks, to relate to the decorative gold tooling on the boards. The boards themselves were quite damaged and needed to be repaired, so I decided to highlight both the board attachment and every repair, with the same bright blue colour that appears within the marbled edges on the book-block. The re-binding of this book came the year after conserving Q. Horatii Flacci Carmina Expurgata, where I first explored the concept of highlighting the repairs and it felt absolutely like the right thing to do. It has caused a lot of controversy though: people either love it or hate it.

    SacredDramas3-KathyAbbottSacredDramas4-KathyAbbott

    – – – – – – – – – – –

    QHoratiiFlacci-KathyAbbott

    The repair on the binding of Q. Haratii Flacci Carmina Expurgata (1784) is subtle yet stunning. Can you walk us through the steps: was the book resewn and how was the hand-gilded paper used to repair the binding?
    This poor book was in such bad shape when I found it but I absolutely loved its original binding and thought it was essential to keep every last crumb of it. My good friend is a Kintsugi restorer: this is where broken Japanese ceramics are repaired with lacquer and the repairs are highlighted in real gold or silver powder, rendering the piece even more beautiful. I thought that this particular book would really benefit from this sort of treatment.

    QHoratiiFlacci2-KathyAbbott

    The sewing was broken in many places and the alum-tawed thongs were very brittle and had snapped in several places, making them unusable. I didn’t want to use new, white thongs, as they would look very bright and at odds with the rest of the book, so decided to dye some alum-tawed skin dark brown to match the titling, using conservation leather dyes.

    I pulled the book and then repaired the tears in the cover with Japanese tissue, the text-block did not need to be guarded nor repaired. I then re-sewed the book following the original sewing positions. I gilded a piece of hand-made paper with 23.5 carat gold leaf and the piece was then inserted under the turn-ins of the cover and was adhered to the original turn-ins only, using methylcellulose.

    QHoratiiFlacci3-KathyAbbottQHoratiiFlacci4-KathyAbbott

    The sewing of the front section to close the binding was very complex: the fold of the pastedown was hooked around the first and last sections. To close the binding, (join the cover to the sewn text-block) I had to sew through the front section and the hooked fold of the pastedowns at the same time. The sewing had to go around the thongs, (which needed to be laced through the cover before the sewing could be done), without piercing through the pastedowns nor the cover. I had to make a series of needles, curved to different angles in order to achieve it. It was one of the most technically difficult things I have ever had to do but the result looks very simple. On the finished binding, the gold is only visible where there is a piece of the spine missing and a tiny bit through the lacing positions.


  3. December // Bookbinder of the Month: Kathy Abbott

    December 1, 2015 by Erin Fletcher

    OnACalmShore-KathyAbbott

    On a Calm Shore is a 1960 edition by Frances Cornford with illustrations by Christopher Cornford. In 2015, Kathy Abbott bound this copy in full grey goatskin with recessed and embossed onlays with relief printing. The edges are decorated and printed to match the design on the covers.

    Can you walk us through the processes used to create the layered design in the recessed areas of the binding?
    This text-block was a very unusual choice for me as it was printed in the 1960’s on modern paper and was heavily illustrated. I am usually drawn to early 20th century, letterpressed printed books from private presses, with no illustrations. When I found this text in a second-hand bookshop, I was delighted: the poems were charming and the illustrations were so vibrant and alive, that I just had to buy it.

    OnACalmShore2-KathyAbbott

    I made this binding for an exhibition in London last year called: Covered. I have responded to the references to the sea in the poetry and to the layered screen-printed illustrations by the author’s son, Christopher Cornford on this binding. I felt that the structure had to be a fine binding over layered pasteboards so that I could sculpt the boards easily, and cover it in beautiful grainy leather, to create different textures.

    OnACalmShore3-KathyAbbott

    Boards before lacing onto the book.

    To create this design, I cut away parts of the boards; laced the boards on and lined the outside with paper to form a solid ground for the leather. I then covered the book with Nigerian goatskin, pushing the leather into the recesses with a very fine-pointed bone folder. I made seaweed-y shapes from millboard (a very laborious job achieved by cutting out the shapes with a scalpel and making bespoke sanding tools to get into the nooks and crannies) and then pressed the millboard pieces really hard into the dampened recessed areas of the covers. I applied the feathered yellow onlays, pressed the millboard shapes in again and then relief printed on top with acrylic ink through scrim, to achieve the texture, which is consistently used within the book’s illustrations.

    OnACalmShore4-KathyAbbott

    left: Boards laced onto book with design cut out | right: Binding covered in goatskin with feathered onlays.

    My response to each book I bind dictates the technique I must employ, often pushing me outside anything I have ever tackled before, and forces me to be on the edge of my practice technically: I always embrace this process.

    What techniques did you employ to carry that pattern onto the edge decoration?
    I coloured the edges with terracotta coloured acrylic ink and then used the same relief printing technique for the texture.

    OnACalmShore5-KathyAbbott

    This interview comes as a suggestion from Haein Song after I interviewed her back in February 2014. Not knowing anything about Kathy or her work, I soon discovered that, though her bindings may appear simplistic, her designs are meticulously planned and thoughtfully executed. In addition to her striking designs, I was pulled in by the gorgeous leathers used to cover her bindings. In the interview, I ask Kathy about her design processes, techniques and her strategy for choosing the perfect skin. She also goes into the concept behind Tomorrow’s Past and the ease of publishing a bookbinding manual.

    Check out the interview after the jump for more about Kathy’s training and her creative process. Come back each Sunday during the month of December for more on Kathy’s work. You can subscribe to the blog to receive email reminders, so you never miss post.

    read more >


  4. March // Bookbinder of the Month: Tracey Rowledge

    March 1, 2015 by Erin Fletcher

    FourQuartets1997a-TraceyRoweledge

    Tracey Rowledge bound her first copy of T.S. Eliot’s Four Quartets in 1997 (shown above) years before she would revisit the text again with a parallel binding in 2014.

    You have created two very similar bindings for T.S. Eliot’s Four Quartets; bound in black goatskin with gold tooled markings. The gold tooled design on the earlier binding offers freedom and movement while the gold tooled design on the later binding feels more direct and deliberate. Can you discuss your concept behind each binding?
    For the first binding I was conscious of T. S. Eliot’s dislike for images on the covers of his books, so I decided to create two brush marks that evoked the flow of his writing, rather than creating an image depicting anything I perceived to be pictorial. This was a very early fine binding and as the book was letterpress printed on thick paper, it was my first rounded-only fine binding (i.e. not backed). It was also the most technically demanding gold tooling I’d undertaken to date.

    FourQuartets1997b-TraceyRoweledge

    Ivor (Robinson) very generously told me that my first binding of Four Quartets would be one of his desert island books, and it was during the second binding of this book that Ivor died. The image on this book responds to the text, to my first binding of the book, but also, and for me just as importantly, this image contains my thank you letter to Ivor, it was the perfect and most poignant place for it.

    FourQuartet2014-TraceyRoweledge

    – – – – – – – – – – –

    I’m so pleased to present the following interview with Tracey Rowledge. I didn’t know of Tracey’s work until Haein Song, whom I interviewed back in February of 2014, suggested that I interview her. What I came to discover is that Tracey is a keen artist who found a calling in bookbinding. Her artistic curiosities continue to influence her design choices as she blends together her artist techniques with those common to bookbinding. In the interview, I question Tracey both about her bookbinding and artwork and how the two have influenced each other.

    Check out the interview after the jump for more about Tracey, her background and creative process. Come back each Sunday during the month of March for more about Tracey’s work. You can subscribe to the blog to receive email reminders, so you never miss post.

    read more >


  • My name is Erin Fletcher, owner and bookbinder of Herringbone Bindery in Boston. Flash of the Hand is a space where I share my process and inspirations.
    The StudioNewsletterInstagramEmail me
  • Archives