RSS Feed

‘conservation’ Category

  1. Onward to Charleston, South Carolina

    September 10, 2016 by Erin Fletcher

    screen-shot-2016-09-10-at-9-30-16-am

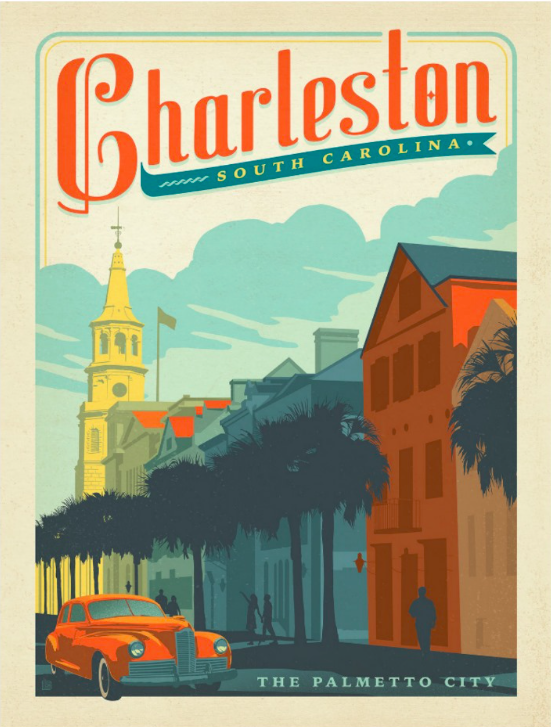
    I am on my way to Charleston, South Carolina for the annual Standards of Excellence Seminar put on by the Guild of Book Workers. My trip begins in North Carolina with fellow guest bloggers, Henry Hébert and Jeanne Goodman. This will be my second trip to North Carolina and my first to South Carolina. I’m looking forward to traditional Carolina barbecue, lemurs, exploring the southern landscape and oh, yes all things books. This year I’m looking forward to touring the Charleston Library Society, the presentations (particularly the ones given by Chela Metzger & Erin Hammeke and Betsy Palmer Eldridge) and the vendor room.

    I’ll be writing a review of the seminar shortly after I return, so look for it around the end of September.


  2. Conservation Conversations // What drives treatment?

    December 22, 2015 by Jacqueline Scott

    One of the most important questions we need to ask ourselves as book conservators is how the object we are working on will be used. What is driving the need for treatment? Because there are often so many different treatment paths we can choose from for one object, this question not only helps us to narrow the path of treatment, but it also helps to make sure that we don’t over treat an object, altering something in a way that might be irrelevant to its ultimate use. If we aren’t asking this question before beginning, thoughtless and potentially harmful treatment is most likely to result.

    There are three reasons for treatment that I see most often: heavy reader use, exhibition, and digitization. Each presents unique challenges and treatment options . . .

    Heavy Reader Use:
    If a book is expected to see heavy use, the treatment focus is going to put on making the binding functional and able to withstand handling. Often times, this means rebacking the binding in cloth, leather, or tissue, and treating the pages so that they can be flipped through without crumbling to pieces. Circulating collections conservation labs see this work most often, performing rebacks as if they were as second nature as brushing ones teeth. Special collections conservation labs see this less frequently, but if a binding is special enough, it might require a full treatment: disbinding, washing and sizing, and either repairing the original binding or giving it something shiny and new. The treatment that I described in my previous post, where a loss was filled in the front cover of a wooden boards binding, was done because the volume was expected to see use and having a complete front cover would prevent a significant amount of damage to occur in its handling.

    1


    The binding to the left was rare, and as a result likely to be requested by researchers. The above image was before treatment, and any handling would clearly be difficult as the binding had essentially been lost, save for the covers. The volume was treated by washing and sizing the pages, making them softer and easier to handle, mending and guarding, and putting the text into a limp paper case, which opens easily and protects the pages within.

    Exhibition:
    When a book is slated to go into exhibition, this typically means that it is going to sit in a case, opened to one angle for at least a couple of weeks. In this case, it is not so much necessary to treat the entire binding as it is to make sure that the binding will be stable when it is on display. Making sure that the binding doesn’t open past where it is comfortable by fitting a cradle to it is paramount. Treating the pages that it will be opened to, for handling and aesthetic purposes, is also important. There are some great photos here from the Folger Shakespeare Library’s 2015 three-day symposium on book cradles for exhibition.

    Digitization:
    In the short time I’ve spent working in this field, digitization has quickly emerged as the most common reason for treating a volume. Initially, I saw digitization as something that might eventually make conservation work unnecessary. Often the work that is done on an object slated for digitization is quick, with the goal of stabilizing the volume so that it can be handled by the photographer. If something is being put online, presumably where most people will access it, why spend time and money conserving the actual object? However, I hope that digital access will instead serve to peak interest in physical books, resulting in a need to spend more time conserving the bindings so that they can be used. Increased availability of collections will hopefully result in more people being aware of the books that are available to researchers, and after finding them online will want to see them in person. Because digitization is such a new component to conservation, only time will tell how it will affect treatment decision-making.

    8257-AT-02

    This book was being digitized, and so I used re-moistenable tissue for quick, in-situ repairs of these map folds.

    IMG_3465

    Imaging was also the goal of this bound volume of 19th century newspapers. The papers were disbound and mended, so that they could be imaged flat, and never rebound.


  3. Conservation Conversations // Making an Old Book Whole Again

    December 3, 2015 by Jacqueline Scott

    Before Treatment – front cover

    While I was a book conservation intern at the Newberry Library this past fall, I had the opportunity to treat an incunabula in a wooden boards binding. The binding, while quirky with old DIY repairs, was structurally sound, and most of the pages were in good condition. The primary problem needing to be treated was that the front board had split, half of it being lost along the way. As a result, part of  the text block was left exposed, torn and dirty. In order to prevent future damage to the text block, as well as to restore cosmetic integrity, we decided that the loss in the front board should be replaced and the damaged pages of the text block mended. What seems at first glance to be a simple, mostly cosmetic repair in fact required a nuanced execution and was important to the binding’s stability. The volume was rare enough that the library could expect it to see significant use, so having a complete front board was important to help protect the text from future damage.

    Before Treatment – Inside front cover

    The first step I took in treating the volume was to surface clean and mend the first three pages of the text block. It appeared that the half of the front board must have been missing for a big part of the book’s life, because the pages were highly discolored and torn only in the exposed area.

    The next step was to trace the general shape of the loss onto a new piece of wood. Because the board split in an uneven way, resulting in variations not only across the board but thickness-wise, fitting the new board to the old was a finicky process. I used a tracing profile gauge (a tool typically used to trace the shape of crown molding) to transfer the contours of the broken board onto the new. I then used a dremel with various attachments to very slowly fit the new board to the old. This process took about three days of trial and error, slowly removing more and more material until the fit was more or less right.

    During Treatment – using a dremel to shape filler board

    IMG_3919

    During Treatment – checking fit of filler board

    During Treatment – cutting filler board to proper length

    The old board had some slight shaping to it, so before fitting the two boards together, I had to shape the edges of the new board to transition seamlessly to the old. I did this by lightly sanding with a sanding block.

    To attach the new board to the old, I used wooden biscuits inserted into slots made in each board. The biscuits we had on hand were a tad too thick for the boards, so I sanded them down to a proper thickness. I then used a drill to make starter holes in each board and finessed the holes with the dremel until the biscuits fit snuggly. I first inserted the biscuits into the filler board using PVA and then made slots in the original board that they would fit into.


    IMG_3940

    During Treatment – using a drill to start the slots in the original board

    During Treatment – filler board with biscuits inserted

    It took a couple of tries to get the slots in the original board deep and wide enough so that the filler board would sit flush.

    During Treatment – checking the fit of the biscuit slots, still had a ways to go

    During Treatment – the PVA/wood shaving filler mix

    After the two pieces of board were joined together, there was still a small gap between them. While I wanted it to be apparent that new material had been added to the cover, I still wanted the transition from the original board to the fill to be as smooth as possible. I decided to fill the gap from the front with a mixture of PVA and wood shavings. The PVA dried clear, resulting in a fill that matched the new wood perfectly. I used the dremel to produce the wood shavings, because I found that if I used sandpaper, bits of black sandpaper grit found their way into the shavings, resulting in a dirty-looking fill. I decided to leave the inside of the board unfilled because it left the biscuits slightly visible, allowing a future conservator or researcher easy access to the history of the binding’s repairs. The new board was left uncovered for the same reason.

    The result of the treatment was incredibly satisfying to see and hold. The book felt much more comfortable, resting between two complete boards, and I feel confident that the treatment will keep it safe and accessible for future researchers.

    After Treatment – front board

    After Treatment – inside front board

    After Treatment


  4. Conservation Conversations // Tape Tricks

    November 12, 2015 by Jacqueline Scott

    Tape, once an innocent medium used to laminate middle school notebooks with drawings and pictures of my favorite boy band members, has become one of the great horrors of my life.

    Courtesy Eliza Gilligan, UVA Libraries

    The horror!!! Courtesy Eliza Gilligan, UVA Libraries

    While I might be exaggerating a tiny bit, tape is most certainly very bad for paper and books and has lead to many hours spent hunched over a bench or under a fume hood trying to get the stuff off. A convenient household repair material, it has long been misused by well-meaning folk in last ditch attempts to fix their beloved tomes. However, this seemingly convenient repair material always does more harm than good. Not only does it look horrible, often obscuring text and discoloring the object it is stuck to, if left on an object for too long it can fuse itself with the paper fibers, making removal of the adhesive and resulting stain very difficult and time-consuming.

    Pressure-sensitive tape ages in very distinct stages. In their 1983 article for The Book and Paper Group Annual, Merrily A. Smith, Norvell M. M. Jones, II, Susan L. Page and Marian Peck Dirda describe the aging process:

    Initially, there is a period of little alteration, an induction time. During the induction time, removal is relatively easy. As oxidation progresses, this stage is followed by a fairly abrupt change in adhesive consistency and color. The adhesive mass gets very sticky and oily, perhaps, in part, because of the breaking up of the rubber polymer. It also starts to yellow. Apparently during this stage various components of the adhesive soak into the paper, rendering it translucent. Some components probably remain, at least temporarily, on the surface. In this oily condition the adhesive mass can penetrate the paper entirely and move into adjacent sheets.

    Its components can also begin to affect certain media—particularly printing, typing, and ballpoint pen inks—causing them to bleed. Removal of tape during this very sticky period is usually still possible, but is more difficult.

    The adhesive, having permeated the paper, continues to oxidize, and gradually loses its adhesive properties. The carrier may fall off, and the adhesive residues crosslink, becoming hard, brittle, and highly discolored. Once it has reached this condition, the adhesive residue and the stain it has created are very difficult, sometimes impossible, to remove.

    Tape on vellum, the saddest of tragedies.

    Tape on vellum, the saddest of tragedies.

    So, what to do? There is a plethora of ways to attack tape removal. I am going to touch on a few ways to remove the carrier (the material that physically holds the adhesive, usually either cellophane or paper) and the remaining adhesive from the affected object.

    Carrier Removal
    Naturally, the least-invasive method of carrier removal is to mechanically chip it off with a Casselli spatula. However, most often the adhesive is still too effective and mechanical removal will result in damaging the surface of the object. The next least-invasive method is to apply heat, loosening the adhesive, and allowing the conservator to peel back the carrier. There are a few ways to do this:

    • Heated Spatula – Heated spatulas soften the adhesive and remove the carrier in one go. A thin metal piece can be heated to various temperatures (it is always best to start at the lowest heat setting and increase if necessary) and slipped beneath the carrier to lift it away from the object. The metal apparatus comes in various sizes and thicknesses, and can be modified to be thinner if necessary.
    • Heating the object from behind – A new technique to me, but one that is simple and effective. Many different flat heating elements can be employed—a cup warmer, the bottom of a tacking iron, a kapton test tube warmer, or a heated silicone blanket. The heating element is covered in blotter and the object placed on top. This slowly warms the adhesive from behind, and allows a Casselli spatula to be slipped beneath the carrier and remove it. An effective technique if you need to remove a significant amount of tape, as it allows a large surface to be warmed at once, making removal much faster.


    IMG_3101

    Lifting tape with a Casselli.

    If heat is ineffective, solvents can also be used to loosen the adhesive and remove the carrier.

    • Solvent chamber – Insert a piece of blotter that has been soaked with your solvent of choice into the top of an upside-down beaker. You can either cut the blotter so that it is a slightly larger circle than the beaker and will hold on its own, or cut it to be the same size or smaller and hold it to the roof of the beaker with magnets. Place the upside-down beaker on top of the tape you wish to remove and let the solvent work for a few minutes. It should loosen the adhesive enough so that the carrier can be easily removed.
    • Plaster – the same technique as above can be employed using a glass cup filled with Plaster of Paris. PoP is porous and as a result can absorb large amounts of solvent. This technique is nice because you can easily make a stash of PoP cups in advance (making sure that you only use one type of solvent in each) and have them on hand. This technique can also hold more solvent than the blotter technique, so you can remove more tape without having to replenish the solvent over and over.
    Left to Right: a solvent chamber, direct application of solvent-soaked blotter to tape, plaster chamber.

    Left to Right: a solvent chamber, direct application of solvent-soaked blotter to tape, plaster chamber.

    • Air pen – this technique has been discussed in this Conservation Conversations post.
    • Clarinet reed – Because the wood used to make reeds is so light, it can absorb liquid. The reed’s tapered, rounded tip is also a convenient shape to slip underneath tape. The reed can be soaked in solvent and then used to both loosen the adhesive and lift the tape at once. Make sure you have a stash of reeds on hand if you choose this technique, because the wood will quickly fray and become less effective at lifting.
      Using a clarinet reed to lift tape.

      Using a clarinet reed to lift tape.

    Adhesive Removal
    After the carrier is completely removed, there will most likely still be residual adhesive left on the object. A crepe square is usually the most effective way to remove the remaining adhesive. However, if using the crepe square damages the object further, and if there isn’t much staining or the staining isn’t an issue, it is possible to end the process here and simply cover up the adhesive. I have done this in two ways. The first is to use toasted cellulose powder, which can be baked for a range of time to match different paper hues (Marianna Crabbs touched on TCP in this Conservation Conversations post). Sprinkle the powder over the parts that are still sticky, and it will get rid of any residual tack. The same thing can be done with paper shavings of a similar color. Simply run a scalpel blade over the paper to make fine shavings and use that in the same way you would the cellulose powder. This is helpful if you have a paper that is colored.

    Further reading:

    Conservation Wiki, “Hinge, Tape, and Adhesive Removal.”

    Merrily A. Smith, Norvell M. M. Jones, II, Susan L. Page and Marian Peck Dirda, “Pressure Sensitive Tape and Techniques for its Removal from Paper.”

    Ted Stanley, “A Tool for Pressure Sensitive Tape Removal: The AirPencil.”

    Tesa Tape, “Understanding the Basics of Pressure Sensitive Tapes.”
    – Side note – this article contains the most frightening sentence ever written: “The pressure sensitive adhesive (PSA) tape market is projected to grow exponentially by the year 2020.”


  5. Conservation Conversations // The Continuum

    October 28, 2015 by Henry Hebert

    Typically very few of the items that come through a research library conservation lab are in their original or unaltered state. While library and archives conservation, as a field, is relatively young, many universities have had some form of bindery or mending division in operation for decades. We often find ourselves as the current custodian in conservation continuum, with our professional forebears in possession of very different materials and training backgrounds than our own. The common result is a book with poorly applied repairs or very degraded repair materials, which can compromise the object’s look and functionality. I am often unsure of the absolute best method for resolving the condition issues of the item without obscuring some evidence of the way it was maintained and used.

    As an example of this situation, I was recently confronted with this first edition of Sir Isaac Newton’s Opticks; A valuable book, which gets a significant amount of use.

    Newton's Opticks

    It is obvious that this item has gone through several “campaigns” of repair. Some are more successful than others – but, ultimately none of them have maintained their intended function.

    I cannot say for certain if the boards and leather with the Cambridge panel design are the original binding, but they appear to be roughly contemporary to the text. The book has been rebacked with a very dark brown calfskin, and the new spine leather features a red leather lettering piece and some simple tooling. This leather is now splitting at the joints and along the center of the spine, but was admittedly a well executed repair at the time it was done. The front board also features a rather distracting patch in much lighter, plastic textured calfskin. I assume this was added after the reback, since the person doing the reback would have either matched their repair to this color or just removed this patch altogether.

    The boards show evidence of spine repairs prior to the current one. Impressions of a woven pattern in the original leather and vertical cuts suggest to me that a piece of textile was once glued over the spine and a portion of the boards and trimmed directly on the book.

    Opticks textblock before treatment

    More repairs are visible inside the volume as well. The inner hinges have been repaired with white cloth. A new flyleaf of laid paper has been tipped on and a strip of that same paper has been applied to the pastedowns at front and back.The extant thread and visible sewing supports do not appear to be original. Several types of sewing thread are visible inside the gutter, but much of it has broken. The textblock is essentially split in half and sections are falling out of the book.

    It is immediately clear to me that the functionality of the book must be regained. It is requested often for classes and we don’t want pieces to be lost or damaged in the process of use. The question of which material to retain and which to remove, however, is not so clear.

    Some of these repairs – namely that leather patch on the front board – are so distracting. Yet the fact that this book has been repaired so many times, in so many ways, says something about its value and history. The new materials are in such poor condition, however, that I must take the book apart completely, documenting everything as I go.

    Starting from individual sections, I resew the book onto single raised supports using (as far as I can determine) the original sewing stations. The newer flyleaves from the repair are left out and I add new endsheets of sympathetically colored handmade laid paper. I line the spine with unbleached linen and handmade paper to create an appropriate opening.

    Opticks opening after treatment

    In the course of pulling the textblock, I find evidence of blue and white sewn endbands. I sew endbands in matching colors off the book and adhere them to the spine.

    So many past interventions have left the original boards in very poor shape. The exposed corners have delaminated and become incredibly soft. The original leather has become very brittle from repeated lifting and application of various adhesives. I am not confident that I can safely lift it one more time to insert new material underneath.

    Opticks after treatment

    In concert with the curators, the decision is made to create a new leather binding, but retain the original boards, with all the evidence of their previous repairs. I consolidate the original leather and boards, re-adhere any lifting leather, and create a paper wrapper for them. This sits underneath the volume in the custom enclosure.

    Opticks and box after treatment

    The new binding is constructed and decorated in the same style as a rather plain book from the period, but it is obvious from the materials that it is new. It protects the text and opens well. The high quality materials and optimal storage conditions will hopefully maintain the functionality of the book for a long time. Should some future scholar be interested in the more artifactual evidence of this particular book and its rocky repair history, she will hopefully find the original boards in the box and hopefully be able to access my born-digital treatment documentation. This is all assuming the library can continue performing its duties, that digital preservation initiatives succeed, etc.

    I believe that this treatment is successful in that it is reversible, satisfies the treatment goals for the object, and could be completed in a relatively short amount of time. There will likely be other conservators in the continuum of care for this object. I hope that they agree with the decisions we have made – but only time will tell.


  6. Conservation Conversations // A Helpful Little Hobo

    October 8, 2015 by Henry Hebert

    I’d like to share a rather handy bit of hardware that we recently acquired and started using in my institution: The Onset HOBO MX1101 data logger.

    hobomx1101

    This little device measures approximately 1.5″ in height by 3″ in length, and is about an inch thick. It measures temperature and humidity – which is nothing new for a data logger and I have used many other devices over the years that can do that job just as well. The great thing about this model in particular, however, is the included Bluetooth connectivity, which allows you to view or download the collected data on your mobile device.

    Duke University’s Rubenstein Library recently underwent a major building renovation. The collection storage areas, exhibition spaces, reading rooms, staff offices, and instruction spaces were all redone, including HVAC systems. The library officially reopened in the new space in August, a time of very unpredictable weather in North Carolina. With all these new spaces and infrastructure, it has been helpful to be able to quickly gather data on the environmental conditions in a given space. If the settings of a new air handler are adjusted, for example, we can easily monitor the space it serves for several days and have the data on hand.

    The magnets make this data logger easy to mount on nearby metal surfaces, like library shelving.

    Batteries

    Each unit is powered by two AAA batteries, which the manufacturer says should last for about a year (depending upon some variables). The specified operating range is -4° to 158°F (accurate to ±0.38°F) and 0 to 95% RH (accurate to ±2% at room temperature). You can set the device’s logging rate anywhere from 1 second to 18 hours, and the memory can store over 84,000 measurements. The back of the unit contains four small magnets, making this data logger easy to deploy and monitor. The LCD screen on the front allows you to get a quick visual of the current environmental conditions, and status of the logger – but the real magic happens in the free HOBOmobile App.

    You can give each unit a unique name and restrict access with a password. The manufacturer says the transmission range of the Bluetooth is up to 100 ft, but this is for clear line-of-sight. I usually have to be within about 10-20 feet of the device to be able to connect and download the data with my iPhone 6, but I have been able to do so through fairly thick concrete and masonry. In fact, I can often connect to a unit on the floor directly above or below me. This means you can gather the data from all the units in a space at once, without disturbing them; No more crawling around with a cable looking for each HOBO. In fact, if you forget where a unit is located, you can page the device from the app for easy identification.

    List of Hobos displayed

    Supported file types

    IMG_2649

    After downloading the data from all the units, you can see small display graphs right on your mobile device. You can zoom-in or drag the graph on your screen to get a better view of the data points. My favorite feature is the very simple interface for selecting and sending data files to either cloud storage or other staff.

    There are many different devices for monitoring environmental conditions, and each has different functionality and associated cost. If you just need to collect data on temperature and relative humidity in a normal library or museum environment, though, the HOBO MX1101 is great. It currently retails for around $135, making it a very affordable solution. If you would like to hear more about how these devices can be used, I would suggest watching the webinar titled “Tracking Environmental Conditions in a Museum with Onset Bluetooth Data Loggers“. Staff from the Hunter Museum of American Art in Chattanooga, TN discuss their experiences with these HOBOs.


  7. Conservation Conversations // Boxing The Unwiedly

    September 17, 2015 by Henry Hebert

    Conservators working with research library collections are often confronted with objects more difficult to store and handle than books. At times we must become a bit creative in designing and fabricating enclosures for these items, so that they can be safely stored and are easily delivered to patrons in the reading room. The enclosure must always be constructed of high-quality, stable materials, fit the item well, and be intuitive to use. I have found that, in most cases, I can accomplish this with just a few standard materials on hand. In describing my process on a recent project, I hope to show some of these principles in action.

    Patent of Nobility

    I was recently confronted with the challenge of building an enclosure for this French Patent of Nobility from 1816. The manuscript document itself is made of parchment, measuring approximately 14″ x 20″. Attached to the lower left hand corner, via 4 woven textile laces, is a very heavy wax pendant seal (approximately 1″ thick and 5″ in diameter). The corner of the parchment has been folded back, so that the woven textile can pass through two layers of strong parchment. Seals like this were often attached as a pendant, rather than applied to the folded or rolled document, so that it can be read without destroying the seal. The colors of the lacing are often representative of the livery colors of the document’s issuer.

    Wax Seal (detail)

    While the seal remains securely attached, the weight of it has put significant strain on the woven lacing and they are beginning to fray.

    When designing a unique enclosure, I try to take all the aspects of the item and its use into consideration. In this case, the parchment piece is not folded or rolled, so it should remain flat. If it were treated differently, then my final design would take that into consideration. I usually begin by asking the collection managers about storage conditions and anticipated use. Next I think about the types of materials needed to safely support the object.

    I have found it best to build a custom enclosure from the inside-out, first measuring the object and then compensating for any padding or additional support before building a box. The wax seal is nearly 1″ thick, and needs to be snuggly held in place so that it is not damaged when moved. The parchment also has some dimensionality to it- and while I want the enclosure to provide some containment so that it does not completely curl, I do not want to force it to be flat. Closed-cell polyethylene foam (ethafoam) seems to be the best choice as the body of the support, since it is light weight, easy to cut, and chemically stable. I can also purchase it in a 2″ thick sheet.

    I map out the position of the parchment and seal, and cut that out of the ethafoam. I then mount the ethafoam to a piece of B-flute blue corrugated board with hot-melt adhesive. This provides a light weight, but rigid base. For heavier objects requiring more structural support, I might choose something like honeycomb board. The cut edges of the ethafoam can be quite rough, so it must be covered to protect the object. The foam support is covered in a thick mulberry fiber paper, by just adhering the turn-ins on the underside of the foam with hot-melt adhesive. Since the wax seal must fit very tightly, I decide to line the area around the wax seal with a strip of 1/4″ thick Volara, a smooth polyethylene foam. The area under the seal and parchment are also lined in volara foam, making the depth of the tray a little more shallow.

    Wax seal in foam enclosure

    The open layout of the tray makes it easy for a researcher to lift the seal and turn it over.

    Now that the piece has a nice little bed in which to lie, it needs a lid to hold it in place. I create a simple portfolio case from 4-ply mat board and attach the boards of the case with a pressure-sensitive adhesive tyvek tape. You could also use book cloth or linen here. The tray is attached to the case with 3M 415 double-sided tape.

    Open Case

    This lid comes open quite easily and I want to protect the sides of the tray, so I constructed a simple corrugated clamshell enclosure to fit using the same B-flute corrugated board.

    Case in boxThis final box keeps the entire package secure while being lifted off the shelf. Combined with the inner portfolio, it also acts as a gentile “pressure lid” in case the parchment begins to move from changing environmental conditions.

    Corrugated Box

    I can now affix labels which describe the item inside and provide handling instructions to the patrons. As someone who fabricates and uses enclosures all the time, I can pretty quickly determine how they are intended to be used. This is not always the case with library or archives patrons, so it is best to provide clear descriptions or diagrams either on the lid or inside the enclosure.

    Designing custom enclosures to fit unusual objects can be challenging, but also fun. With a limited number of simple, but high-quality materials, you can produce a safe and durable housing that can protect an object for many years.


  8. Conservation Conversations // Adhesives for Paper Mends

    August 28, 2015 by Becky Koch

    Adhesives are an essential part of book and paper conservation. If you want to repair a paper tear you have to use some sort of adhesive, and it’s important to choose an archival adhesive. Archival adhesives won’t turn yellow or become brittle over time, and most importantly they’re reversible. Reversibility is a big factor so future conservators can remove your mends if they need to – maybe to see what’s under it, or it could be interfering with a treatment they want to do, or maybe they just know a way to repair the same tear with a better technique.

    There are two main adhesives I use to make archival paper mends – wheat starch paste and methylcellulose. There are lots of different archival adhesives out there and this is by no means an extensive list, but these are the adhesives that I always reach for and use the most often.

    Wheat Starch Paste
    It’s a paste, that’s made from wheat starch.

    Paste in its dry powder form, before cooking

    Wheat starch is widely used because it’s easy to make, easy to store, relatively inexpensive, archival, and strong. It’s also very versatile – you can make paste that is extremely dry and thick, but you can still make viable repairs when it’s watered down to the consistency of skim milk (paste consistencies are always measured via a dairy scale for some reason. It can get kind of gross).

    Paste, after cooking, ready to be strained

    There are loads of different ways to make paste out of wheat starch and which one of these ways is the best way is a fierce topic of debate between conservators and bookbinders. Some choose to cook theirs on the stove while others in the microwave. Some leave their starch to soak overnight in cold water before they cook it, some strain it with only a horse hair strainer, etc etc etc… No matter what exact recipe you choose to follow the process basically calls for adding water to dry wheat starch and applying heat. The starch will gel and become sticky, and that’s your paste. After the paste is made it needs to be pushed through a strainer of some sort to make it smooth, and then water is added to create the right consistency.

    The benefits of paste: versatile, easy to make.

    The drawbacks of paste: cooked paste doesn’t keep well and it won’t be long before you need to make more.

    Methylcellulose
    The other adhesive I reach for during paper mending is methylcellulose, which in it’s dry state is a white powder made from vegetable cellulose. You may have heard of methylcellulose before – it’s used as an emulsifier and thickener in processed foods and cosmetics, and I was also surprised to discover that it’s also used as a laxative.

    Methylcellulose adhesive typically creates a much weaker bond than wheat starch paste. Sometimes this is a good thing – if you’re working with a very weak object you don’t want to make a very strong mend. But I rarely find a paper that is so weak I can’t use some dilution of wheat starch on it, so I typically use methylcellulose in water as a poultice to rehydrate dried glue on spine linings or whatnot and I use methylcellulose in ethanol to make mends on papers that are prone to tide lines. Diluted methylcellulose can also be used as a paper size.

    Jars of methylcellulose

    To cook methylcellulose in water you first need to dissolve it in cold water and apply heat to make it gel up (once again, there are a number of ways to accomplish this). With alcohol, I mix the powder with the appropriate amount of ethanol and let it sit overnight. Also like wheat starch paste the viscosity can be modified depending on how much water/alcohol you use, but unlike with paste the correct amount of liquid should be measured out before cooking rather than diluting the finished product.

    Benefits of methylcellulose: you can make it in water or alcohol, keeps longer than paste.

    Drawbacks of methylcellulose: not very strong, can leave a “sheen” when dry.

    What I’ve chosen to highlight here are the two of the perhaps most commonly used adhesives in a book and paper lab, but there are lots of choices out there. Wheat starch and methylcellulose are versatile but they don’t address every situation, so if you have a problem that these adhesives don’t solve do some research and ask around, there is an adhesive out there to meet your needs.


  9. Conservation Conversations // Choosing the Right Repair Paper

    August 7, 2015 by Becky Koch

    In my last post I talked about how many papers are out there for conservators to choose from. It’s great to have so many options, but picking the right one for your situation can be a challenge, the options are often overwhelming.

    When making a mend, there are several considerations to take into account. How thick is the paper? How strong is it? Is it very brittle? What color is it? The goal is to create a repair that blends in with the paper, does not obscure any text or image, and successfully stabilizes the piece.

    Different colors of Japanese tissue

    Different colors of Japanese tissue

    A subtle mend can be achieved by using a slightly colored tissue. You can buy pre-toned tissue, or to get the perfect match sometimes you need to tone your own paper with watercolors or acrylic paints. A thinner tissue often does better at blending into its background, and it may also be semi transparent so text can be read through it. Often times color is less important than transparency. A white tissue that is very thin and transparent will usually blend in well with tan or acid-burned papers without any toning whatsoever.

    Toning tissue

    Toning tissue

    Perhaps the most tricky of all of these factors is choosing the correct weight and strength of the tissue. A repair paper should be chosen that is as thin as possible to stabilize the paper – usually something slightly weaker than the paper being repaired. This is so that if the paper is ever put into a situation where it is overly stressed, any future tears will occur at the mend rather than somewhere new on the sheet. If a very strong tissue is used to repair a very weak paper then there is a high likelihood that the paper will crack or tear on either side of the new mend since that area is supported while the rest of the page is not. That is why, in the hopes of creating no further damage, a weaker tissue should be chosen. On occasions where the paper is extremely brittle I sometimes choose to line the entire sheet with a piece of thin tissue to create even support.

    Tengucho paper is very thin and text can still be read through it

    Tengucho paper is very thin and semi transparent

    If a piece of paper has a hole, or loss, the paper chosen to fill in this area will go through different considerations. Typically a paper should be chosen that is the same weight as the paper being mended or something slightly thinner. This is so the original piece will move smoothly and stay supported around the loss. This is especially important in the case of very large losses in a book where pages will be turned and handled regularly.


  10. Conservation Conversations // Japanese Papers and Tissues

    July 28, 2015 by Becky Koch

    Japanese papers and tissues are used extensively in book and paper conservation; they are used to mend tears, fill losses, back or line weak or brittle papers, line spines and perform innumerable other conservation repairs. These papers originated in Japan (as I’m sure you’ve guessed) and are mostly made from kozo fibers from the paper mulberry tree. They come in a variety of thicknesses for different needs, and some are thin enough to be translucent and are ideal for mending over text or images. Japanese papers are soft and flexible and do not become brittle or discolored over time so they are especially appropriate for conservation. But the most important trait of Japanese tissue is its strength – due to the long kozo fibers these papers are very strong. Deceptively strong. Even the thinnest tissues are useful for mending tears and lining brittle pages, often times creating almost invisible repairs.

    I was introduced to Japanese papers at my first conservation internship during college. I spent the summer repairing larger-than-life stained glass window templates by Rudolf Buenz at the Winterthur Museum in Delaware. The sketches had been kept rolled up in a garage since the 1960s and their edges were crushed and tattered.

    We used a lot of tissue that summer. A LOT.

    My internship advisor, knowing that if we kept on the conservation track Japanese tissue would become our lifeblood, had us make a sample book of all of the lab’s tissues. Being a very well stocked lab, there are 15 papers in my original sample book. This may sound like a nothing task and at the time it didn’t feel that I was doing something very important, but in all honesty I still consult this book today.

    As a side note, this was the first book I ever made

    IMG_3687

    I think all conservators have their favorite go-to tissues, two or three different weights that we use for different tasks. But sometimes when you’re faced with a different type of challenge it’s good to have all of your options at hand, right in front of you in a little booklet, where you can feel the weight, texture and color of each and choose the one that’s best for your task. Whenever I encounter a new tissue I take a small sample and label it (seriously, don’t forget to label it, otherwise it’s useless) and add it to my collection – it’s one of the best tips I can give to any new conservation student.


  • My name is Erin Fletcher, owner and bookbinder of Herringbone Bindery in Boston. Flash of the Hand is a space where I share my process and inspirations.
    The StudioNewsletterInstagramEmail me
  • Archives