RSS Feed

Posts Tagged ‘becky koch’

  1. Online Exhibit for Stitch·illo – Creative Expressions through Thread and Fiber

    January 14, 2018 by Erin Fletcher

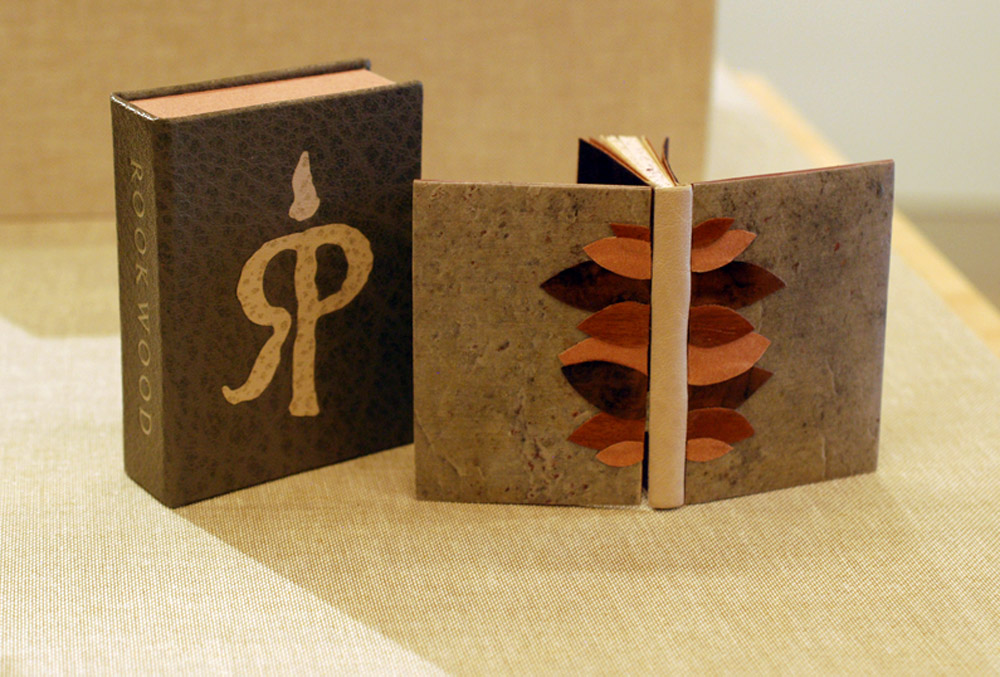
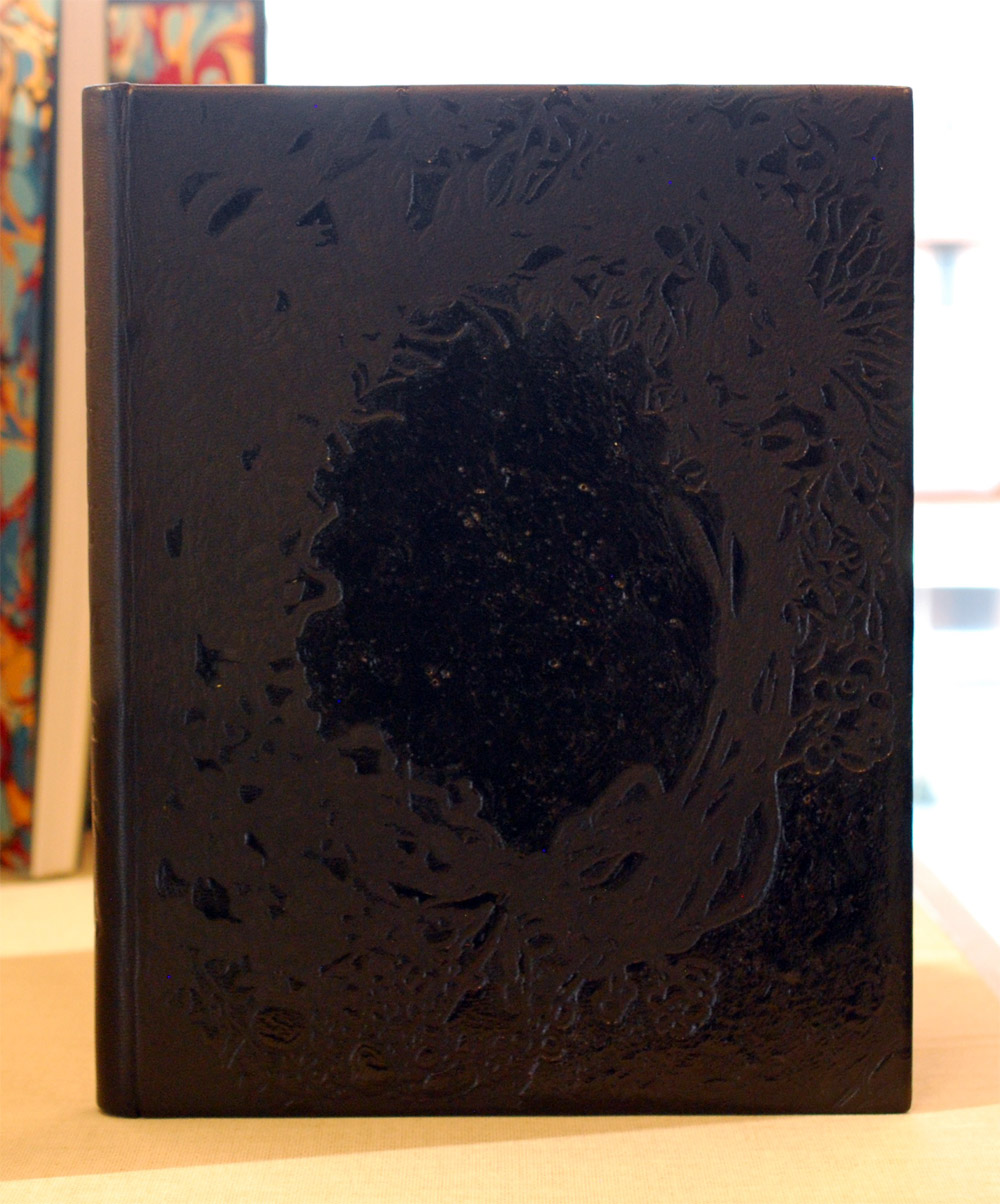
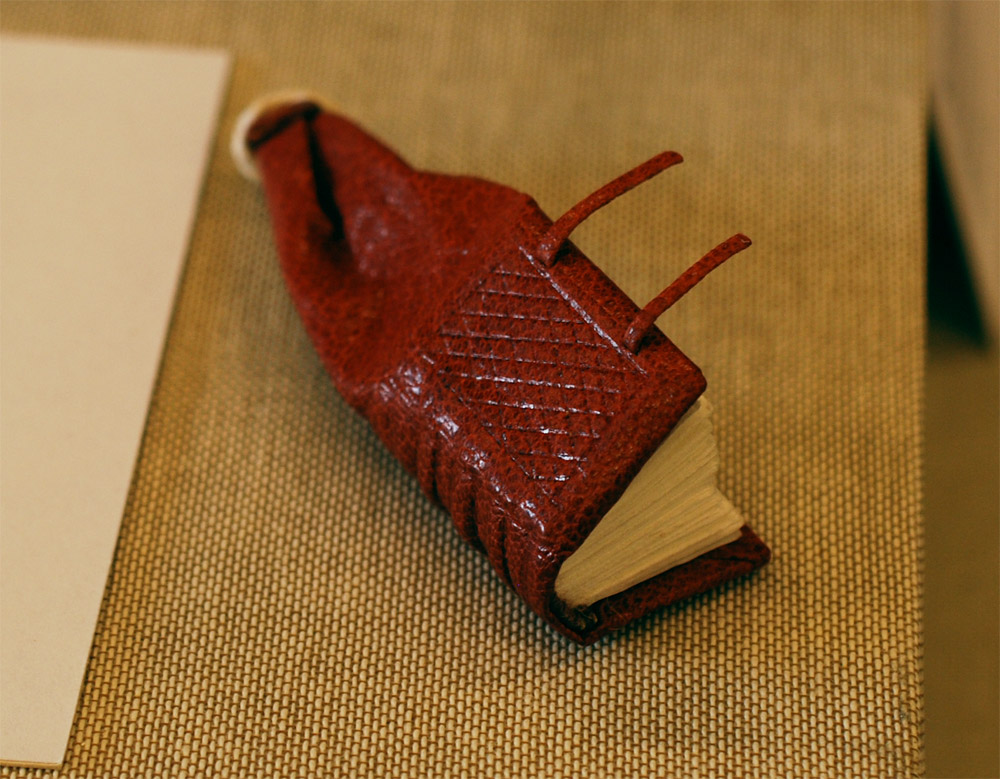
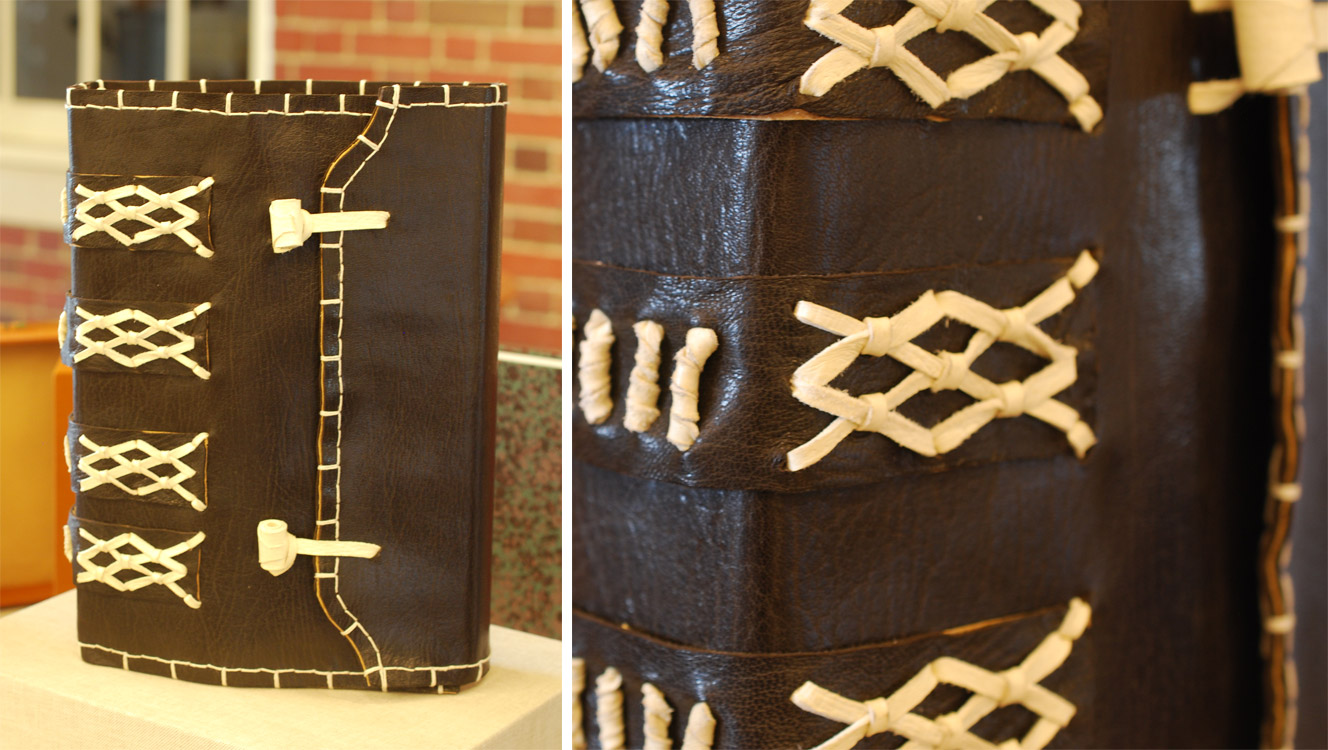
    binder: Jennifer Evers

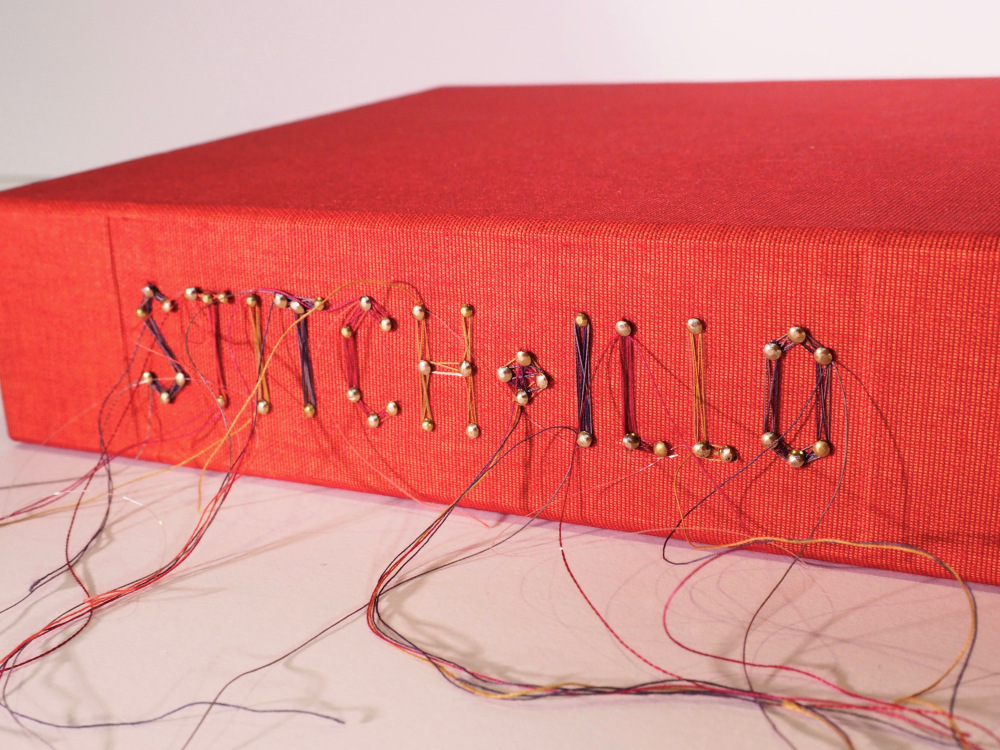
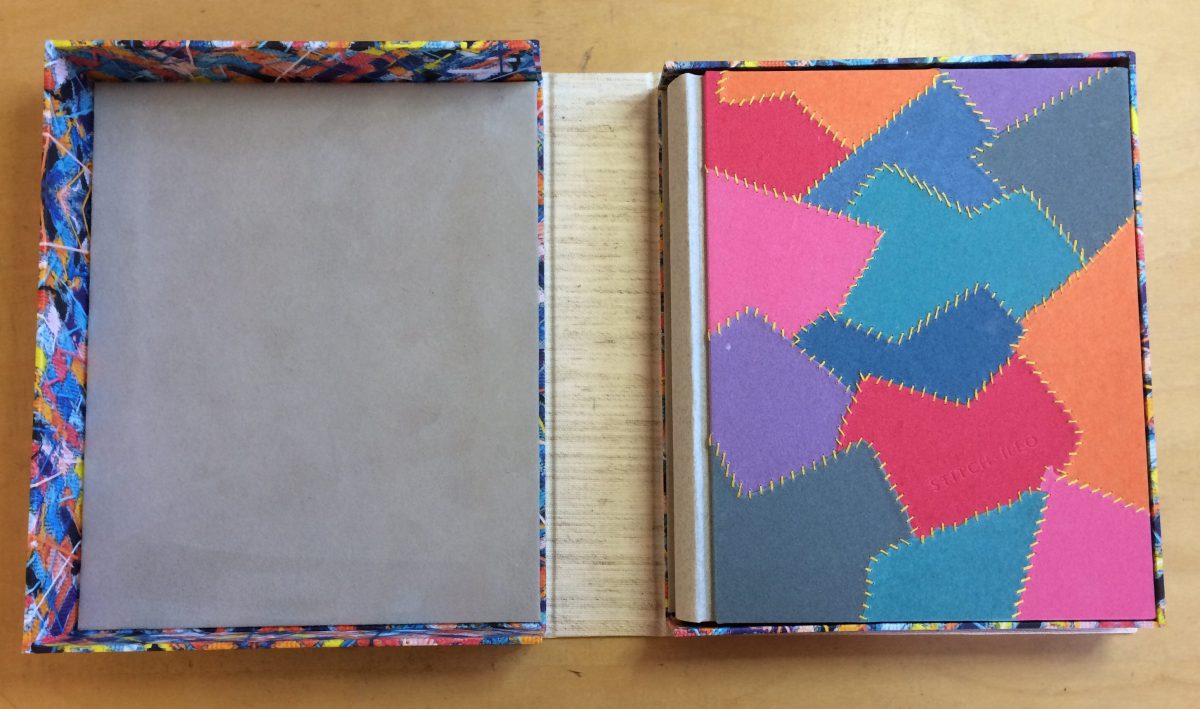
    Last year, I posted about my binding Feed Sacks: The Colourful History of a Frugal Fabric, which came about through an invitation from Todd Pattison. Along with fourteen other binders, we each bound a copy in our own style. The Feed Sacks bindings are now on display at the Iowa Quilt Museum alongside objects made with feed sack fabrics. In addition to our bindings, we also had the chance to recommend a binder for a second project. Janine Vanpool, the publisher of Uppercase magazine generously donated copies of Stitch·illo – Creative Expressions through Thread and Fiber.
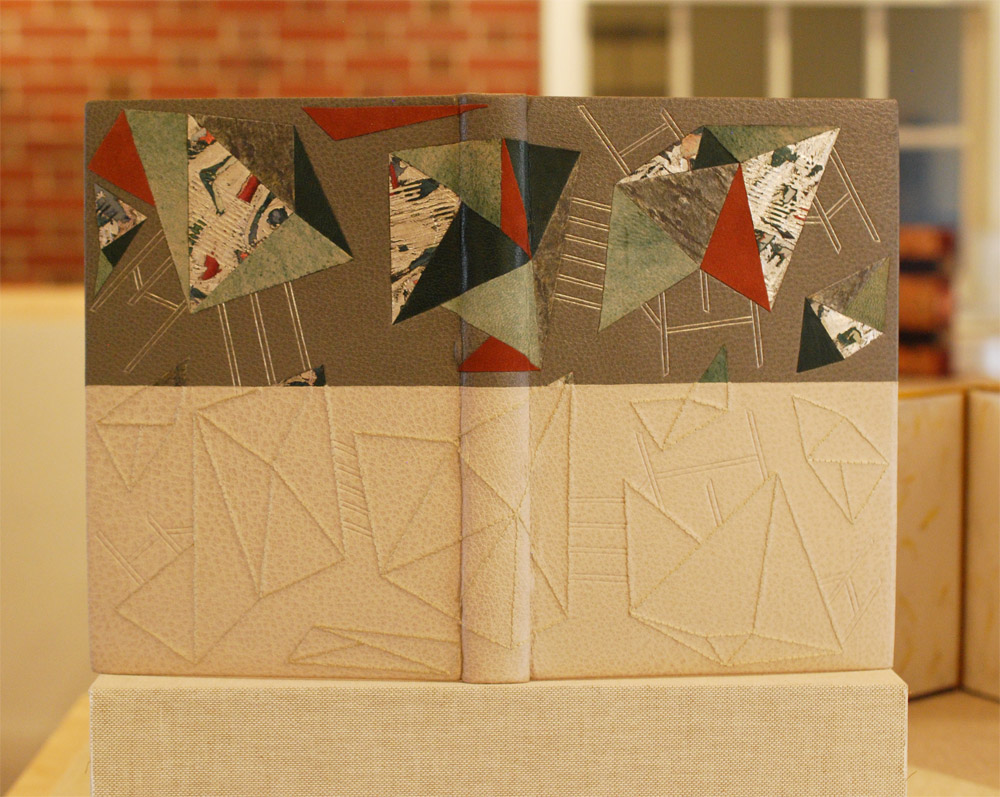
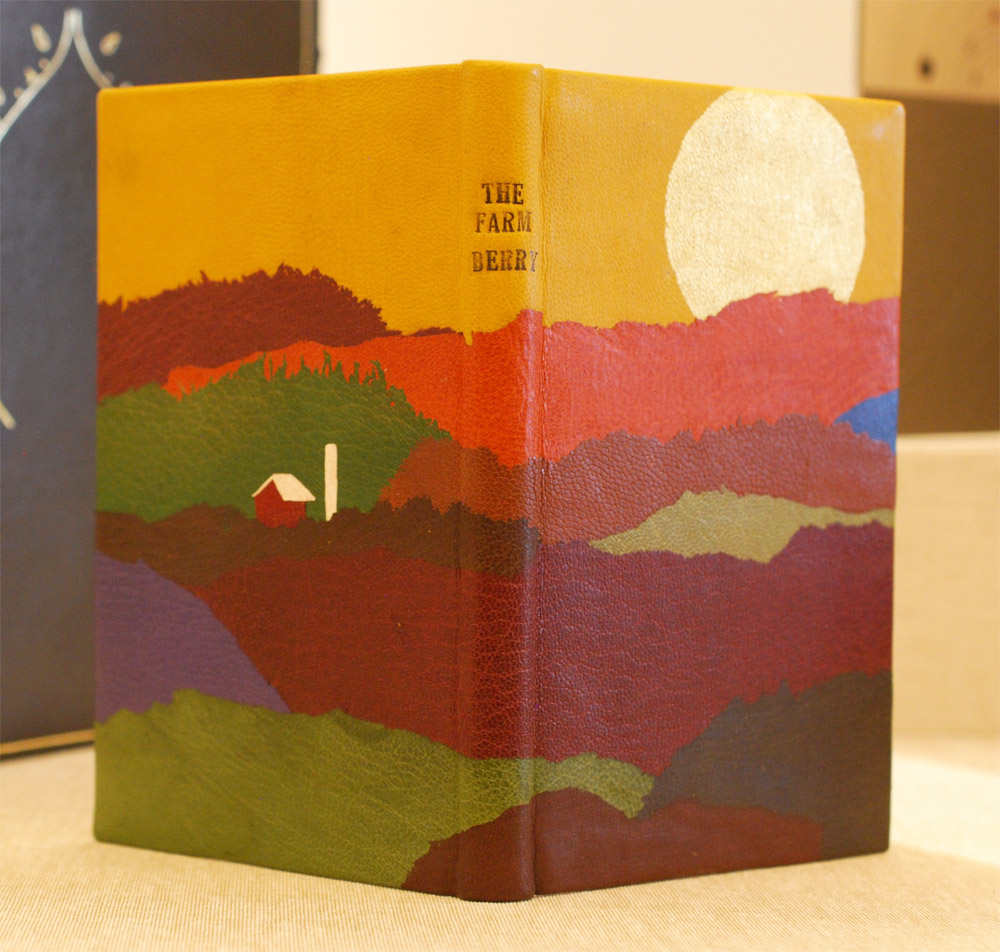
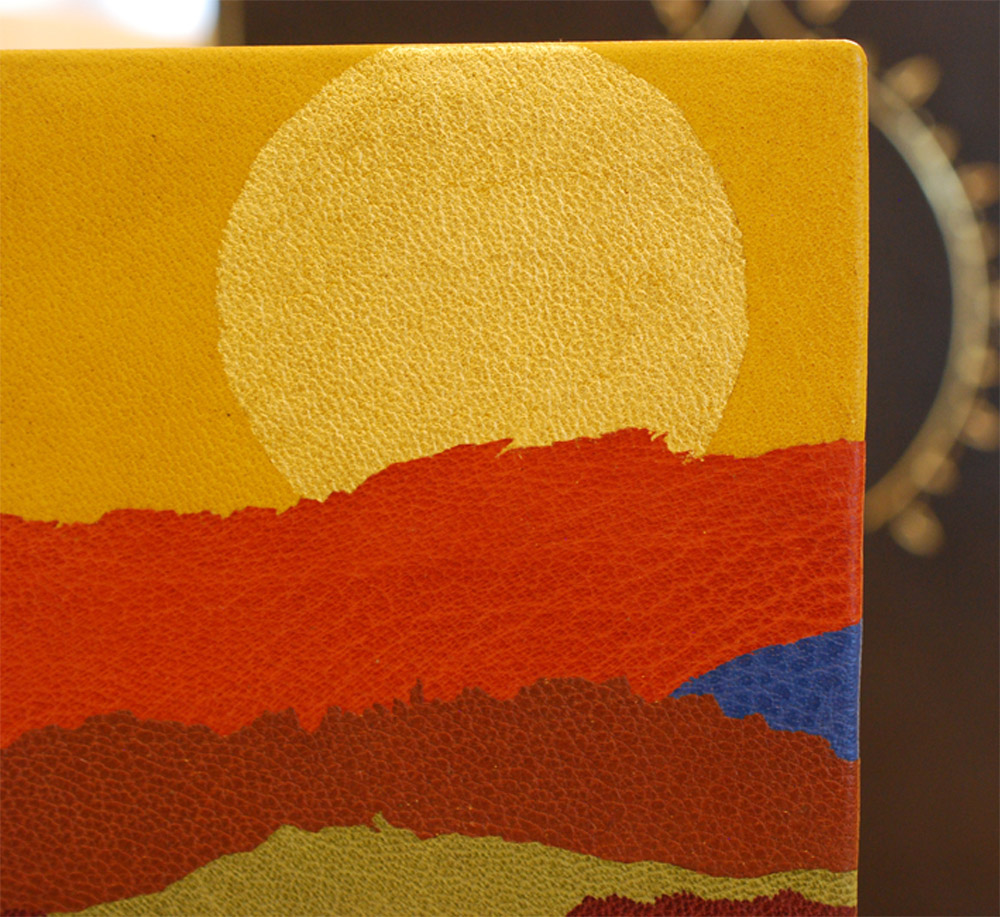
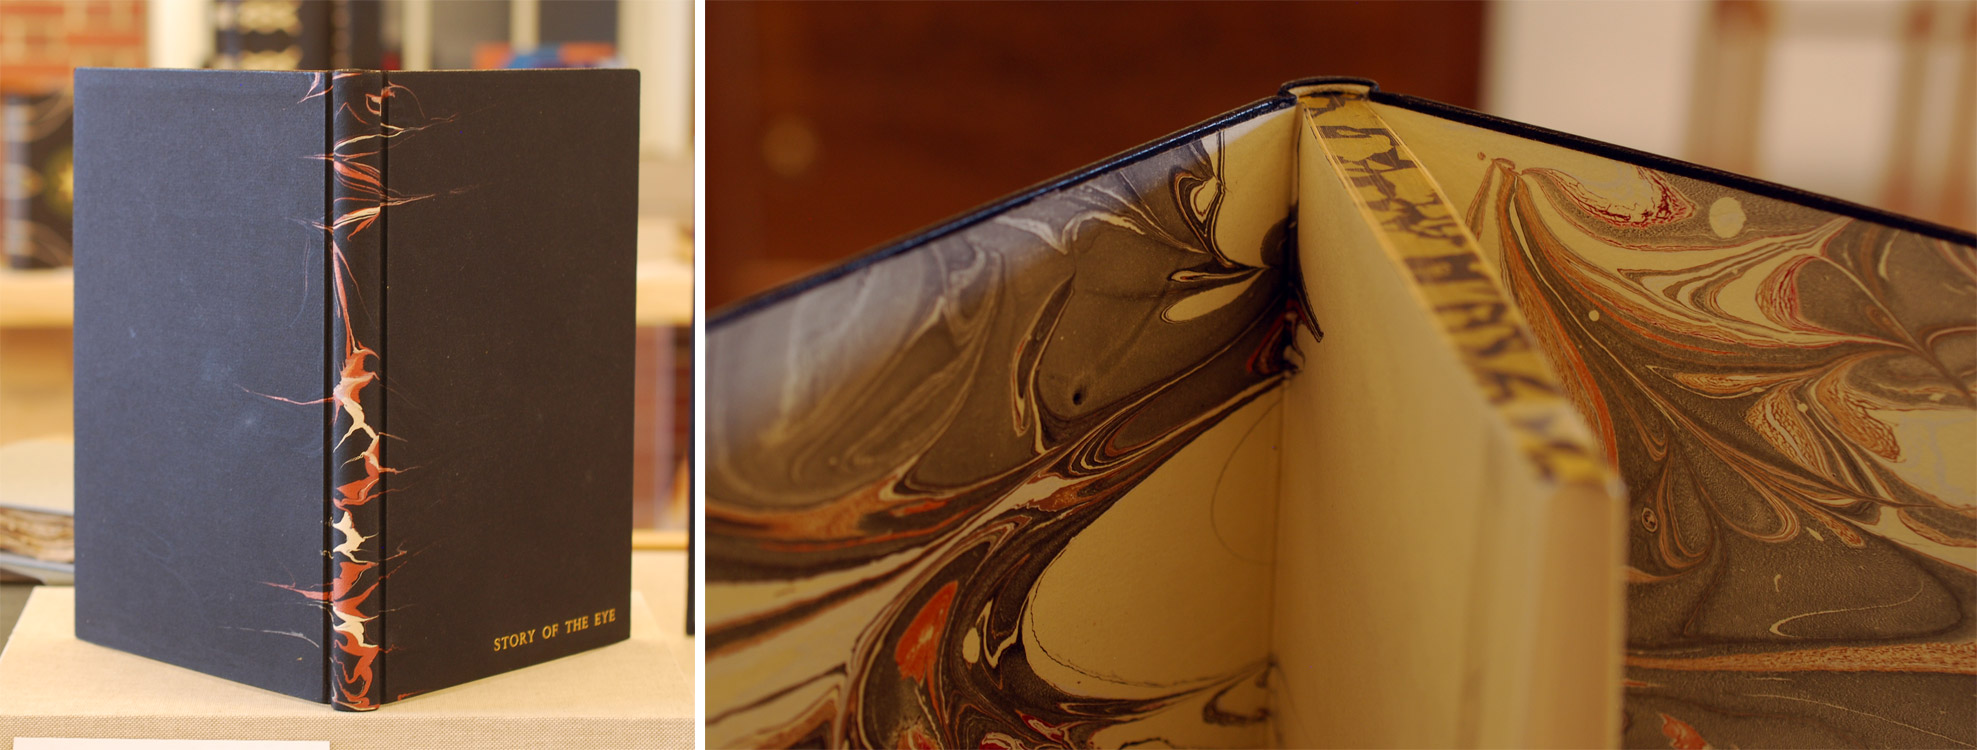
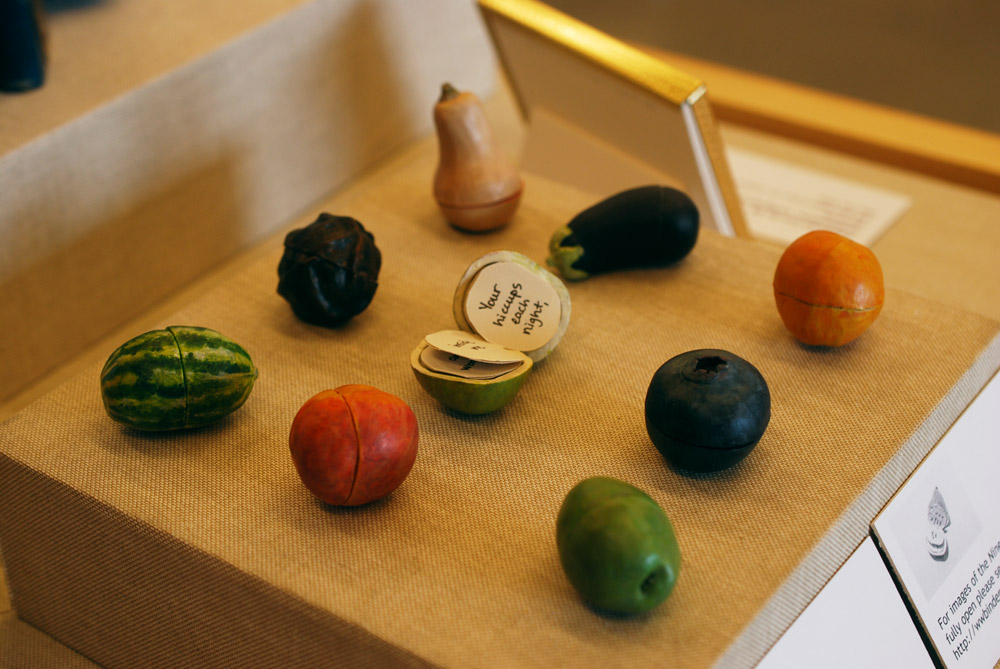
    binder: Becky Koch

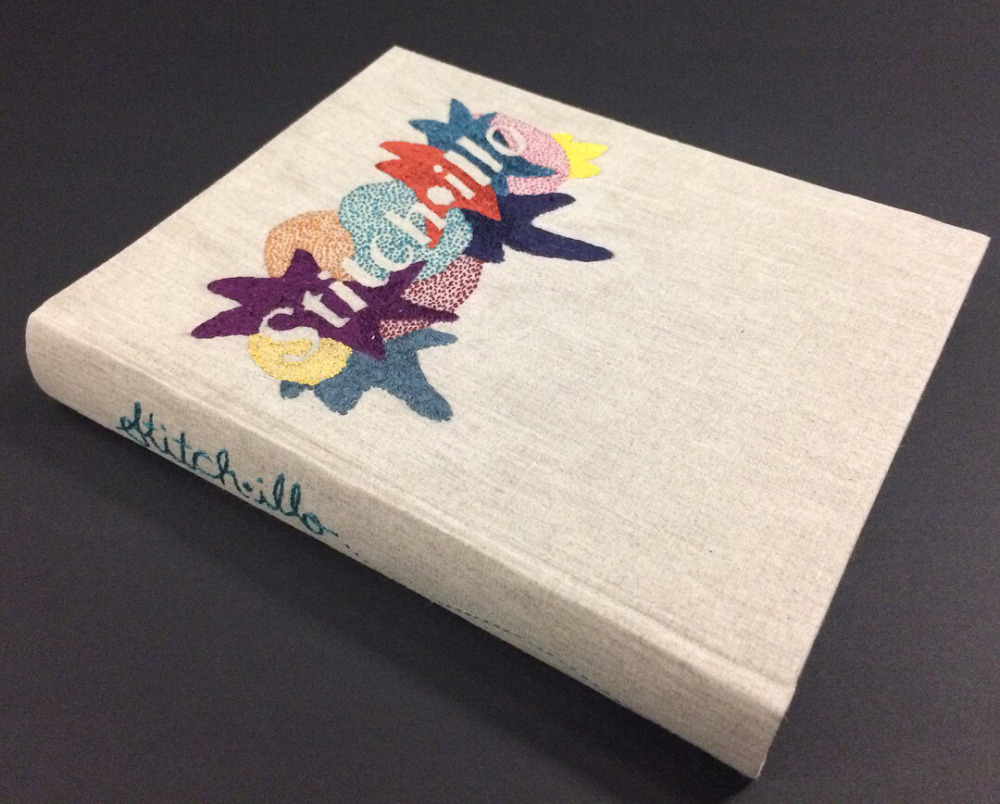
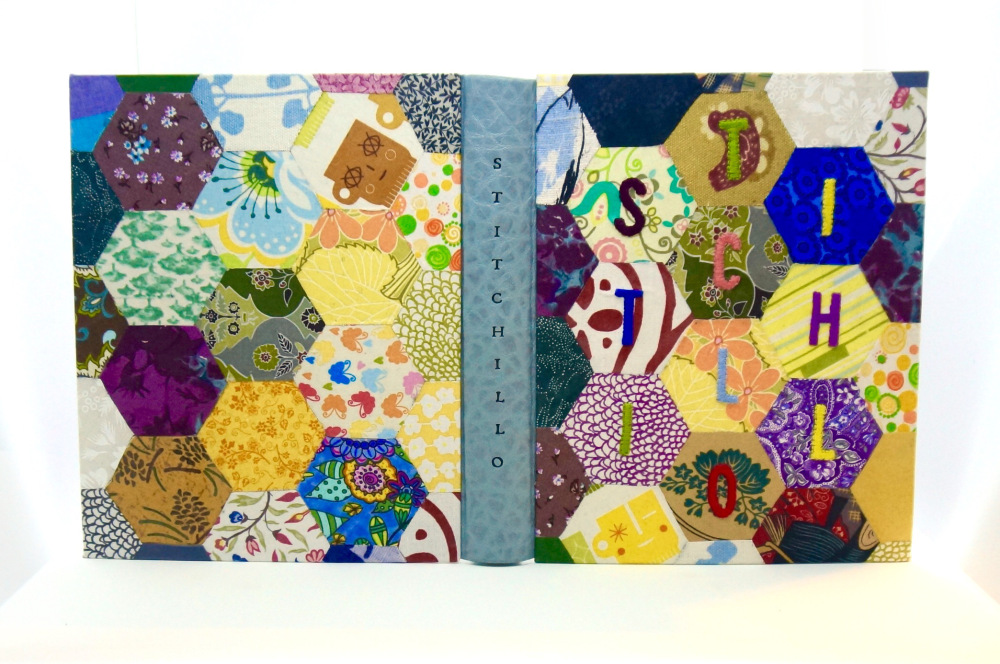
    This book profiles 46 contemporary artists who are using embroidery and other textile processes to explore their art by honoring historical techniques and exploring new ways of crafting through fiber arts. Check out the fifteen binders who put their own unique spin on Stitch·illo.

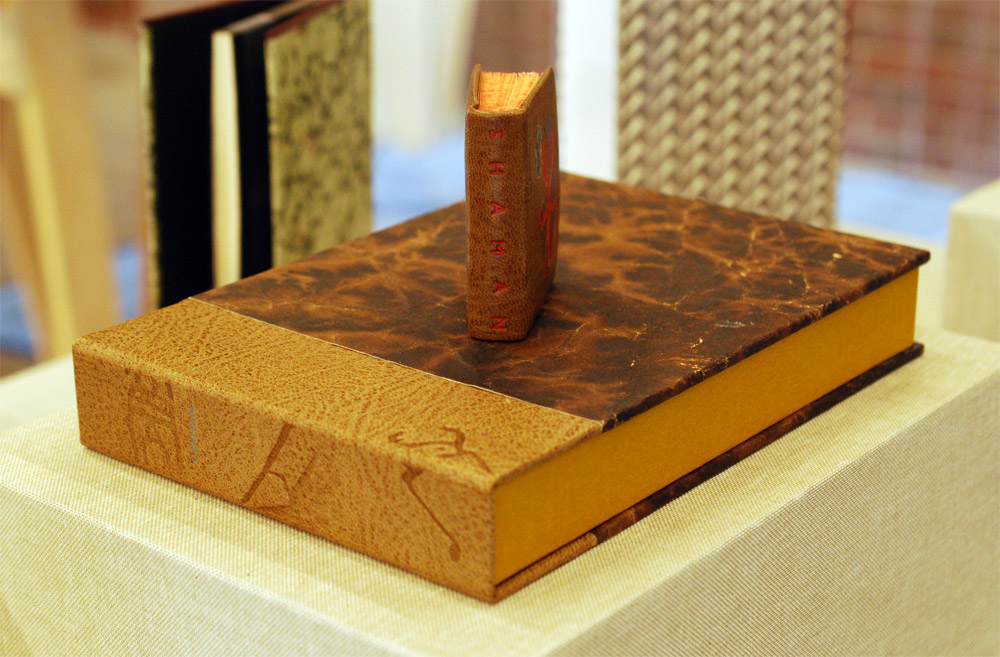
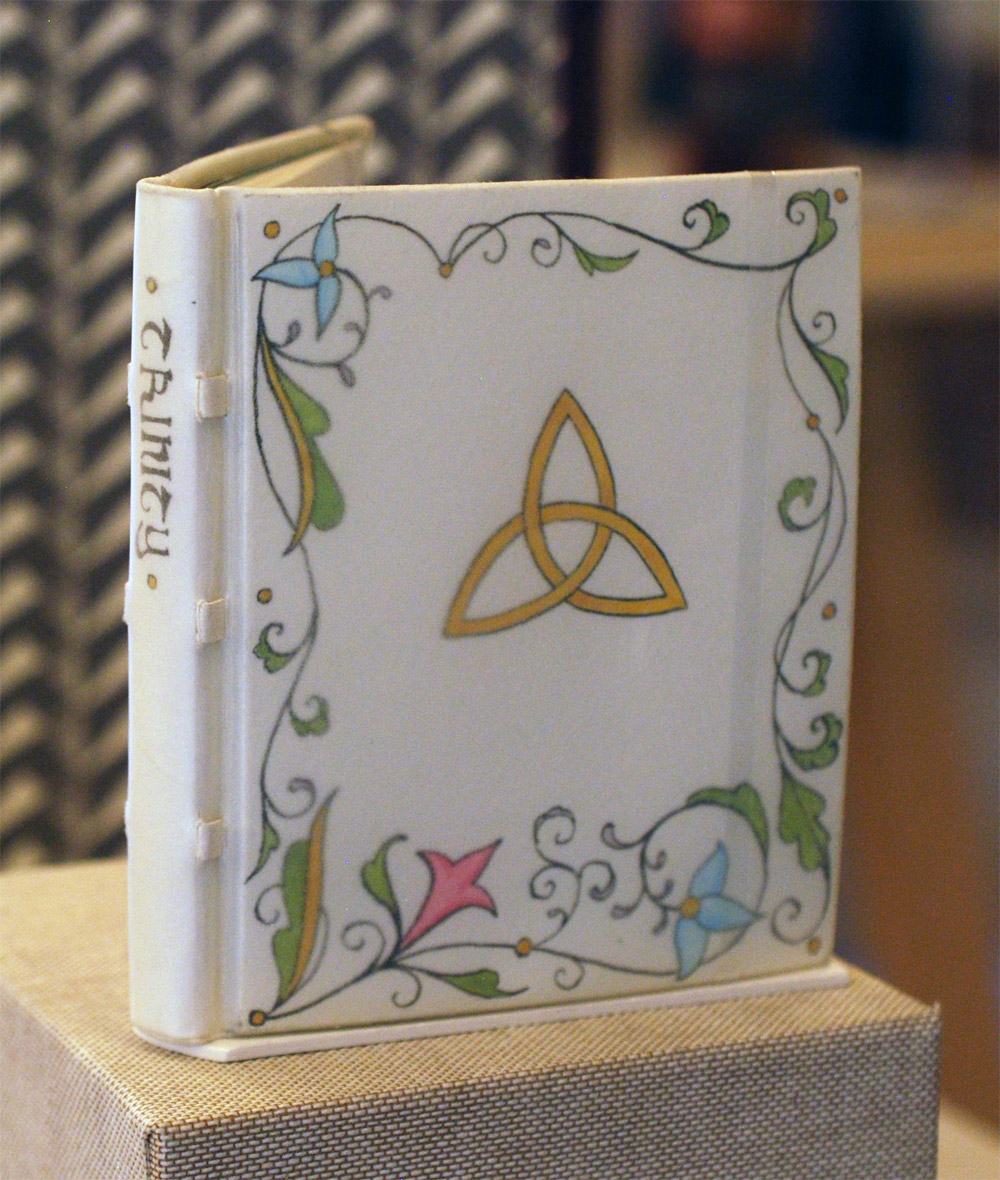
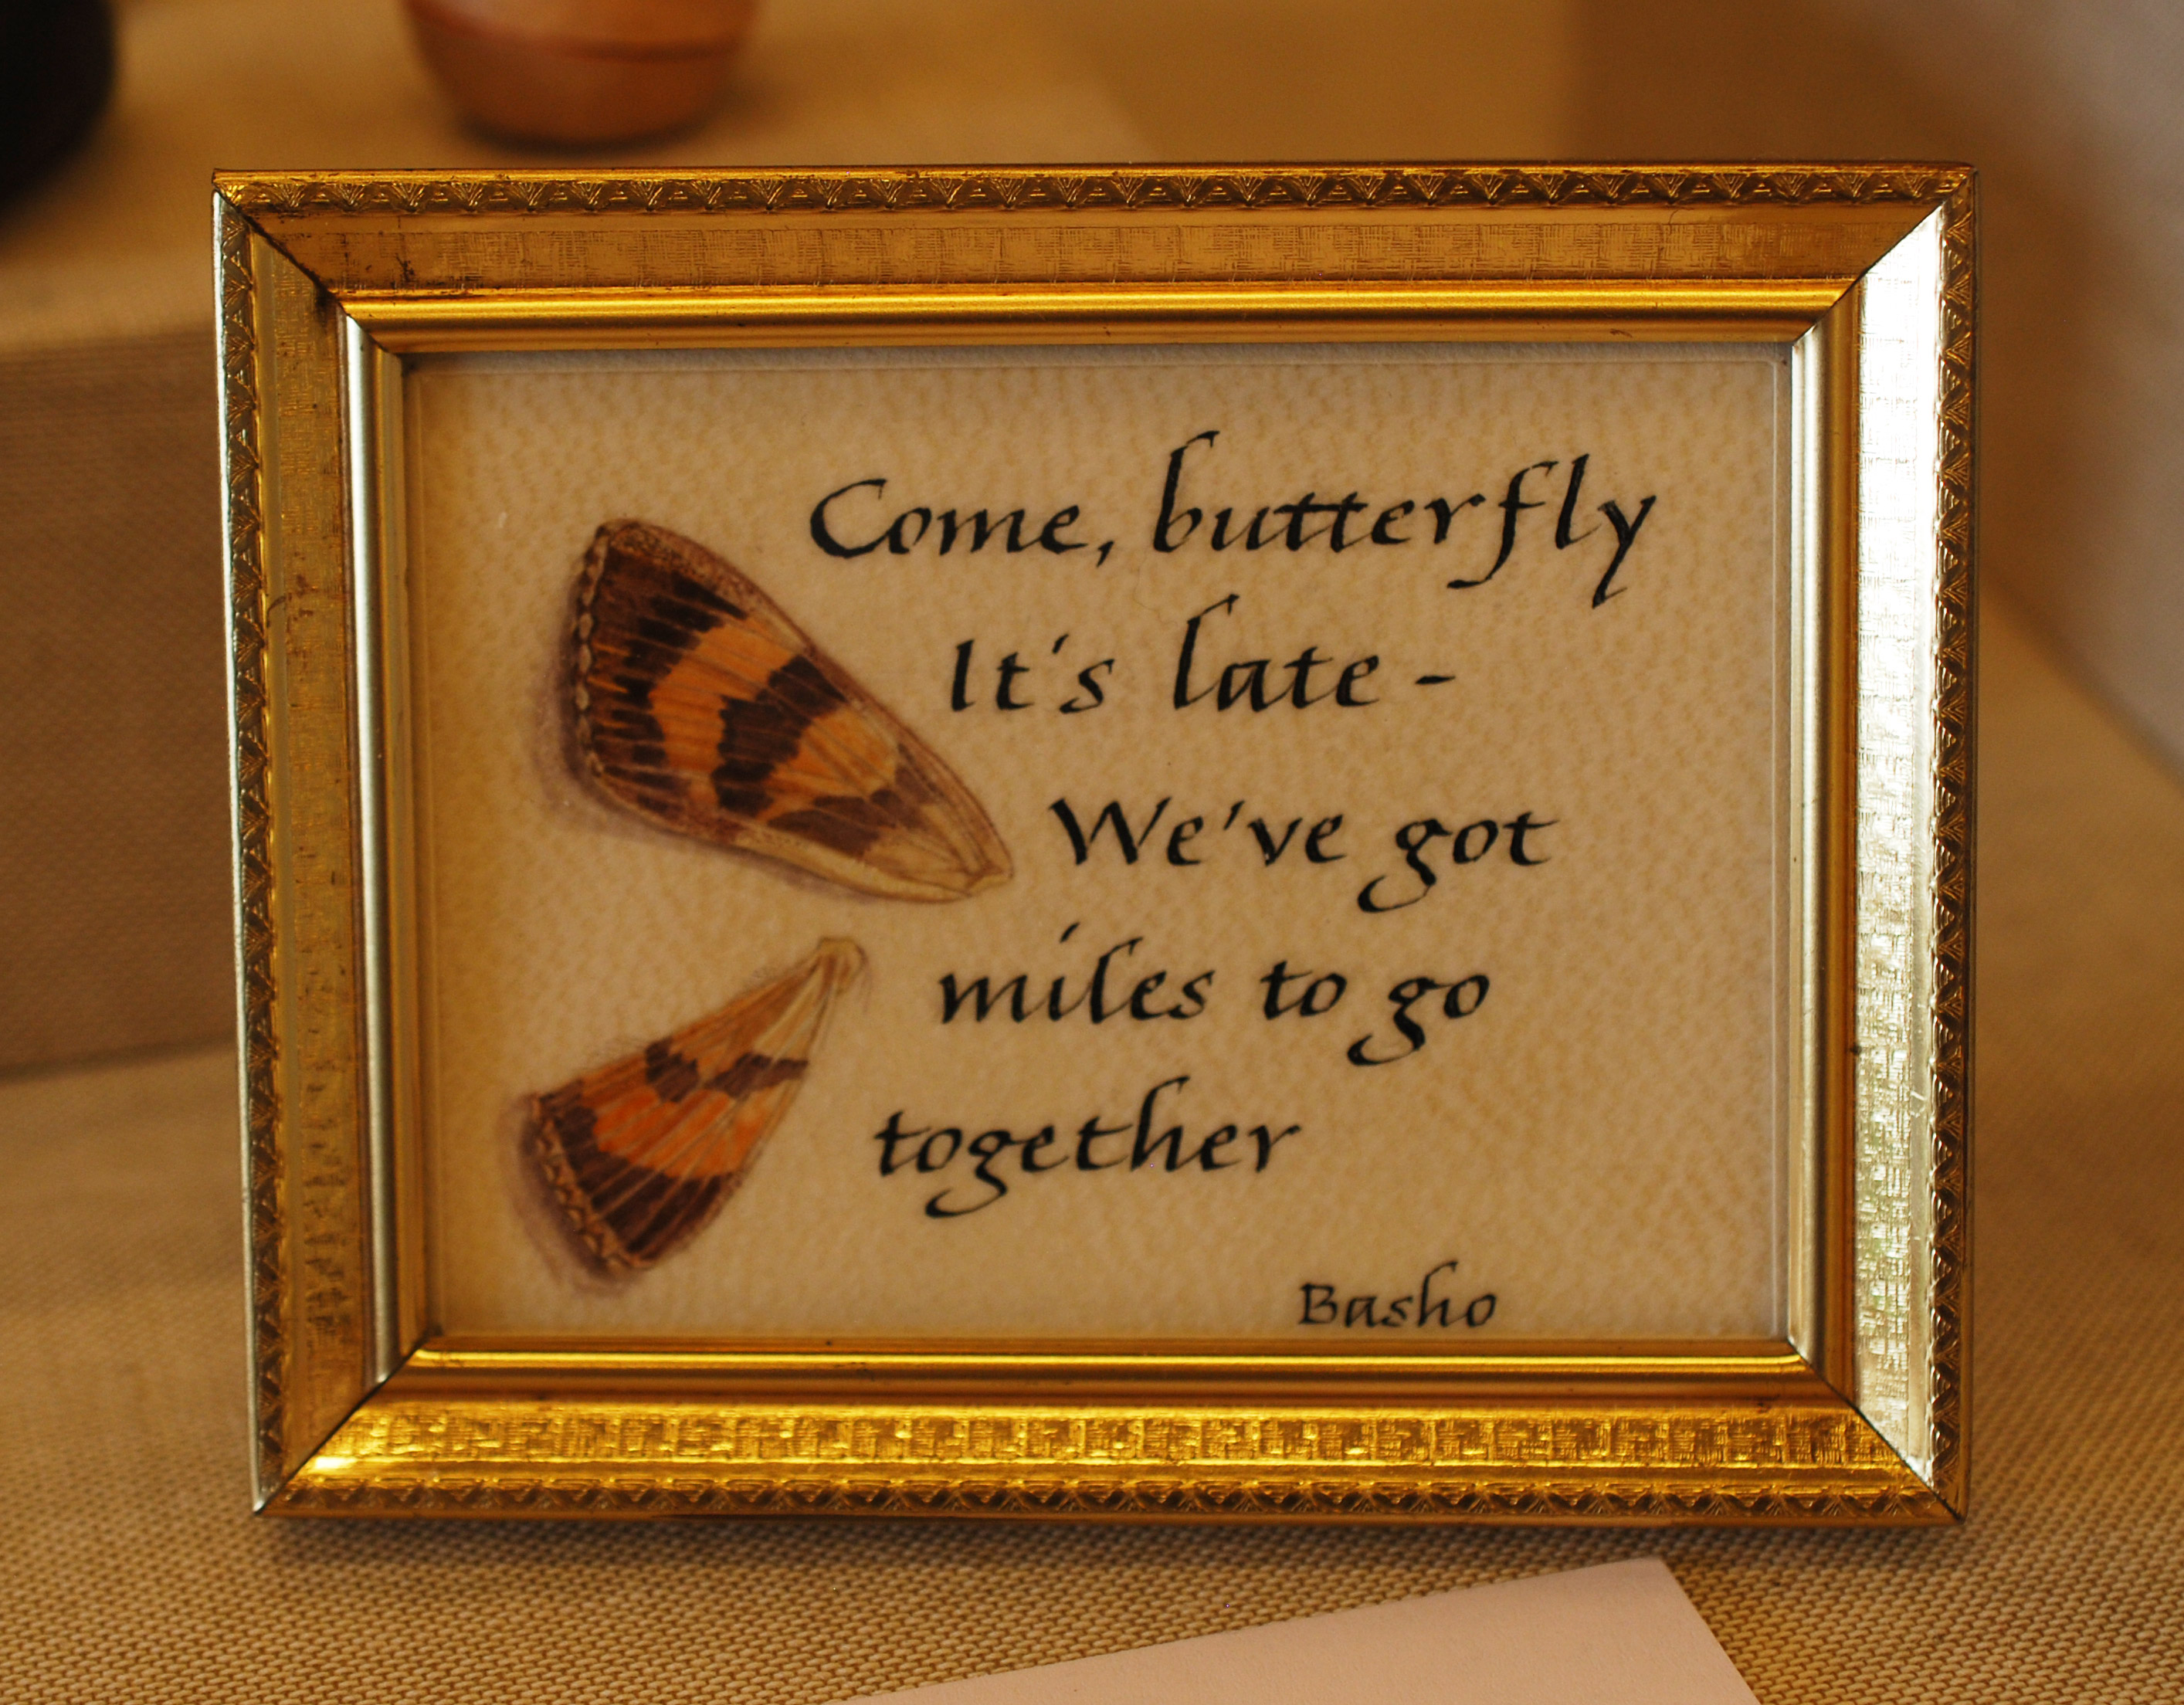
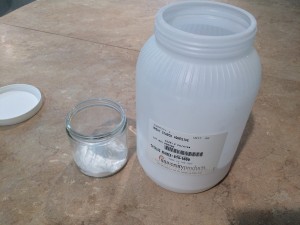
    binder: Gabby Cooksey
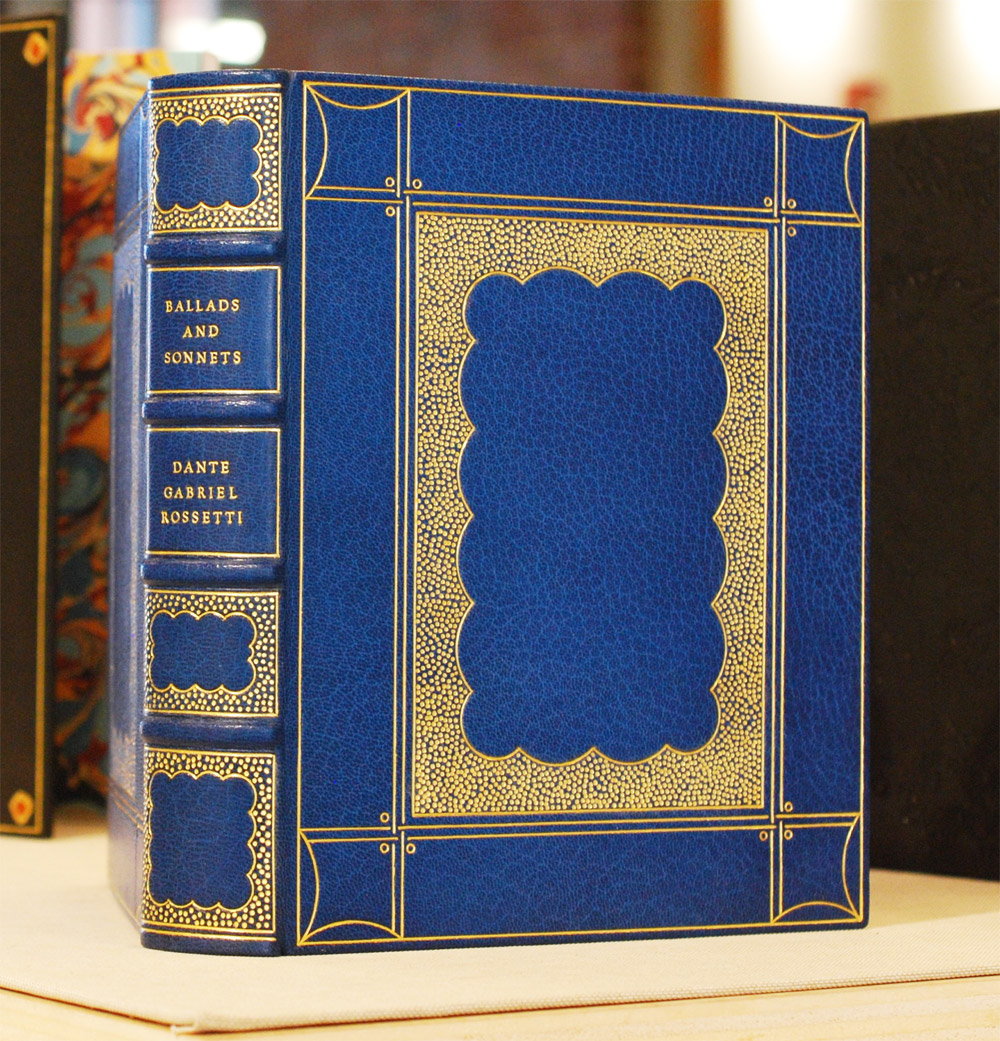
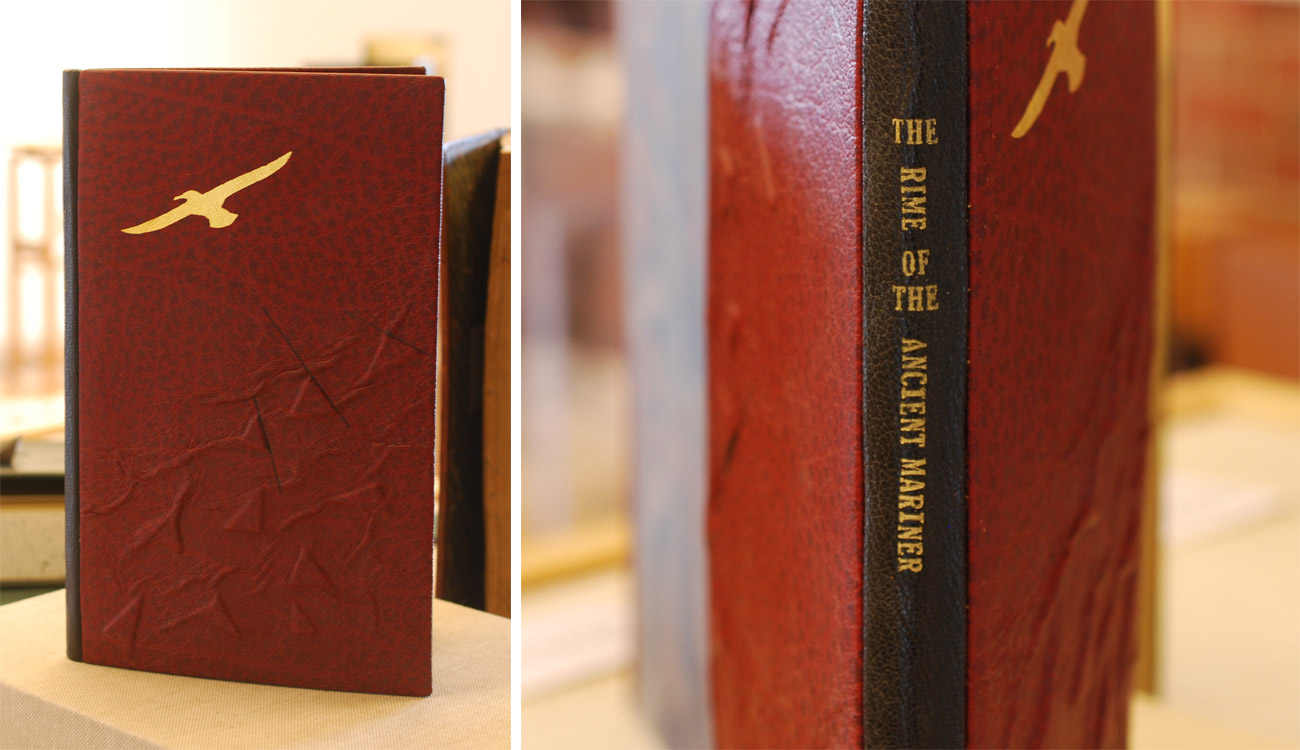
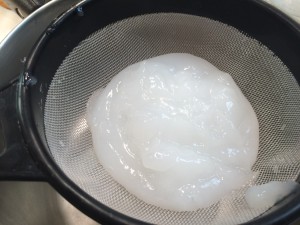
    binder: Kate Levy


  2. North Bennet Street School // Student & Alumni Exhibit 2017 – Alumni Work

    May 18, 2017 by Erin Fletcher

    In the second portion of my post on the Student and Alumni Exhibit at North Bennet Street School, I want to highlight some of the pieces showcasing the talents of our alumni. If you missed the post where I interviewed the graduating class on their set book, check it out here.

    I’ll start with my own bindings. This year I chose to submit two recently completed bindings. The first is a miniature binding of Bobbie Sweeney’s Rookwood printed by Mosaic Press in 1983. The text chronicles the Rookwood Pottery studio founded in 1880 by Maria Longworth Nichols who fell in love with the Arts & Crafts movement. She and her employees pioneered a variety of different pottery styles and glazes over the course of Rookwood’s existence.

    Bound in a Dorfner-style binding, the boards are covered with stone veneer with onlays of wood veneer and handmade paper. The interior side of the board is also covered in stone veneer facing a suede fly leaf. The edges have been sprinkled with purple gouache. The box is covered in dark grey buffalo skin with a back-pared onlay of light grey buffalo skin in one variation of the Rookwood insignia.

    The second binding I chose to submit was completed just last month after working on it for over a year. This fine binding of Italo Calvino’s Invisible Cities is bound in two buffalo skins, with dark grey on top and light grey on the bottom. The top is adorned with a series of onlays in green goatskin (show in both leather and suede), ruby Novasuede, stone veneer and multilayered palladium gilt pieces. The bottom half is embroidered in a matching thread in such a way that partially mimics the top portion. All of the lines on the top are palladium tooled and the bottom are blind. I was greatly inspired by all of the imagery in Calvino’s abstract telling of a conservation between Kublai Khan and Marco Polo. I will be posting on this binding further, there is so much to reveal about the edge decoration and doublures.

    Colin Urbina, BB’11
    Next up is another lovely miniature, this one was bound by Colin Urbina.

    Colin’s binding of Shaman is covered in a medium brown goatskin and adorned with onlays of stone veneer. Illustrations gleaned from the text are stamped in red foil. The head edge is sprinkled with red acrylic paint. The title is stamped in the same red foil along the spine of the book.  The box for this miniature book is quite large because it holds the book, a paper folder of loose prints and a map (displayed open). The spine of the box is covered in a tan goatskin stamped in blind with the same icons from the book.

    Samuel Feinstein, BB’12
    As always, Samuel Feinstein impresses with his incredible tooling abilities. His binding of Dante Gabriel Rossetti’s Ballads and Sonnets is covered in a bright blue goatskin and intricate gold tooling. His work is always teetering on the line of classic design and modernism.

    Gabby Cooksey, BB’14
    The Book of Penumbra comes from the very talented Gabby Cooksey. Her work is always fresh and interesting and splendidly weird. The cover stands out in a unique way against the rest of the bindings and so does the technique. Gabby arranged the illustrations from the book in a chaotic way before debossing them into the black goatskin. Contrast is created through the application of varnish on the raised areas. The text block was also illustrated and printed by Gabby, you can read more about the work here.

    Becky Koch, BB’12
    My dear friend Becky Koch submitted this delightful little binding of The Farm by Wendell Berry. I love the array of colors she used to capture such a bucolic landscape.

    The sun is beaming over the country side, literally beaming with Becky’s use surfacing gilding in gold leaf. Oh, I love that little patch of blue. Brilliantly place amongst a sea of mainly reds and browns. The title has been hand-tooled with carbon.

    Fionnuala Gerrity, BB’ 11
    Last up is Trinity is a small, but not quite miniature, laced vellum binding containing hand calligraphed pages from Maryanne Grebenstein. The transparent vellum reveals Fionnuala’s painting underneath.


  3. North Bennet Street School // Student & Alumni Exhibit 2016 – Alumni Work

    May 22, 2016 by Erin Fletcher

    The Annual Student and Alumni Show at North Bennet Street School displays work from both current students and alumni. In this post, I will be focusing on some of the outstanding work exhibited by those who have graduated from the full-time program. If you missed my previous post reviewing the Class of 2016’s design bindings of 1984, you can check that out here.

    McKey Berkman, BB ’11

    BooksWillSpeakPlain-McKeyBerkman

    When I looked at the headband and endcap on McKey’s binding of Books Will Speak Plain by Julia Miller I was in awe. Each thread is wrapped with perfect tension and her endcaps are formed so evenly creating a beautiful crescent shape. The binding is covered in full green goatskin. The tooled orange onlay is stamped in a matte grey and outlined with a single brown tooled line with small squares at each corner. The head edge is colored with graphite. The details on this binding are subtle, but done with such a high level of craftsmanship.

    Marianna Brotherton, BB ’14

    ElementsOFGeometry-MarianneBrotherton

    This binding from Marianna is spectacular. I love the how the leather onlays pop away from the cover. Marianna’s binding of Euclid’s Elements of Geometry is bound in full green goatskin with suede doublures. The onlays are gilt in the center to highlight a specific shape. The title is tooled in gold down the spine. The edges are sprinkled with green pigment. The headbands are hand sewn with white and green silk. The book is housed in a beautiful 4-flap lined in suede. Each pointed flap wraps around the book to meet at the center. Check out more of Marianna’s work at her website.

    Lauren Calcote, BB ’15

    FamiliarLecturesOnBotany-LaurenCalcote

    Regulars to the blog, know my admiration for embroidered bindings. Lauren’s work has always impressed me and balances between contemporary and traditional. This embroidered binding of Familiar Lectures on Botany is bound on raised cords that are laced through the covers, which are covered in Galaxy Cave Paper. This richly dark handmade paper is filled with flecks of mica offering a subtle dazzle of shimmer. The embroidery is achieved with linen and metallic threads. The center motifs are designed with gold leaf for the sun and a piece of vellum for the moon.

    MiniGirdleBook-LaurenCalcote

    Lauren is also highly skilled with creating miniature bindings of historic models. This mini Girdle Book is sewn over raised cords and laced into cedar boards, which are covered in a crimson goatskin. The covers are blind tooled in a traditional lozenge pattern. There are even miniature brass clasps and a small linen knot to secure the book underneath your teeny, tiny belt.

    Samuel Feinstein, BB ‘12

    StoryOfTheEye-SamuelFeinstein

    It is so great to see work from a former classmate of mine. Samuel is one of the most talented binders of my generation. Story of the Eye by George Bataille is bound as a Millimeter binding in the Rubow-style. A strip of black goatskin runs across the entire head and tail edge of the book. An exquisite marbled paper (made by Samuel) covers the remainder of the binding. The marbled area is isolated to the spine with threads of color sprawling onto the covers. The head edge of the text block is decorated with gold leaf over graphite. The endpapers are also marbled, but on white paper instead of black. Check out more of Samuel’s work at his website.

    Fionnuala Gerrity, BB ’11 and Maryanne Grebenstein

    Butterfly-FionnualaGerrityandMaryanneGrebenstein

    During our time at NBSS, Fionnuala gave a presentation on back-painted vellum; a decorative technique seen on Cosway and stiff-board vellum bindings. It was clear to me that she was hooked by this niche area of bookbinding. Maryanne Grebenstein is a very talented calligrapher and teaches workshops at NBSS. Together they created this lovely rendition of a haiku by Matsuo Basho, a famous poet of the Edo period in Japan.

    Barbara Halporn, BB ‘06

    PictorialWebster-BarbaraHalporn

    There are so many things I love about Barbara’s binding of Webster’s Pictorial Dictionary by John M. Carrera. The leather from Pergamena has been distressed and is absolutely alluring. In these three bindings, Barbara references a historical Coptic binding. She even includes details such as headbands that wrap from cover to cover across the spine and leather toggles to keep the book securely closed. The title is blind tooled across the spine of the largest book. Check out more of Barbara’s work at her website.

    Becky Koch, BB ’12

    RimeAncientMariner-BeckyKoch

    Becky was also classmate of mine and I was so thrilled to see her work in the show. The Rime of the Ancient Mariner by Samuel Taylor Coleridge is bound as a simplified binding with black goatskin for the spine and a deep red buffalo skin for the covers. A surface gilt seagull adorns the front cover. The red buffalo skin is puckered over raised triangles on both covers. The title is tooled in gold down the spine. The buffalo skin offers such a distinct texture, but Becky managed to amplify the skin through her manipulation of the leather. Check out Becky’s website: Dog Eared Bindery.

    Lauren Moon-Schott, BB ’13

    BooksWillSpeakPlain-LaurenMoonSchott

    Lauren is an incredibly talented binder and conservator. She currently holds a position at the Rare Book Room in the Boston Public Library and she is also one of my studio mates. She bound this amazing model of a Stationer’s Binding over Julia Miller’s Books Will Speak Plain. The covers are goatskin with toggles and ties in alum-tawed pigskin. The complexity of the binding is not to be under-rated. Each cross-tie has to be meticulously laced through the covers.

    Wendy Withrow, BB ‘08

    NineMonthsToBearFruit-WendyWithrow

    I met Wendy for the first time at the Standards of Excellence Conference last year in Cleveland, Ohio. I was so excited to meet her, not only is her work well executed and her craftsmanship clean, she was one of the few alumni that I reached out to when applying to NBSS. Her words were so encouraging and her work inspiring. As the only artist book in the show, Nine Months to Bear Fruit, is quite attractive. Each object is sculpted from clay and held shut with magnets. The exterior is painted with acrylic. Hidden inside each piece is a miniature accordion, which you can read by clicking here.


  4. Conservation Conversations // Adhesives for Paper Mends

    August 28, 2015 by Becky Koch

    Adhesives are an essential part of book and paper conservation. If you want to repair a paper tear you have to use some sort of adhesive, and it’s important to choose an archival adhesive. Archival adhesives won’t turn yellow or become brittle over time, and most importantly they’re reversible. Reversibility is a big factor so future conservators can remove your mends if they need to – maybe to see what’s under it, or it could be interfering with a treatment they want to do, or maybe they just know a way to repair the same tear with a better technique.

    There are two main adhesives I use to make archival paper mends – wheat starch paste and methylcellulose. There are lots of different archival adhesives out there and this is by no means an extensive list, but these are the adhesives that I always reach for and use the most often.

    Wheat Starch Paste
    It’s a paste, that’s made from wheat starch.

    Paste in its dry powder form, before cooking

    Wheat starch is widely used because it’s easy to make, easy to store, relatively inexpensive, archival, and strong. It’s also very versatile – you can make paste that is extremely dry and thick, but you can still make viable repairs when it’s watered down to the consistency of skim milk (paste consistencies are always measured via a dairy scale for some reason. It can get kind of gross).

    Paste, after cooking, ready to be strained

    There are loads of different ways to make paste out of wheat starch and which one of these ways is the best way is a fierce topic of debate between conservators and bookbinders. Some choose to cook theirs on the stove while others in the microwave. Some leave their starch to soak overnight in cold water before they cook it, some strain it with only a horse hair strainer, etc etc etc… No matter what exact recipe you choose to follow the process basically calls for adding water to dry wheat starch and applying heat. The starch will gel and become sticky, and that’s your paste. After the paste is made it needs to be pushed through a strainer of some sort to make it smooth, and then water is added to create the right consistency.

    The benefits of paste: versatile, easy to make.

    The drawbacks of paste: cooked paste doesn’t keep well and it won’t be long before you need to make more.

    Methylcellulose
    The other adhesive I reach for during paper mending is methylcellulose, which in it’s dry state is a white powder made from vegetable cellulose. You may have heard of methylcellulose before – it’s used as an emulsifier and thickener in processed foods and cosmetics, and I was also surprised to discover that it’s also used as a laxative.

    Methylcellulose adhesive typically creates a much weaker bond than wheat starch paste. Sometimes this is a good thing – if you’re working with a very weak object you don’t want to make a very strong mend. But I rarely find a paper that is so weak I can’t use some dilution of wheat starch on it, so I typically use methylcellulose in water as a poultice to rehydrate dried glue on spine linings or whatnot and I use methylcellulose in ethanol to make mends on papers that are prone to tide lines. Diluted methylcellulose can also be used as a paper size.

    Jars of methylcellulose

    To cook methylcellulose in water you first need to dissolve it in cold water and apply heat to make it gel up (once again, there are a number of ways to accomplish this). With alcohol, I mix the powder with the appropriate amount of ethanol and let it sit overnight. Also like wheat starch paste the viscosity can be modified depending on how much water/alcohol you use, but unlike with paste the correct amount of liquid should be measured out before cooking rather than diluting the finished product.

    Benefits of methylcellulose: you can make it in water or alcohol, keeps longer than paste.

    Drawbacks of methylcellulose: not very strong, can leave a “sheen” when dry.

    What I’ve chosen to highlight here are the two of the perhaps most commonly used adhesives in a book and paper lab, but there are lots of choices out there. Wheat starch and methylcellulose are versatile but they don’t address every situation, so if you have a problem that these adhesives don’t solve do some research and ask around, there is an adhesive out there to meet your needs.


  5. Conservation Conversations // Choosing the Right Repair Paper

    August 7, 2015 by Becky Koch

    In my last post I talked about how many papers are out there for conservators to choose from. It’s great to have so many options, but picking the right one for your situation can be a challenge, the options are often overwhelming.

    When making a mend, there are several considerations to take into account. How thick is the paper? How strong is it? Is it very brittle? What color is it? The goal is to create a repair that blends in with the paper, does not obscure any text or image, and successfully stabilizes the piece.

    Different colors of Japanese tissue

    Different colors of Japanese tissue

    A subtle mend can be achieved by using a slightly colored tissue. You can buy pre-toned tissue, or to get the perfect match sometimes you need to tone your own paper with watercolors or acrylic paints. A thinner tissue often does better at blending into its background, and it may also be semi transparent so text can be read through it. Often times color is less important than transparency. A white tissue that is very thin and transparent will usually blend in well with tan or acid-burned papers without any toning whatsoever.

    Toning tissue

    Toning tissue

    Perhaps the most tricky of all of these factors is choosing the correct weight and strength of the tissue. A repair paper should be chosen that is as thin as possible to stabilize the paper – usually something slightly weaker than the paper being repaired. This is so that if the paper is ever put into a situation where it is overly stressed, any future tears will occur at the mend rather than somewhere new on the sheet. If a very strong tissue is used to repair a very weak paper then there is a high likelihood that the paper will crack or tear on either side of the new mend since that area is supported while the rest of the page is not. That is why, in the hopes of creating no further damage, a weaker tissue should be chosen. On occasions where the paper is extremely brittle I sometimes choose to line the entire sheet with a piece of thin tissue to create even support.

    Tengucho paper is very thin and text can still be read through it

    Tengucho paper is very thin and semi transparent

    If a piece of paper has a hole, or loss, the paper chosen to fill in this area will go through different considerations. Typically a paper should be chosen that is the same weight as the paper being mended or something slightly thinner. This is so the original piece will move smoothly and stay supported around the loss. This is especially important in the case of very large losses in a book where pages will be turned and handled regularly.


  6. Conservation Conversations // Japanese Papers and Tissues

    July 28, 2015 by Becky Koch

    Japanese papers and tissues are used extensively in book and paper conservation; they are used to mend tears, fill losses, back or line weak or brittle papers, line spines and perform innumerable other conservation repairs. These papers originated in Japan (as I’m sure you’ve guessed) and are mostly made from kozo fibers from the paper mulberry tree. They come in a variety of thicknesses for different needs, and some are thin enough to be translucent and are ideal for mending over text or images. Japanese papers are soft and flexible and do not become brittle or discolored over time so they are especially appropriate for conservation. But the most important trait of Japanese tissue is its strength – due to the long kozo fibers these papers are very strong. Deceptively strong. Even the thinnest tissues are useful for mending tears and lining brittle pages, often times creating almost invisible repairs.

    I was introduced to Japanese papers at my first conservation internship during college. I spent the summer repairing larger-than-life stained glass window templates by Rudolf Buenz at the Winterthur Museum in Delaware. The sketches had been kept rolled up in a garage since the 1960s and their edges were crushed and tattered.

    We used a lot of tissue that summer. A LOT.

    My internship advisor, knowing that if we kept on the conservation track Japanese tissue would become our lifeblood, had us make a sample book of all of the lab’s tissues. Being a very well stocked lab, there are 15 papers in my original sample book. This may sound like a nothing task and at the time it didn’t feel that I was doing something very important, but in all honesty I still consult this book today.

    As a side note, this was the first book I ever made

    IMG_3687

    I think all conservators have their favorite go-to tissues, two or three different weights that we use for different tasks. But sometimes when you’re faced with a different type of challenge it’s good to have all of your options at hand, right in front of you in a little booklet, where you can feel the weight, texture and color of each and choose the one that’s best for your task. Whenever I encounter a new tissue I take a small sample and label it (seriously, don’t forget to label it, otherwise it’s useless) and add it to my collection – it’s one of the best tips I can give to any new conservation student.


  7. Conservation Conversations // BEVA 371 film

    June 28, 2014 by Becky Koch

    One product we’ve started using in the studio on a regular basis is BEVA 371 film. BEVA is a type of liquid adhesive used mostly in paintings conservation, but it can also be purchased as a thin sheet of film used to back items to paper or board. BEVA is heat activated, is completely reversible with heat or solvents, and creates a strong, archival bond between papers.

    BEVA film comes as a sheet of Mylar, which the BEVA film itself is adhered to, and a sheet of release paper over that. The backing process occurs in two steps – first the release paper is removed and the object to be backed is placed on top of the thin layer of BEVA (which is still adhered to the Mylar at this point). Heat is then applied to activate the BEVA, you can use a tacking iron or if you’re lucky to have a heat/vacuum press like we do, that works ever better!

    These photos have been attached to the BEVA film but the Mylar backing hasn't been removed yet.

    These photos have been attached to the BEVA film but the Mylar backing hasn’t been removed yet.

    When the piece has cooled down you will have your object attached to a piece of Mylar. Now is the time to trim the BEVA so it is flush with the object – remember to cut out any interior areas where there are holes or losses. The Mylar can then be peeled away and the back of your object is covered with a thin layer of BEVA, like a sort of heat activated sticker. Place your BEVA-coated object on your backing paper or board and apply heat. And now you have a perfectly backed object!

    Removing the Mylar backing

    Removing the Mylar backing

    Finished!

    Now this couple is backed to acid free board

    I like BEVA a lot because it’s great for low-stress, no-mess backing. When backing things with Lascaux the adhesive gets a bit “gooey” with heat and things can shift slightly. When backing with paste you need to move quickly before it dries and even while using the most care a bubble can sneak in every once and awhile, not to mention that some objects can’t handle the moisture involved with a paste backing. BEVA isn’t time sensitive (you can start the backing process one day and finish it a week later), I haven’t noticed any “shifting” as of yet, and since it is a dry process there is no mess whatsoever.

    If you’re interested in learning more about how to use BEVA film, I recommend this page by Talas: Basic Instructions for using BEVA 371 Film


  8. Conservation Conversations // Removing Tape with an Air Pencil

    June 6, 2014 by Becky Koch

    For those of you that don’t know, tape is bad for paper and books! Tape eventually stains paper it comes in contact with (the length of time it takes to do this depends on the type of tape and environmental conditions), and the vast majority of the time this staining is non-reversible. Removing the tape itself is a high-risk activity, as there’s a chance that the top layer of paper can peel away, or fragile paper can tear during the process. If you want to keep anything for the long term, it’s just safer to keep the tape far, far away from it!

    DSC_3868

    Tape didn’t help this marriage certificate!

    There are lots of different ways to remove tape – some tape is so old and desiccated it almost falls off by itself, some types of tape easily come off in a water bath or with a poultice, and sometimes heat or solvents have to be used.   In our studio we try to avoid strong solvents as much as possible just for our own health, so our usual tape removal techniques involve heat.

    DSC09749

    Don’t fix your books with electrical tape!

    My go-to method has always been warming the tape up with a tacking iron to reactivate the adhesive and then picking at it with a microspatula or scalpel. After the carrier (the plastic or paper part of the tape that the adhesive is attached to) is removed, the sticky residue that remains can be picked up with a crepe eraser. Sometimes this method works great, but sometimes that tape just does not want to move! In those cases I get out the air pencil.

    photo 1

    The air pencil is something I had never seen before starting my job here. It is a soldering tool that generates a hot, concentrated stream of air. While it’s made to melt wires together, we use it to heat up tape.

    It’s a good alternative to the tacking iron because you’re never applying pressure directly to the tape, which can make the tape just adhere more securely to the paper rather than helping to lift it. The air pencil reactivates the adhesive without actually touching the tape itself, making it much easier to slide a scalpel under the carrier!

    photo 3

    Be aware that the air pencil can get really hot – remember that it’s made to melt wires! It’s easy to not only burn yourself but also burn the paper or even melt the tape carrier. We keep the temperature between levels 1 and 2 which seems to work on most tapes and has yet to damage any paper.


  9. Conservation Conversations // Lascaux 498

    May 16, 2014 by Becky Koch

    I’ve worked in a lot of library conservation labs throughout my training and when I was finally looking for a “real” job I thought I knew more or less what kind of supplies and tools were out there. But then almost two years ago I became the book conservator at a paper restoration company and I suddenly learned about all these new things I had never heard about before. I don’t know if it’s because paper people just use different techniques, or it’s just how my coworkers learned to do things, but I’ve discovered a lot of new things over the past two years! Over the next few weeks I thought I’d share some of the new products I’ve encountered at this job, and maybe you’ll learn something new as well!

    The first new thing I encountered on my first day was Lascaux 498 HV. I’d seen it in a few conservation labs before, but it was always used as one of those “extra” adhesives that you’d only take out on rare occasions when you’d run out of all other options. But we love it and use it all the time!

    photo

    Lascaux looks a lot like PVA, except thicker. You can use it like PVA too, as a wet adhesive, but the fantastic thing about Lascaux is that you can use it as a heat-activated, reversible, dry adhesive.

    We make our own heat-activated mending paper by covering one side of a sheet of tissue with Lascaux and allowing it to dry. If you’re using a thin tissue note that some of the Lascaux is going to bleed through to the other side and cause the sheet to glue itself to whatever it’s drying on! To avoid this, move your glued up tissue onto a piece of silicone release, a drying rack, or hang it up to dry. When the tissue is dry, cut into strips. You now have your very own heat activated tissue!!

    photo 1-1Gluing up some tear strips

    photo 3-1Cutting strips after drying

    photo 4Heat activated mending strips!

    While it works in the same way as Crompton’s Tissue, that being you cut a piece out and then adhere it with a tacking iron, making your own heat-activated tissue gives you a lot more versatility. You can use any tissue weight or color, and sometimes we paint up whole sheets of paper if we need to back a brittle print.

    photo 5Even after drying the strips remain slightly tacky, so store them away from dust and dirt.  I suggest a Disney-themed ziploc bag.

    Lascaux is both heat and alcohol activated, that means if your tacking iron dies you can use a bit of isopropyl to activate the adhesive on your strips, and you can also use alcohol to remove anything you’ve already stuck down. You can also remove any tissue by activating the adhesive with a little bit of heat from your tacking iron.

    This adhesive is especially helpful for use with water-soluble pigments. If you have something that is very fugitive or very prone to tide lines, repairing or backing something with wheat starch paste can cause real problems or even permanent damage. Since Lascaux is a dry process there is no risk to pigments, and any mends or backings that are applied can be removed with heat or in an alcohol bath.

    I’ve painted up both sides of the tissue and used it as a kind of archival/reversible double-sided tape. I just finished repairing a scrapbook – I reinserted everything into a new book with my double sided Lascaux pieces and I didn’t have to worry about the pages cockling with moisture, and if I messed anything up they were easy to pop off and re apply.

    photo 2

    photo 3

    I’m sure there are lots of different applications for Lascaux, but this is how we use it where I work. If you want to give Lascaux a try, make sure to use Lascaux 498 HV, there are lots of different Lascaux out there, but this is the kind to use to make mending strips.


  • My name is Erin Fletcher, owner and bookbinder of Herringbone Bindery in Boston. Flash of the Hand is a space where I share my process and inspirations.
    The StudioNewsletterInstagramEmail me
  • Archives