RSS Feed

Posts Tagged ‘natalie stopka’

  1. Book Artist of the Month: Natalie Stopka

    April 27, 2015 by Erin Fletcher

    BotanicalPrintBook-NatalieStopka

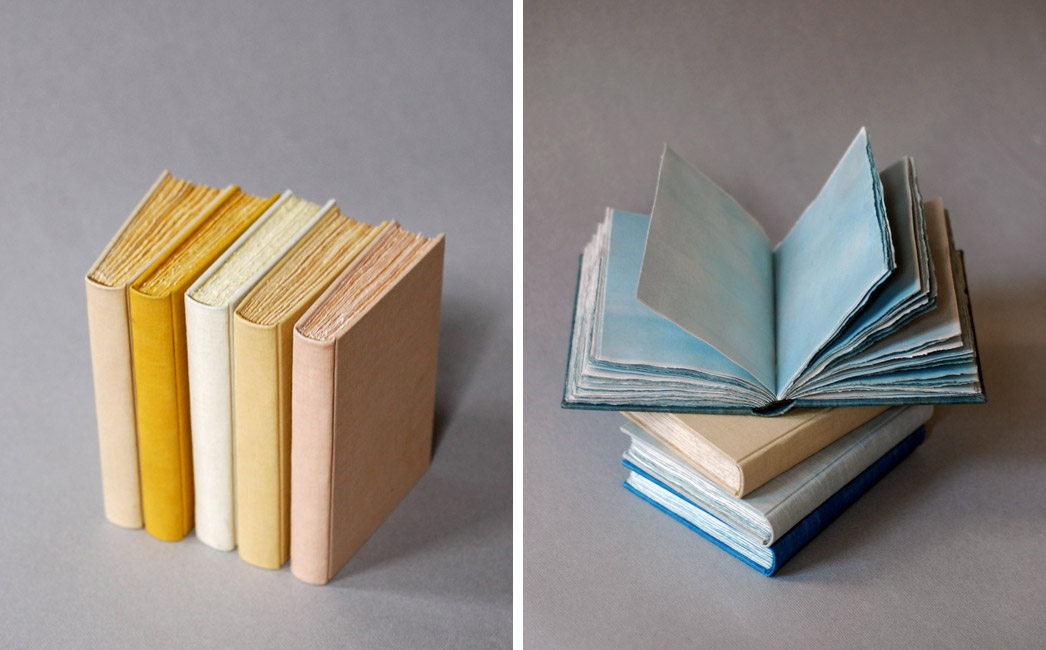
    In this final post with Natalie Stopka, we continue the discussion on her techniques that employ natural pigments for dying and image making by looking at her 2012 artist book Botanica.

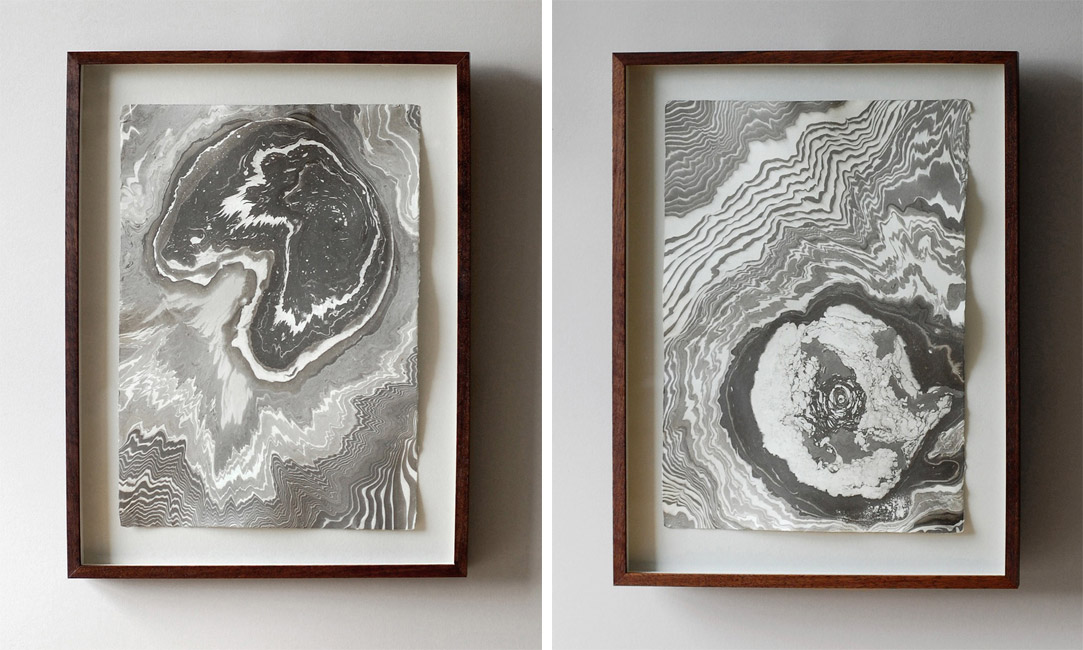
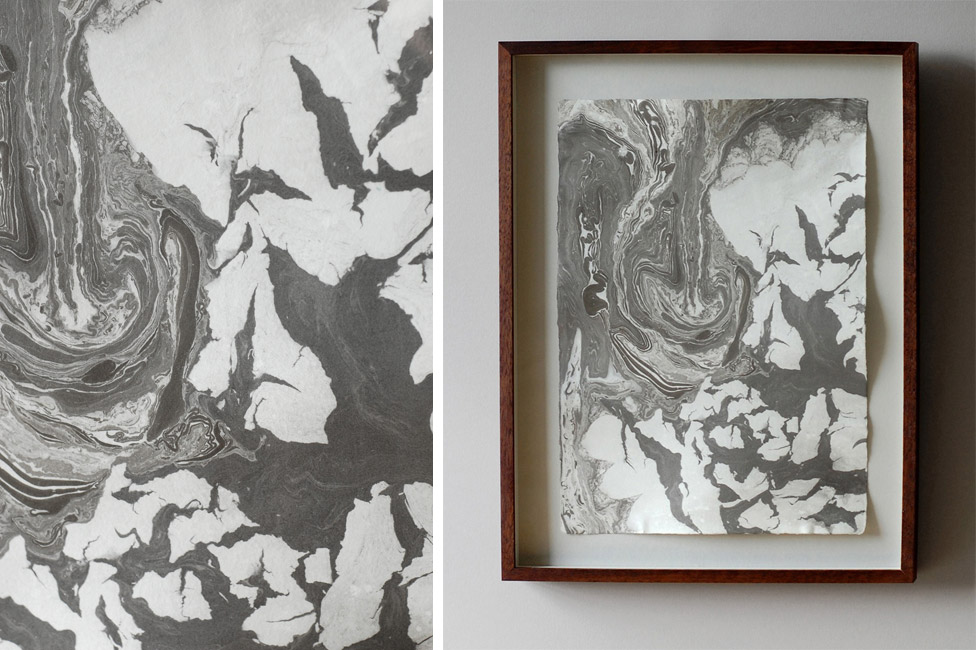
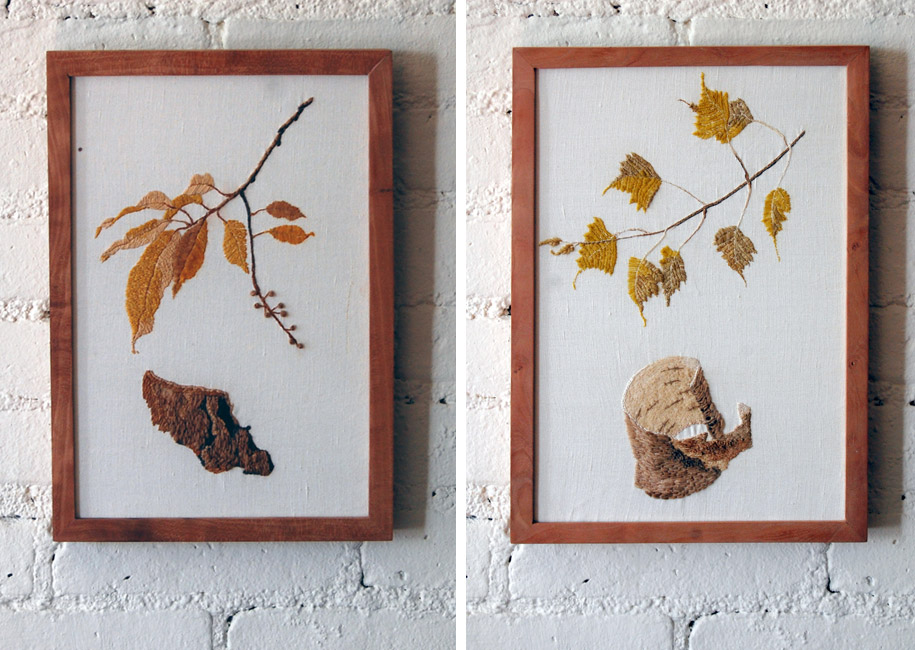
    This binding consists of a series of eco-prints that are brilliant in both color and detail. Can you discuss the process behind eco-printing?
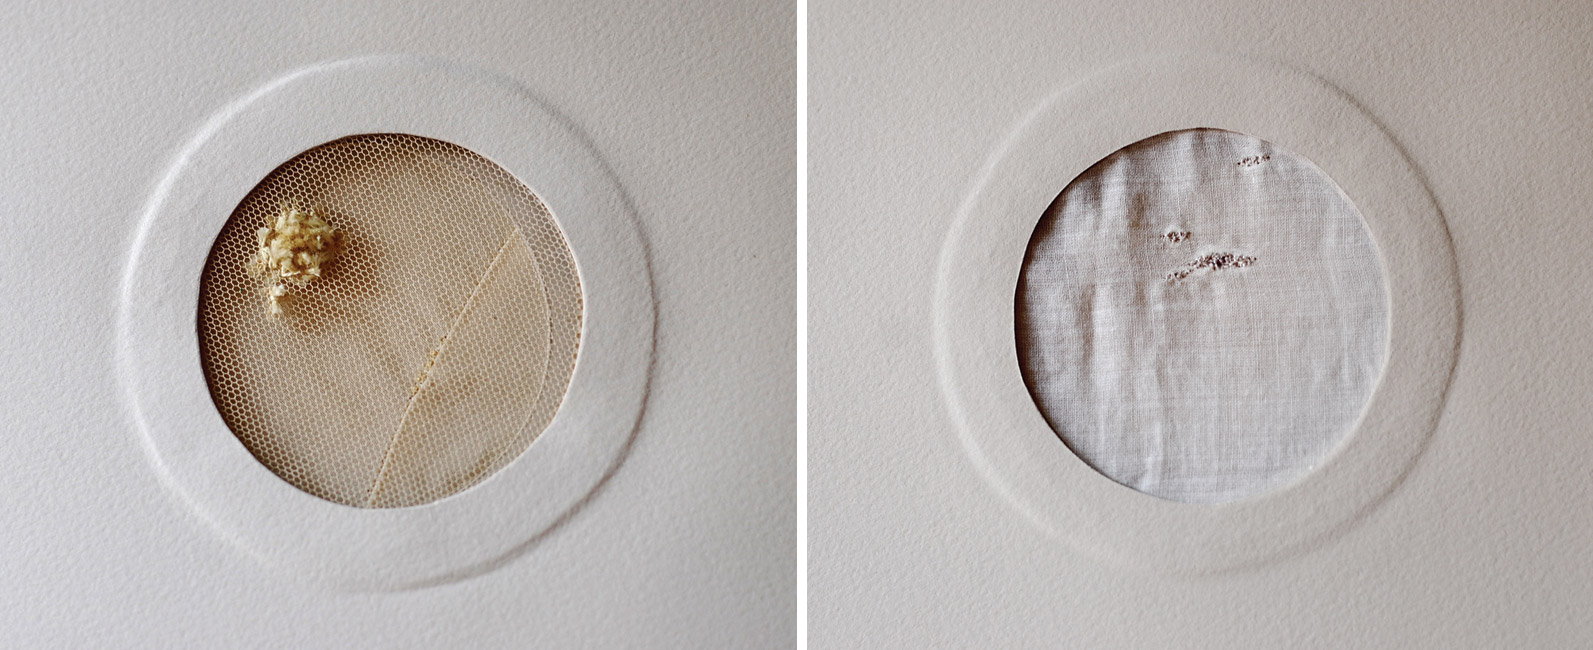
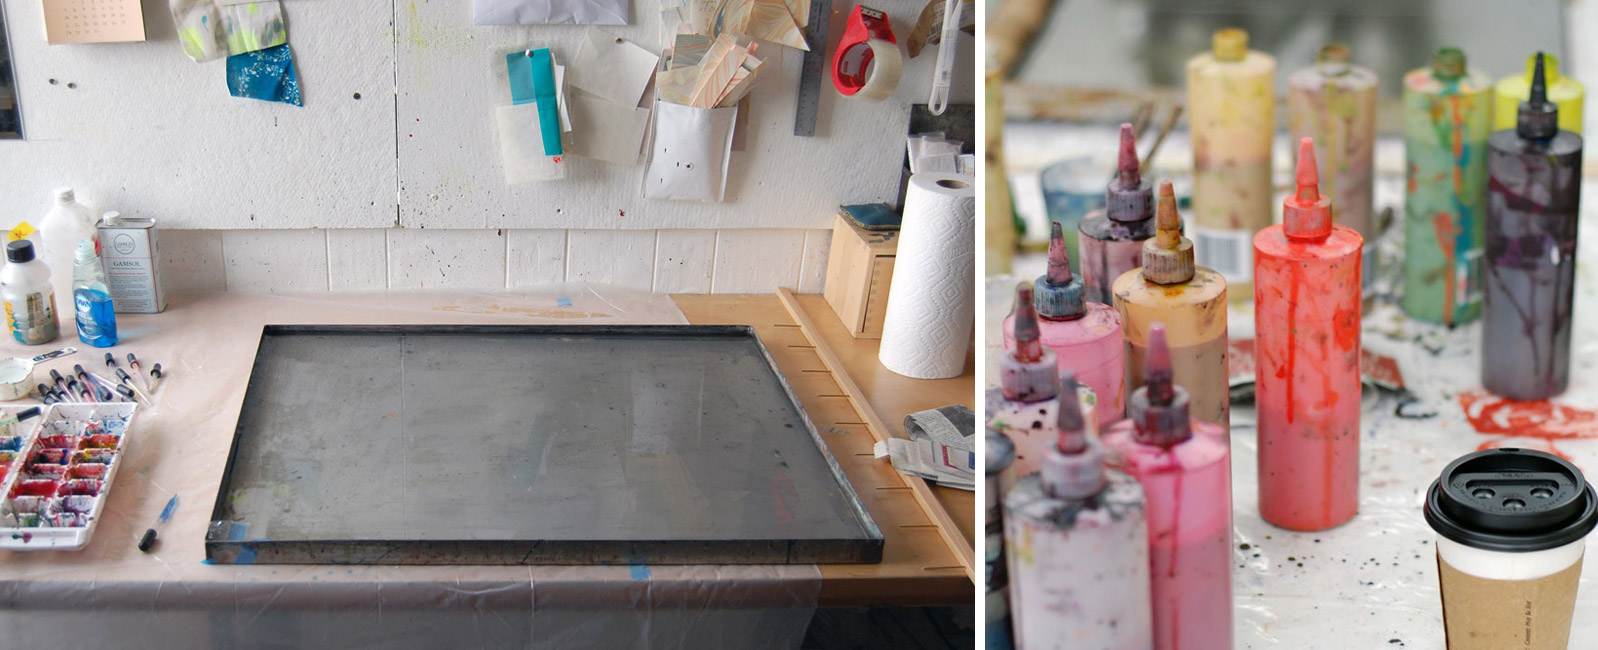
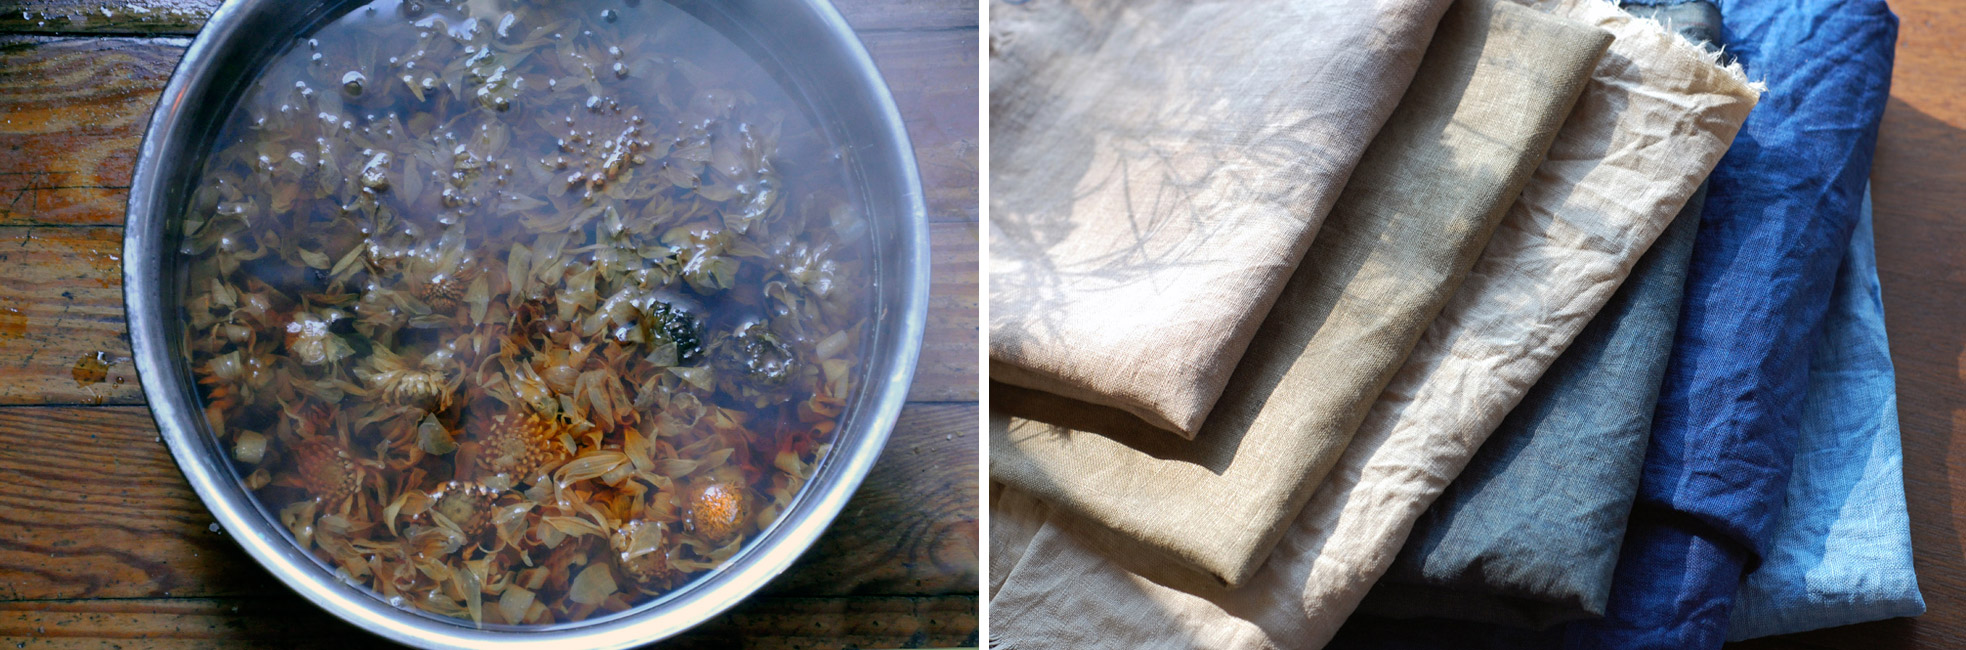
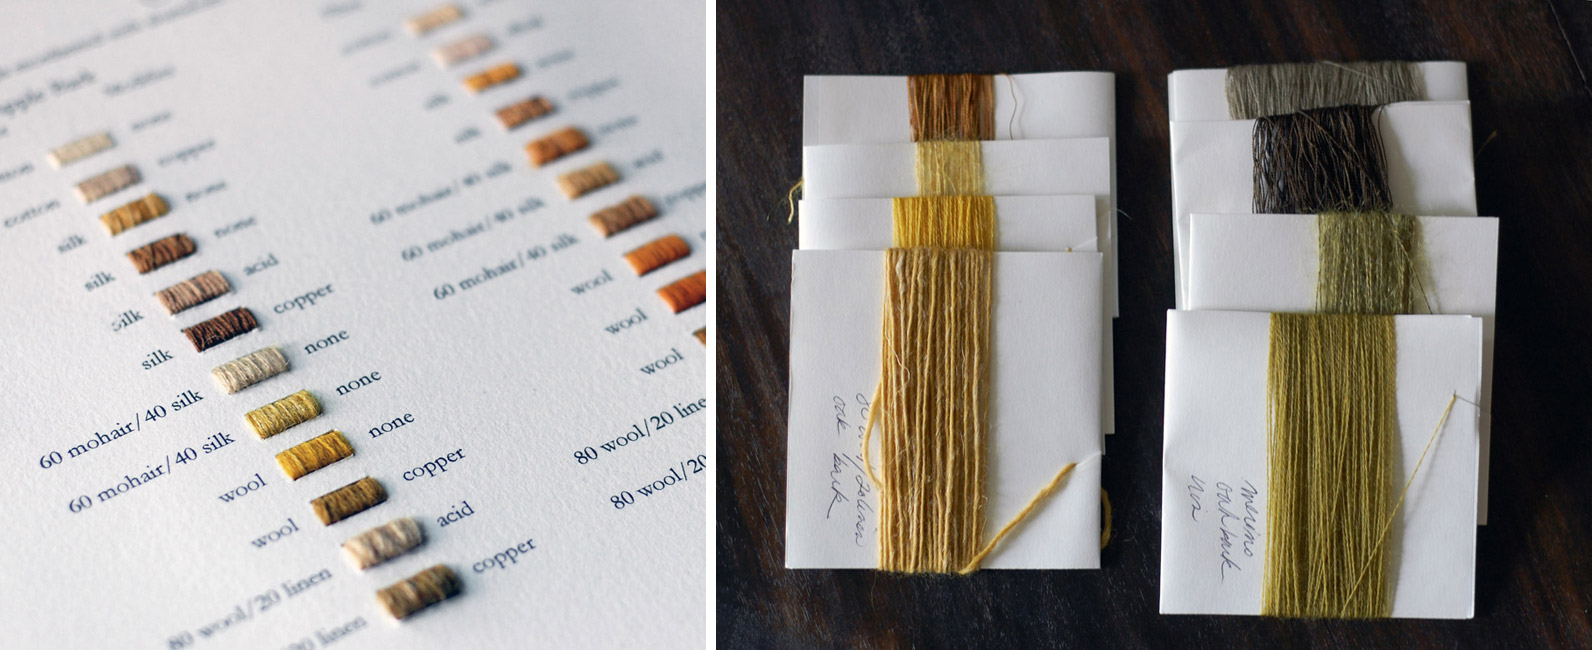
    Eco printing is the process of making a plant print using only the natural colorants contained within the plant. As opposed to nature printing in which pigment is applied to the surface of natural objects, in eco printing the plants can be smashed, pressed, bundled, soaked, steamed, or even frozen to coax the dye colorants out. There are a variety of techniques and terms to describe them. Hapa zome is the pounding of fresh plants directly onto a fiber substrate, and bundle dyeing involves tightly wrapping plant or other dye materials in fabric before burying or steaming them.

    Botanica2-NatalieStopka

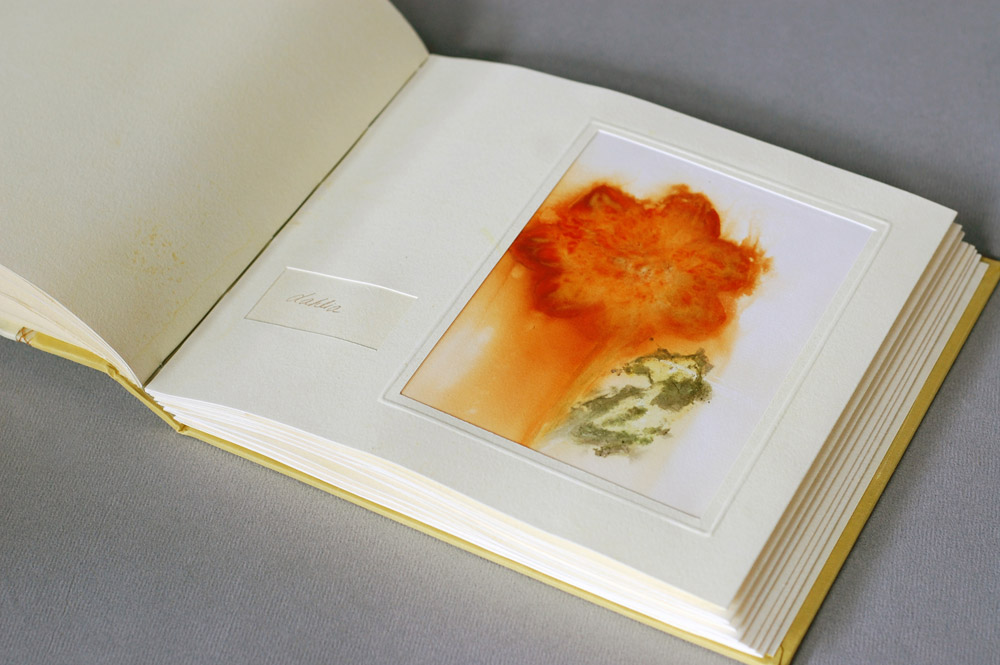
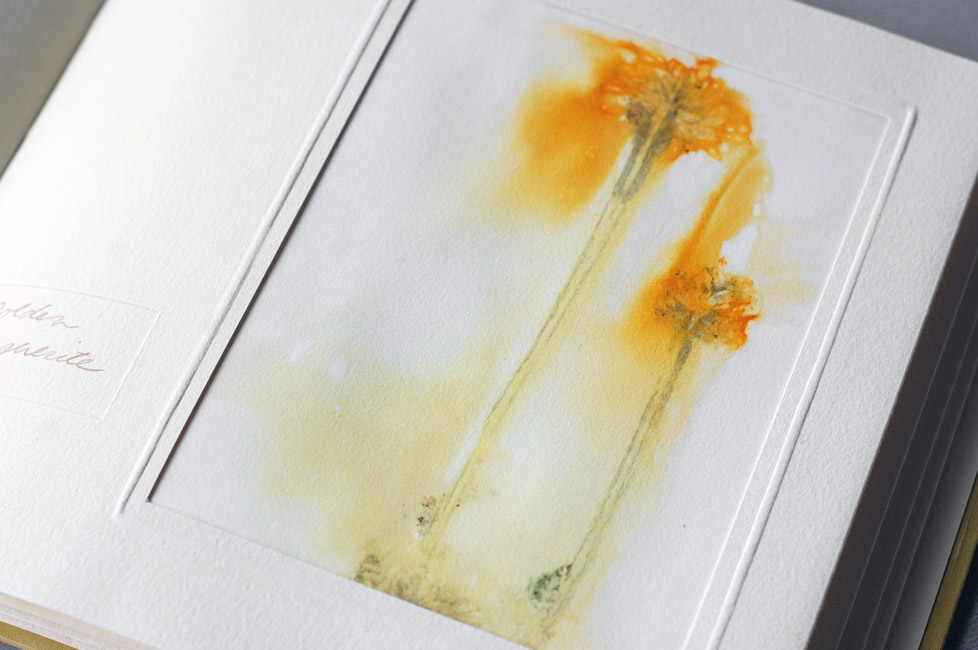
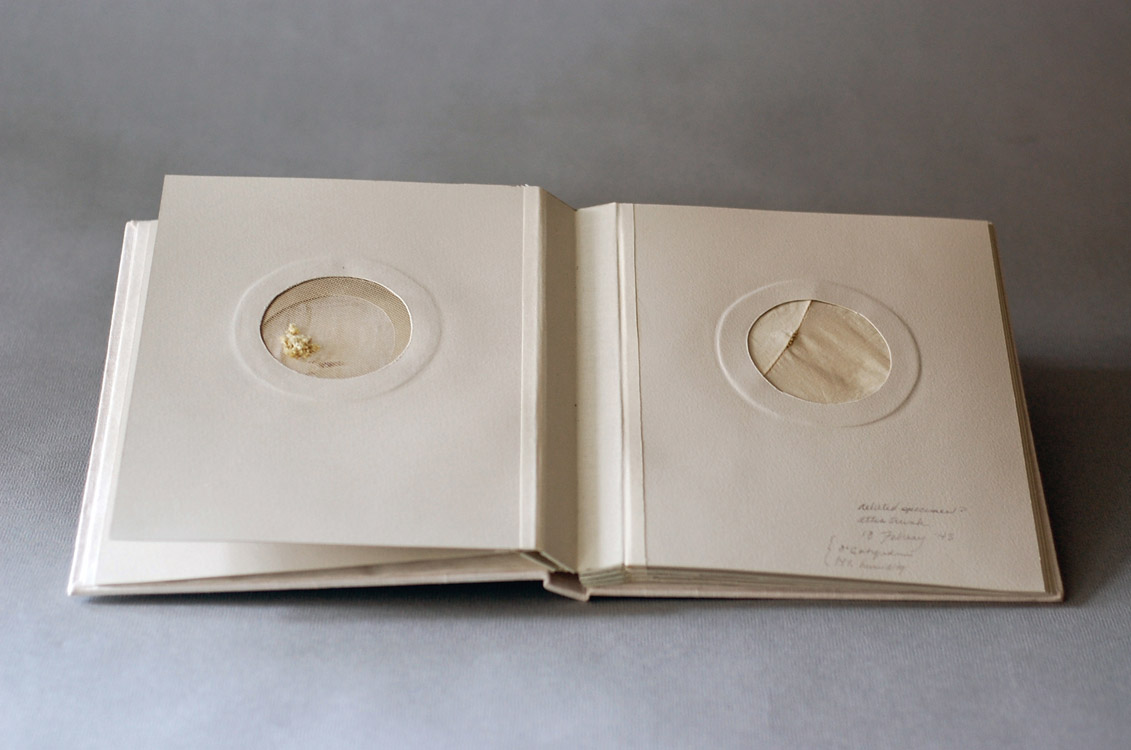
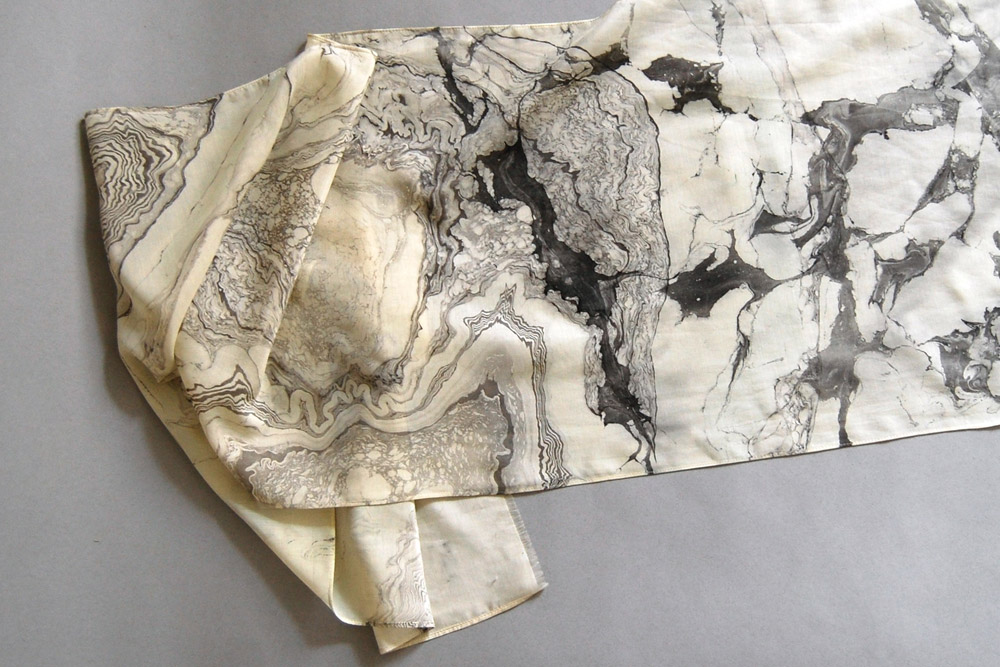
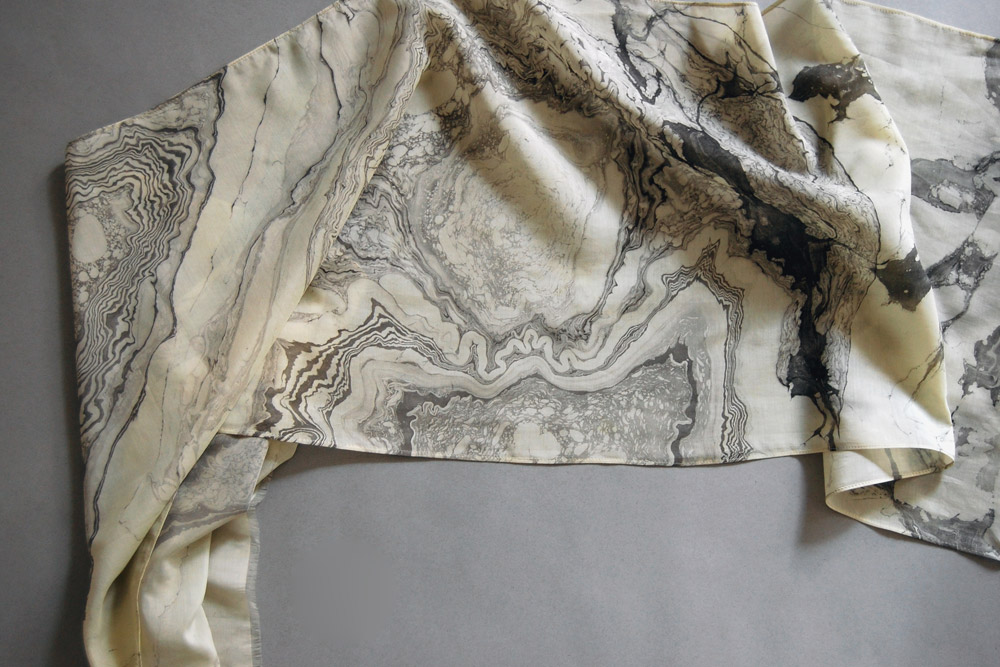
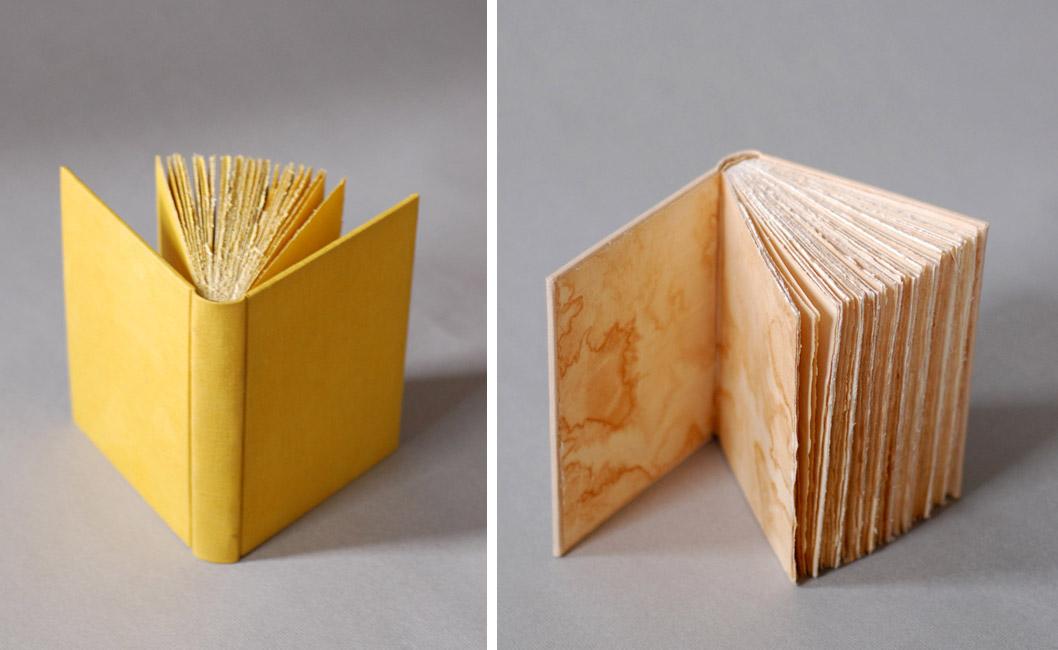
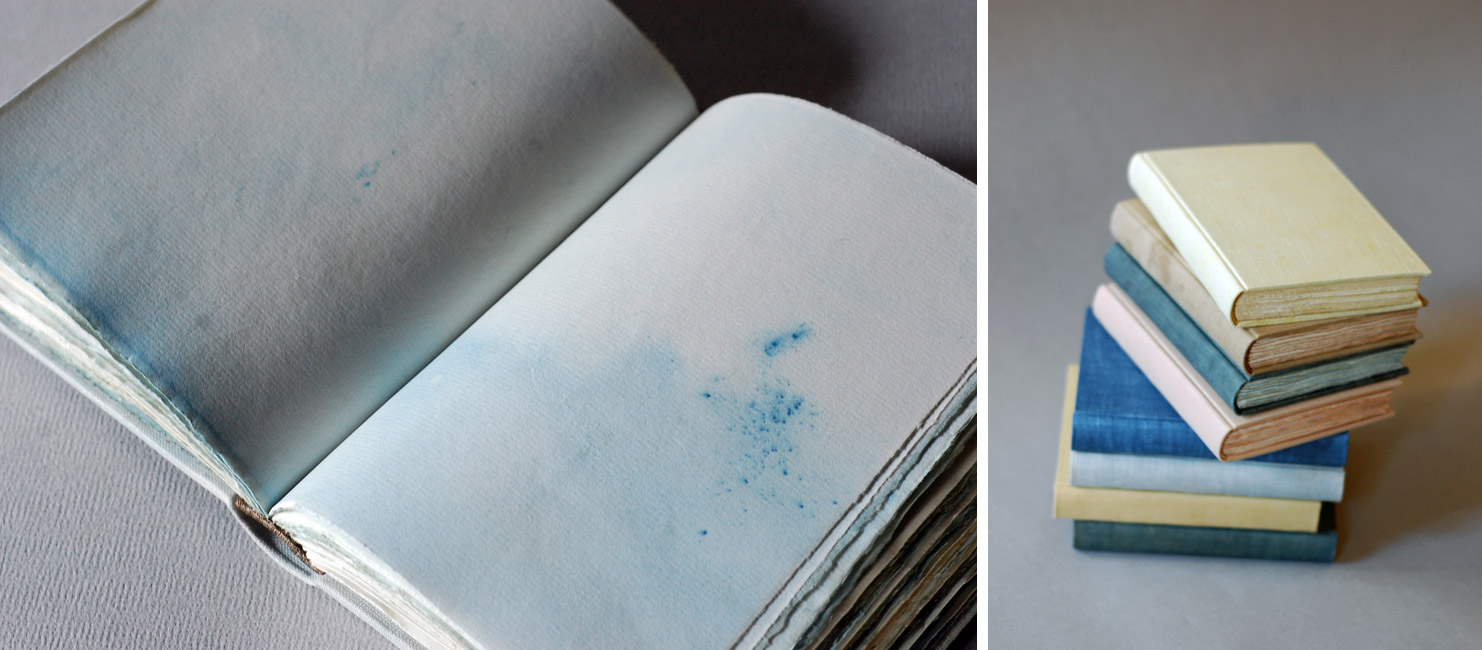
    To create Botanica, I gathered a dozen different dye plants one August day. These included mint, yarrow, dahlia, coreopsis, and goldenrod. Each specimen was folded within alum-mordanted paper, guarded with additional paper, and vigorously smashed with a mallet to break down the plant fibers and transfer the colorants within. I lowered this sandwich, with the plant still inside, briefly into a pot of simmering water. The hot water further drew out the dyes, creating an aura of color around the plant image, and made the print as permanent as possible. I was left with two mirrored images of each plant to create an edition of two books.

    Botanica4-NatalieStopka

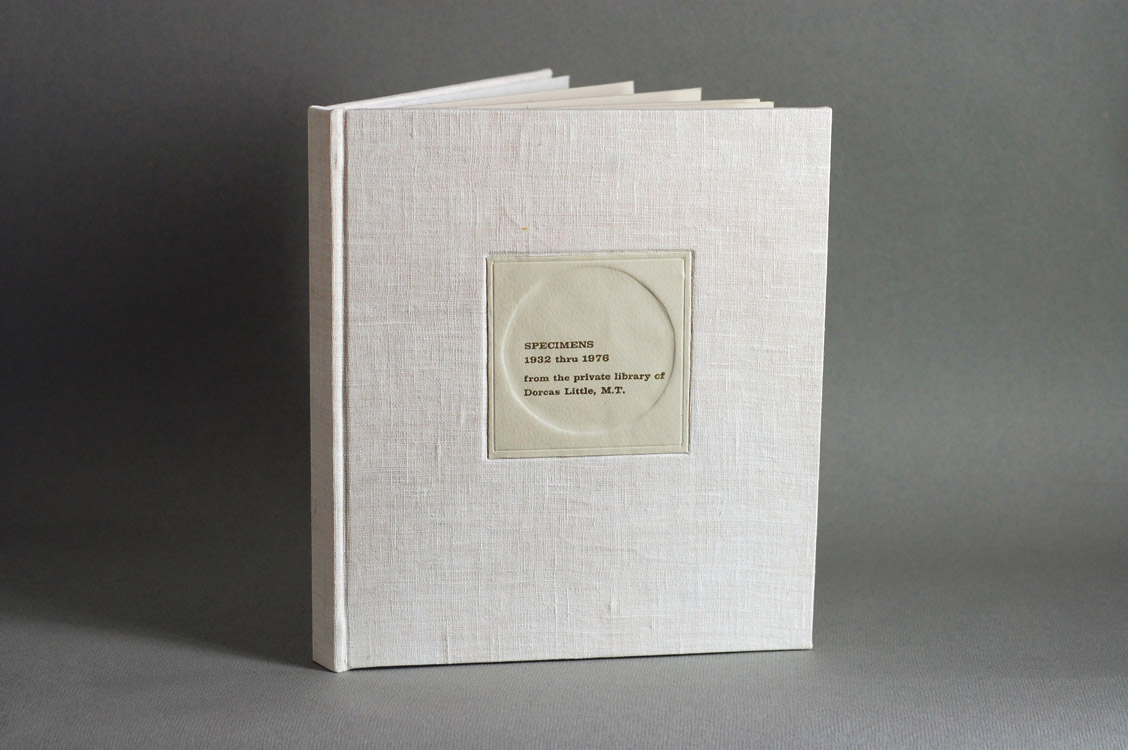
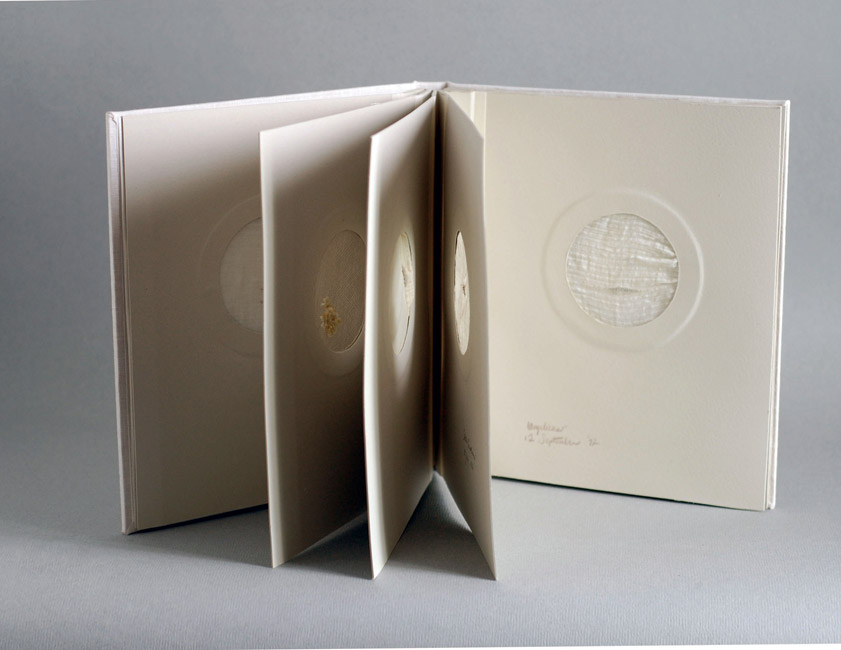
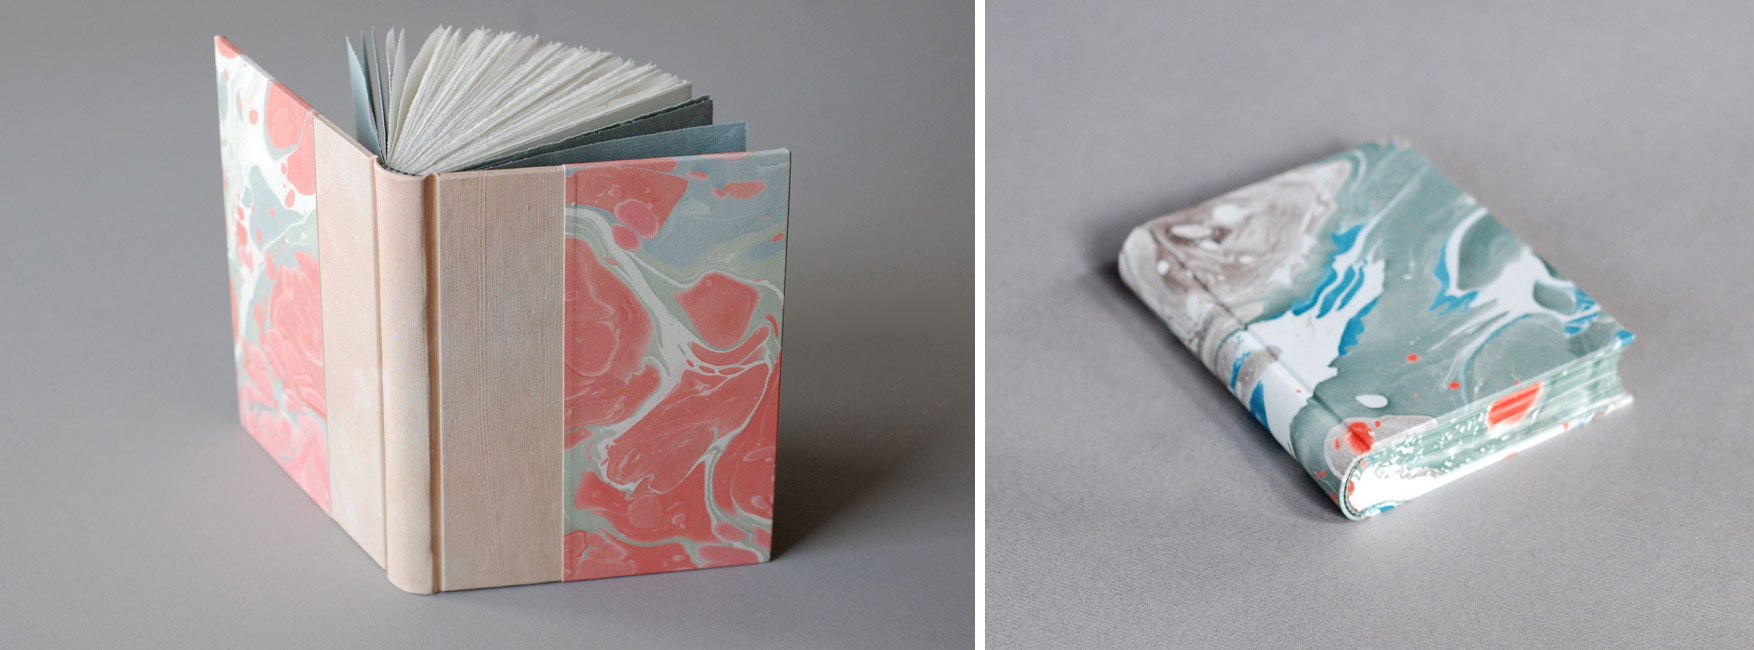
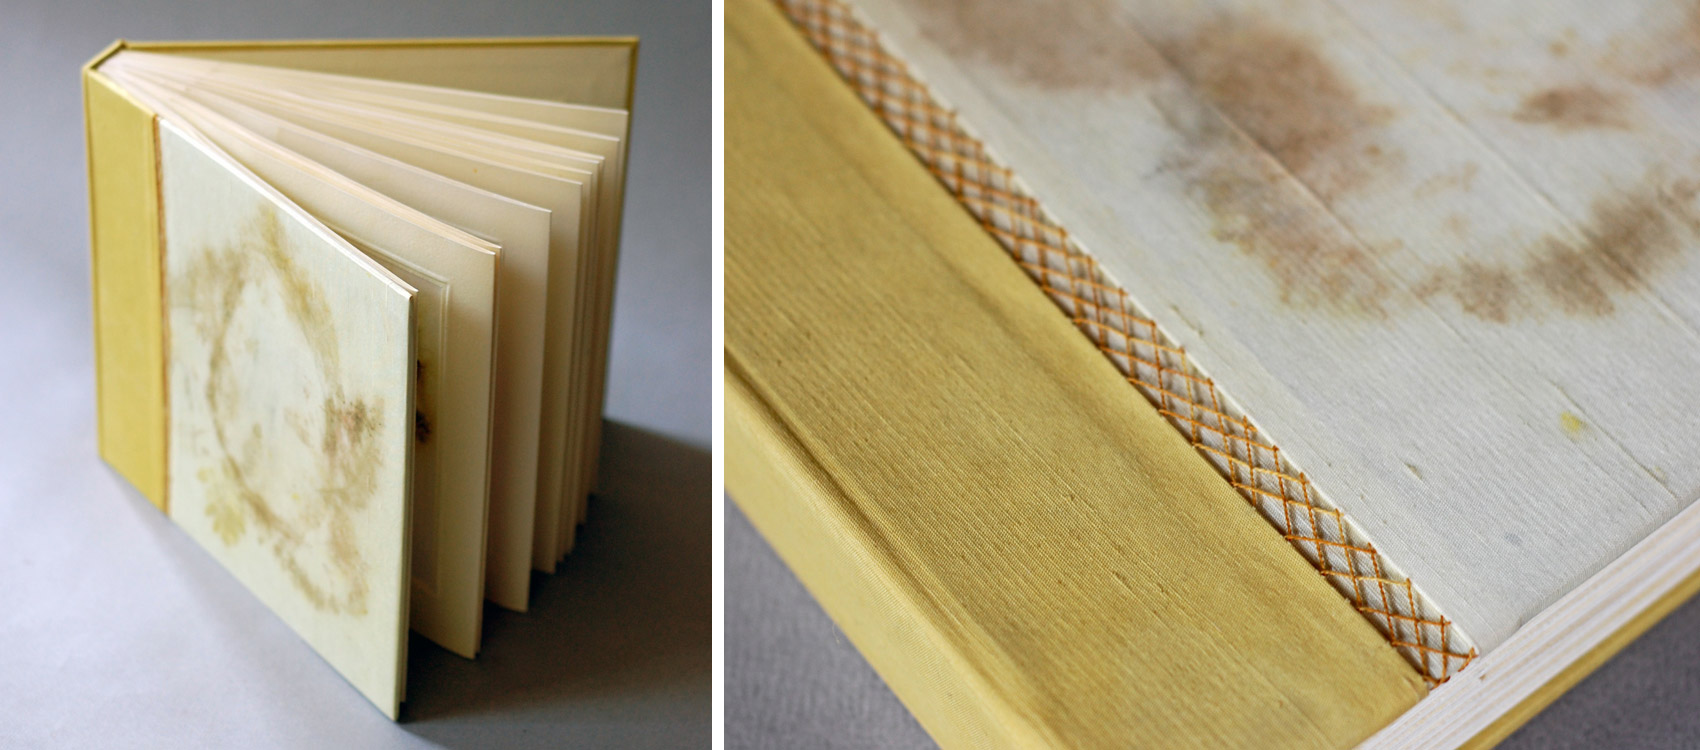
    In binding the books I adopted a flat back variation of Richard W. Horton’s light album structure, with each print mounted inside an accordion fold of naturally dyed paper. The paper as well as the silk book cloth and thread on the cover were dyed with a mix of wildflowers.

    Botanica5-NatalieStopka


  2. Book Artist of the Month: Natalie Stopka

    April 20, 2015 by Erin Fletcher

    Specimens1-NatalieStopka

    Up until this post, Natalie Stopka has shared her techniques for natural dyeing, as well as her methods for marbling and suminagashi. In the last two posts for the month, we’ll look at two artist book projects starting with her 2011 book Specimens.

    Can you talk about the concept behind this work and your inspiration for the book’s structure?
    I’m very interested in the notion of fabricated histories, including artifacts of dubious or bogus provenance such as the Voynich Manuscript or Cottingley fairy photographs. In creating Specimens I bound together the textile fragment collection of the (fictional) Dorcas Little, seemingly a phony collection that she had created and catalogued in the mid-1900s. Each textile fragment was hand sewn from vintage materials to look as if the fibers were is some aspect growing or reproducing. Mounted in a petri-shaped window, each piece is visible from both sides.

    Specimens3-NatalieStopkaSpecimens4-NatalieStopka

    I have a love/hate attitude towards album structures, which are very useful for a book such as this, but generally inelegant and tedious to bind. I elected to use a double guarded album binding, which has the institutional appearance I was hoping for, but a somewhat more graceful movement. As if, in order to augment the appearance of authenticity, the collection’s owner had commissioned the housing.

    Specimens2-NatalieStopka


  3. Book Artist of the Month: Natalie Stopka

    April 13, 2015 by Erin Fletcher

    AblateVesiculate-NatalieStopka

    LEFT: Ablate | RIGHT: Vesiculate

    Then & Now: Ten Years of Residencies at the Center for Book Arts is an upcoming exhibition celebrating two of the Center’s core programs. Among the 50 exhibiting artists who participated in these programs over the last ten years is Natalie Stopka.

    Floe-NatalieStopka

    Floe (detail on left)

    Some of her recent suminagashi work, like those shown in the images above will be included in the exhibit. If you find yourself in the New York area, check out Natalie’s work in person. The exhibit will run from April 17th until June 27th.

    MarbledBooks-NatalieStopka

    Last week’s post focused on Natatlie’s technique and process for natural dyes. This week’s post will focus on her work with marbling and suminagashi.

    Can you discuss your techniques for marbling; what type of size and pigment do you prefer to work with?
    I prefer to work with caragheenan and acrylic pigments when marbling. We undertook a side-by-side comparison of caragheenan and methyl cellulose in a marbling workshop I taught, and for me the clear champion is caragheenan.

    MarblingProcess-NatalieStopka

    Of course, I have written repeatedly about my preference for natural and historically founded materials, but in marbling I use modern synthetic pigments and surfactants. What can I say? They work like a charm – but one day I would like to expand my practice to include earth pigments. It would be very satisfying to create images of stone formations from pulverized stone.

    I am often asked if natural dyes can be used for marbling, but by definition dyes are water soluble, so working around that would be too complex a process to be practicable. However, it is quite handy to marble on naturally dyed paper or fabric, as both the marbling substrate and most dyes (adjective dyes) require mordanting as a preparatory step. And whether you work with natural or synthetic pigments, the natural dyes give a beautiful base tone.

    Sumi-NatalieStopka

    Suminagashi is my escape from the detail-oriented aspects of bookbinding which demand focused hand work. Because suminagashi developed within the compass of Buddhism, the entire approach is at odds with western bookbinding and marbling. Rather than formulate a plan for what each print will be, I can work intuitively. I find that allowing the work to guide me rather than the reverse is very freeing and expressive. To do this I stick to traditional Japanese washi, sumi ink and brushes, a few experimental ingredients, and Don Guyot’s sumifactant.

    Sumi2-NatalieStopka

    You’ve marbled a variety of materials including paper, silk and linen. What unique properties do each of these materials offer and what challenges, if any, do you find?
    The only challenge in using a variety of materials is getting to know each one, and finding some dependable papers and fabrics with the right quality of absorption. The biggest variable in the range of fabrics I use is the crispness of the print each produces. A tight, even weave like silk haboti picks up a very crisp image while a slubby, loosely woven linen makes the image appear more ‘pixelated’.


  4. Book Artist of the Month: Natalie Stopka

    April 6, 2015 by Erin Fletcher

    CompleteDye-NatalieStopka

    As a continuation from last week’s post, I extended the conversation on natural dyes with book artist, Natalie Stopka. During her time at the Center for Book Arts as a Van Lier/Stein Scholar, Natalie also completed a collection of case bindings, where each component beautifully represents the subtleties of natural dyes.

    CompleteDye2-NatalieStopka

    The variation between the different materials is subtle and beautiful. I wonder what your inspiration was for this project?
    Besides my enjoyment of the process of foraging and dyeing with plants, I love the sympathy between natural dyes and fibers, as well as the resonance of using historical methods with historical materials. Prior to the discovery of synthetic dye in 1856, all books were decorated with naturally derived dyes, inks, and pigments. That is a lot of artistic heritage that has been largely supplanted in the past 150 years. I wanted to create some books that were all of a piece referencing that period just prior to the advent of synthetics, using a hollow-back structure with linen book cloth, hand sewn headbands, uncut pages folded down from full sheets, and, of course, natural dyes. I ended up binding a dozen books in different colors, partly as an exercise in honing my binding skills, as well as a continuation of my dye experiments.

    Can you walk through your dying process from the creation of the pigments to the dying of the materials? Where did you learn these techniques?
    Beginning with the techniques I learned at the Textile Arts Center, I extended my natural dye experiments into bookbinding. There was some trial and error at first as I selected and mordanted paper samples. Papermakers generally color the pulp with pigment prior to forming sheets, so there is not a lot of information on how to dye paper, or how the dyes and mordants affect it over time. But paper is just cellulose fiber like many fabrics I had experience dyeing, so I jumped in. I decided to use Zerkall Ingres, which is quite absorbent due to its composition, but also has good wet strength. And when folded down it makes a lovely signature size.

    The first step in dyeing is to source or collect plant material. In this case I used plants I foraged in upstate New York including oak leaves, cherry bark, Queen Anne’s lace, apple bark, and yarrow, the only exception being indigo. I chopped and soaked or simmered the plant material to extract the dye, then strained the dye liquor into a big stainless steel vat containing the mordanted paper and other book materials. After about 12 hours in the vat, everything was ready to carefully remove and dry.

    DyeProcess-NatalieStopka

    As with my embroidered botanical illustrations, these books demonstrate the different shades of color (sometimes slight) that result when a single dye is applied to various substrates. The linen cover, silk headbanding thread, Zerkall Ingres pages, and linen binding thread were all dyed in the same vat. The endpapers were made from the uppermost sheet of paper in the bath, which became patterned by the evaporation of the dye. My favorite book was dyed with black cherry bark – I left the dye vat outside overnight, and a light frost left crystal patterns on the endpapers! Initially I expected the papers to take the dye evenly in a uniform shade, but most dyes were absorbed with a good deal of variation, making a richly toned surface.

    CompleteDye3-NatalieStopka


  5. April // Book Artist of the Month: Natalie Stopka

    April 1, 2015 by Erin Fletcher

    Botanical-NatalieStopka

    Natalie Stopka has conducted extensive research and experimentation with natural dyes, which is partly what drew me to interview her on the blog. I’ve long been interested in incorporating natural dyes into my own work. So it’s fair to say that I’m quite inspired by Natalie’s work.

    At the end of your year at the Center for the Book, you presented on a series of natural dye experiments in a pretty brilliant way. What drew you to focus on natural dyes and how did you to come to present your findings through embroidery?
    I became interested in natural dyeing as an antidote to city life. I was initially drawn to the process of foraging and dyeing itself, but the more I studied the history behind the process, the more it became apparent that our culture has devalued and forgotten the vast majority of the dye artistry we once possessed. This artistry is akin to alchemy, because we still do not scientifically understand what functions many colorant compounds perform for the plants that create them, or how many dye processes occur on a chemical level. I was surprised to learn that each part of a plant – its petals, leaves, bark, and roots – create different colors. These colors can be manipulated into a greater range of tones by using a variety of mordants and fibers. I decided to explore the full range of colors accessible in a single plant using these methods.

    I chose three trees I had access to in upstate New York; birch, crab apple, and black cherry. From these I responsibly foraged leaves and bark, and used them to dye alum-mordanted silk, cotton, wool, linen/wool, and silk/wool thread. I then treated the dyed thread with the color modifiers copper sulfate, ferrous sulfate, an acid, and a base. I was left with about 40 samples in a range of colors and textures representing each tree’s dye potential. Some samples had very little color at all, but some were vivid and strongly varied.

    Botanical2-NatalieStopka

    I had known these experiments would become a series of embroidery pieces from the beginning, and I wanted to illustrate the clear distinctions in the dye colorants accessible in different parts of the plant. I adopted the form of the traditional botanical illustration, utilizing the thread dyed with the analogous plant part to illustrate it. That is to say, the leaves are depicted with leaf-dyed threads, and the bark with bark-dyed threads. For the birch tree embroidery, I also differentiated between the inner and outer barks.

    Botanical3-NatalieStopka

    LEFT: birch MIDDLE: black cherry RIGHT: crab apple

    The final element of these pieces is a question pertinent to any bookbinder: time. Not only are natural dyes sensitive to ultraviolet light, but the modifiers I used degrade fibers over time. The ephemeral nature of natural dyes is a sad reality for an artist, but I think it can also be beautiful. These three pieces each have a lifespan, and to measure it I enclosed a sample of each thread used in the embroidery behind the frame. There it will be protected from light, and can be used as a point of comparison over time.

    – – – – – – – – – – –

    I became aware of Natalie Stopka’s work while visiting the Center for the Book in New York, which in happenstance was exhibiting the piece above. Since then I’ve continued to keep an eye on her portfolio, especially the work she does with natural dyes and marbling. Natalie’s work encompasses not only the prior mediums mentioned, but she also dabbles in book arts as well.

    Check out the interview after the jump, then come back each Monday during the month of April for additional posts on Natalie’s work. Need a reminder? Subscribe to the blog.

    read more >


  • My name is Erin Fletcher, owner and bookbinder of Herringbone Bindery in Boston. Flash of the Hand is a space where I share my process and inspirations.
    The StudioNewsletterInstagramEmail me
  • Archives