A punching cradle is a useful tool to have around in one’s bindery. There are a lot of models available for purchase, but it’s quite simple to make one yourself using just a few tools and materials. I have a few in my bindery that range in size, but I find my collapsible punching cradle to be the most useful. Especially when I am traveling to teach workshops.
The following tutorial will go through the steps to create your own collapsible punching cradle. I’ve including all of my measurements, but the best part about this tool is that you can customize it for your own purposes. This particular cradle will consist of a detachable cradle and 2 leg supports. The cradle will have two different size options, which makes this particular version even more versatile. I discovered this collapsible punching cradle while taking a private workshop with Monique Lallier. She allowed me to take down the measurements and I made my own once I returned to my studio.
If you are looking for more instructional content, I have a growing list of tutorials and I also teach live workshops in-person and online. Check out my list of Upcoming Workshops.
MATERIALS:
– paper for covering (I used Lokta)
– binder’s board
– book cloth
– PVA
– methyl cellulose (optional)
TOOLS:
– pencil
– ruler
– 90º triangle
– Japanese screw punch with 3mm bit
– cutting mat
– x-acto blade
– glue brushes in various sizes
– bone folder
– scissors
STEP ONE:
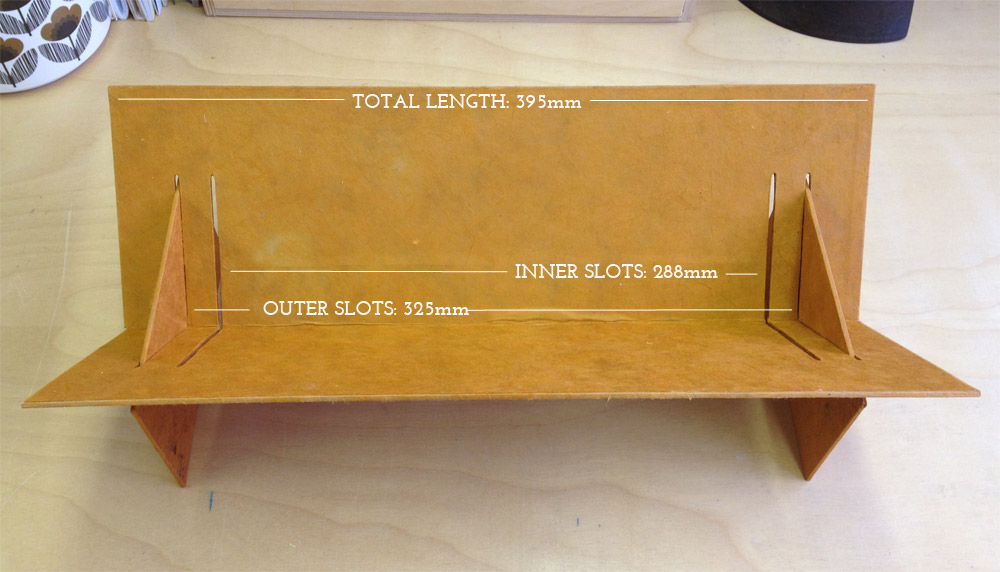
Determine the length of workable space for your cradle. For example, if you tend to work large, then perhaps you want to make a cradle long enough for paper that is 12″ tall. The cradle I’m making in this tutorial is slightly longer than ones I currently have. The total width of my cradle is 395mm (~15½”), the two outer slots give me a workable area of 325mm (~12½”) and the inter slots give me a workable area of 288mm (~11¼”).
Once you’ve decided on your dimensions, grab some binder’s board and cut down 2 pieces the same size for the cradle. The dimensions for the legs and support stubs can really vary depending on the distance you want between the bottom of the cradle and your work surface. The lower the cradle is the more likely that your awl will pierce your work surface if left unprotected. But you can start by using my measurements below and then make your own modifications.
MY MEASUREMENTS:
cradle (cut 2 pieces the same size):
395mm x 125mm
legs (cut 2 pieces the same size):
150mmx 88mm
support stubs (cut 4 pieces the same size):
110mm x 11mm
STEP TWO:
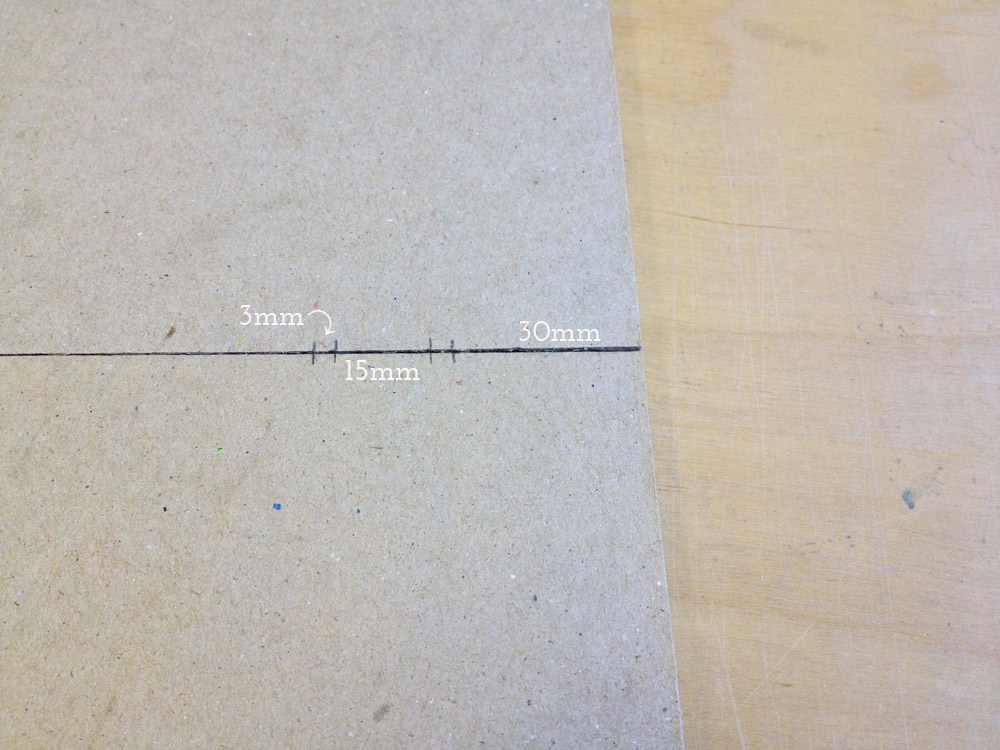
Mark with a pencil where you would like the two slots to be on both cradle pieces. On my cradle the outer slot starts 30mm in from either end. Each slot is 3mm wide and they sit 15mm apart.
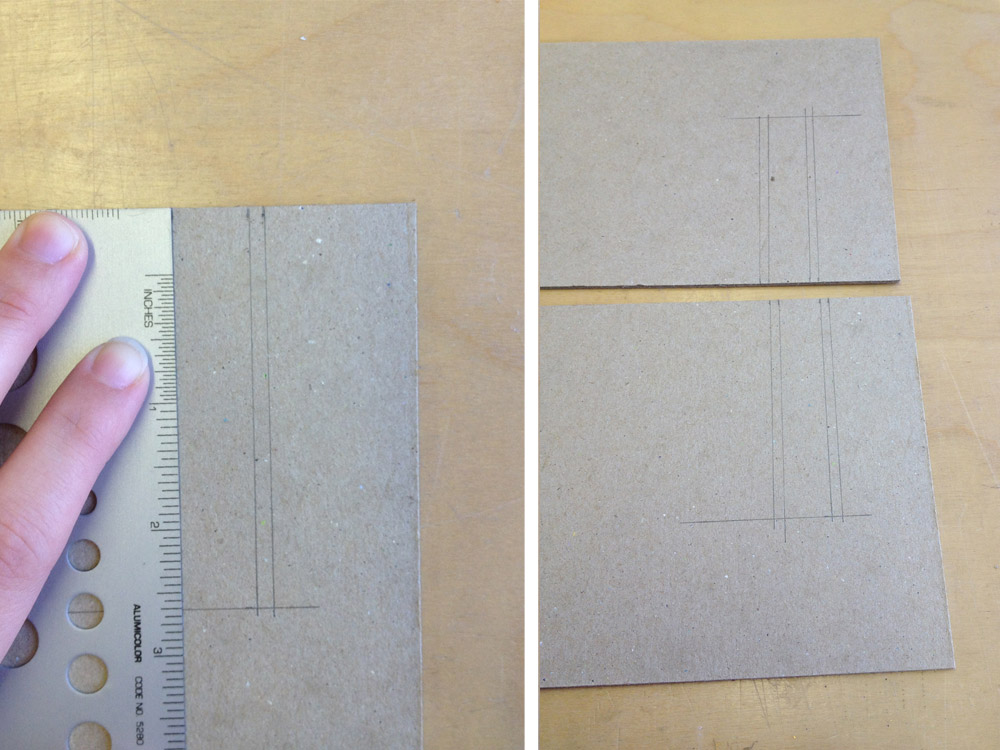
The height of my slots are 80mm from the bottom edge of the cradle. Using a 90º triangle, draw a line from your mark up to the desired height. Do this on either side and on both cradle pieces.
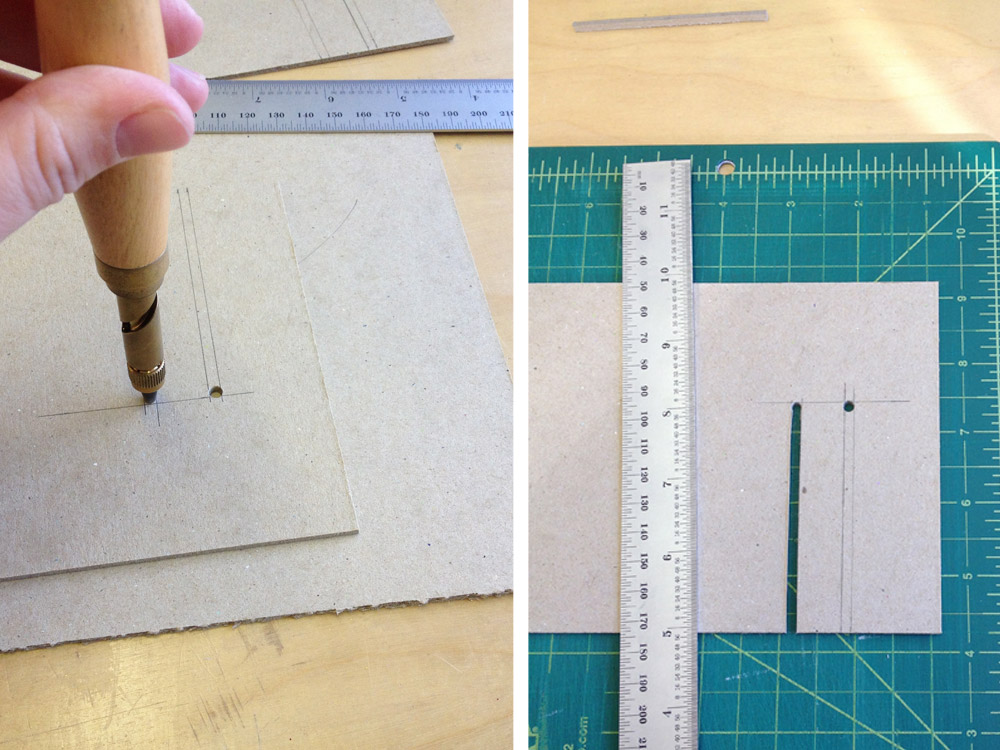
Using a Japanese screw punch with a 3mm bit, punch a hole at the top of the slots. Make sure to have a scrap board underneath to protect your work surface. With an x-acto blade, carefully cut out the slots by slowly cutting through each layer. DO NOT try and cut through the entire thickness in one stroke, the blade could kickback and slice your finger. As you cut, angle your blade as perpendicular to the binder’s board as you can, this will make a nice straight cut. Sand the slots smooth.