RSS Feed

Posts Tagged ‘tutorial’

  1. Tutorial // Petal Fold Book

    July 12, 2020 by Erin Fletcher

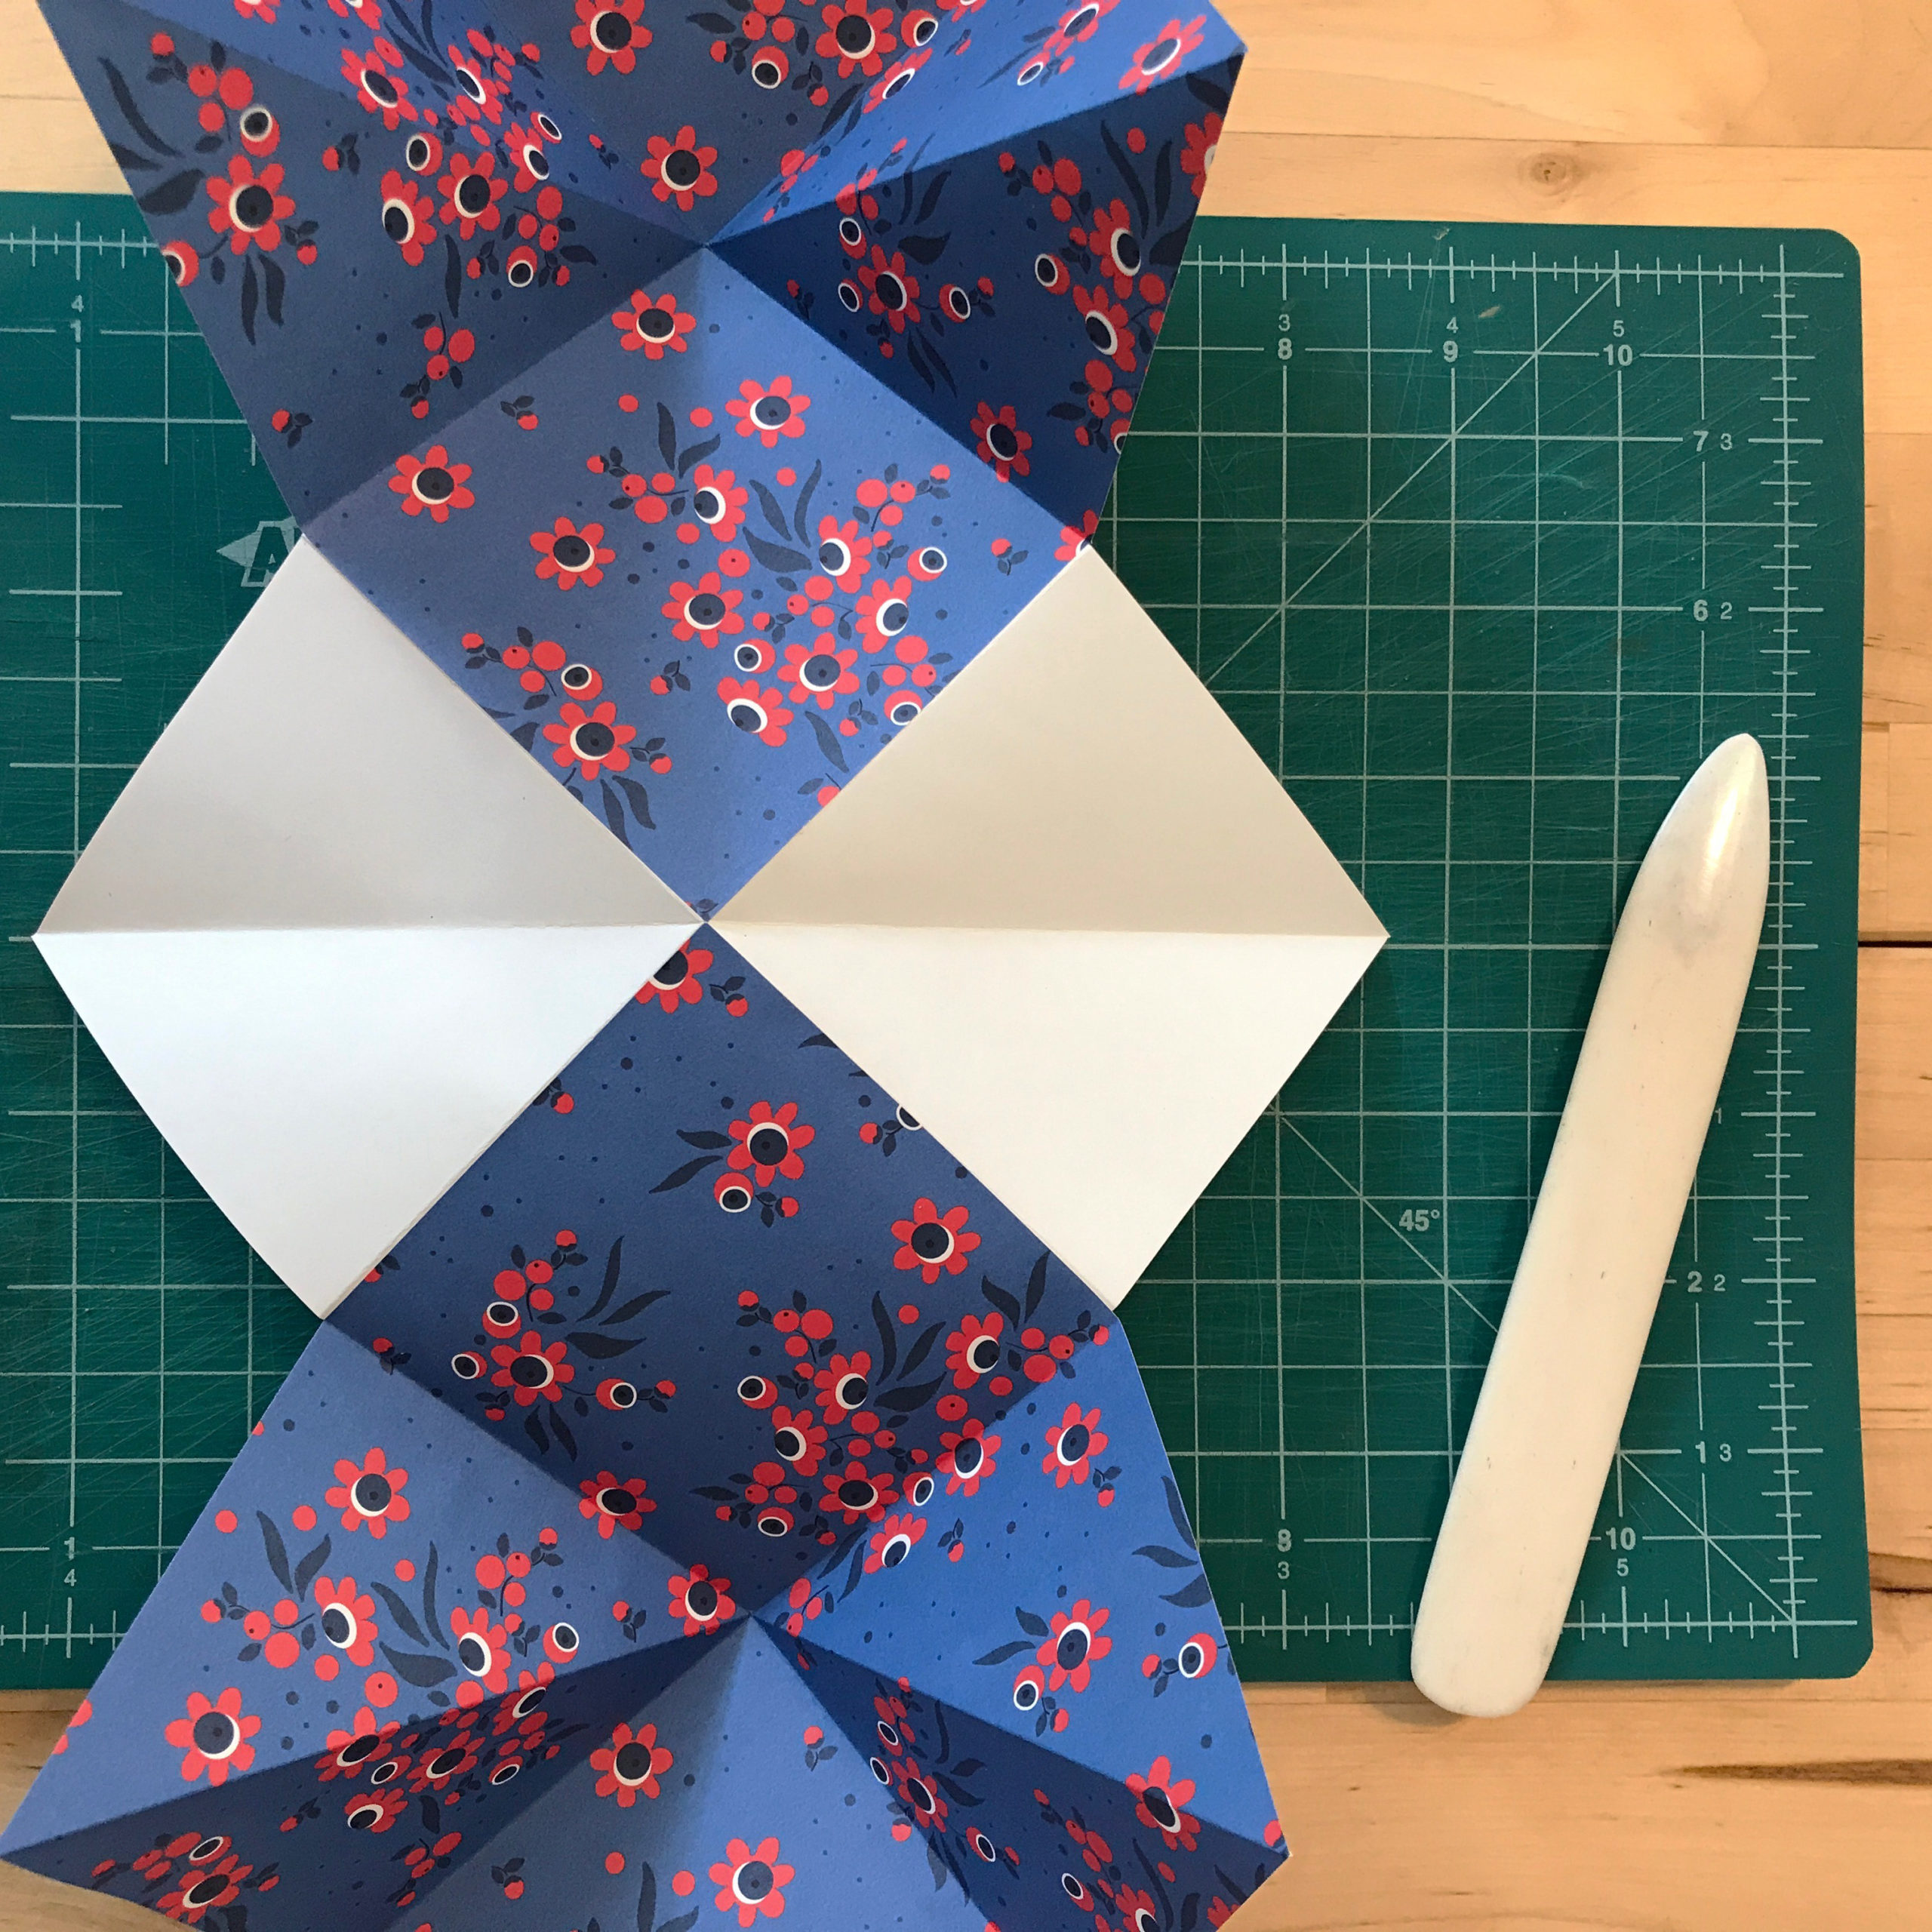
    In this video for North Bennet Street School, my co-host Colin Urbina shows me how to make a Petal Fold Book using simple folding techniques similar to the Turkish Map Fold. Even though this video is geared towards kids, this technique is great for any age group. You can find more online content created for NBSS here.

    If you are looking for even more instructional content, I have a growing list of tutorials and I also teach live workshops in-person and online. Check out my list of Upcoming Workshops.

    SUPPLIES:
    – 5 square pieces of paper, plain or decorative (any size, but should be the same size)
    – Glue Stick
    – Bone Folder (optional)
    – Coloring and decorating supplies (markers, colored pencils, or crayons)

    The Petal Fold is a simplified version of a fold used in origami by the same name. By reducing the number of folds from the origami technique, it can be used to create pages that can easily condense into an artist book.


  2. Tutorial: Collapsible Punching Cradle

    January 3, 2014 by Erin Fletcher

    PunchingTrough1-ErinFletcher

    A punching cradle is a useful tool to have around in one’s bindery. There are a lot of models available for purchase, but it’s quite simple to make one yourself using just a few tools and materials. I have a few in my bindery that range in size, but I find my collapsible punching cradle to be the most useful. Especially when I am traveling to teach workshops.

    The following tutorial will go through the steps to create your own collapsible punching cradle. I’ve including all of my measurements, but the best part about this tool is that you can customize it for your own purposes. This particular cradle will consist of a detachable cradle and 2 leg supports. The cradle will have two different size options, which makes this particular version even more versatile. I discovered this collapsible punching cradle while taking a private workshop with Monique Lallier. She allowed me to take down the measurements and I made my own once I returned to my studio.

    If you are looking for more instructional content, I have a growing list of tutorials and I also teach live workshops in-person and online. Check out my list of Upcoming Workshops.

    MATERIALS: 
    – paper for covering (I used Lokta)
    – binder’s board
    – book cloth
    – PVA
    – methyl cellulose (optional)

    TOOLS: 
    – pencil
    – ruler
    – 90º triangle
    – Japanese screw punch with 3mm bit
    – cutting mat
    – x-acto blade
    – glue brushes in various sizes
    – bone folder
    – scissors

    STEP ONE:
    Determine the length of workable space for your cradle. For example, if you tend to work large, then perhaps you want to make a cradle long enough for paper that is 12″ tall. The cradle I’m making in this tutorial is slightly longer than ones I currently have. The total width of my cradle is 395mm (~15½”), the two outer slots give me a workable area of 325mm (~12½”) and the inter slots give me a workable area of 288mm (~11¼”).

    PunchingCradle2a-ErinFletcher

    Once you’ve decided on your dimensions, grab some binder’s board and cut down 2 pieces the same size for the cradle. The dimensions for the legs and support stubs can really vary depending on the distance you want between the bottom of the cradle and your work surface. The lower the cradle is the more likely that your awl will pierce your work surface if left unprotected. But you can start by using my measurements below and then make your own modifications.

    MY MEASUREMENTS:
    cradle (cut 2 pieces the same size):
    395mm x 125mm

    legs (cut 2 pieces the same size):
    150mmx 88mm

    support stubs (cut 4 pieces the same size):
    110mm x 11mm

    STEP TWO:
    Mark with a pencil where you would like the two slots to be on both cradle pieces. On my cradle the outer slot starts 30mm in from either end. Each slot is 3mm wide and they sit 15mm apart.

    PunchingCradle3a-ErinFletcher

    The height of my slots are 80mm from the bottom edge of the cradle. Using a 90º triangle, draw a line from your mark up to the desired height. Do this on either side and on both cradle pieces.

    PunchingCradle4-ErinFletcher

    Using a Japanese screw punch with a 3mm bit, punch a hole at the top of the slots. Make sure to have a scrap board underneath to protect your work surface. With an x-acto blade, carefully cut out the slots by slowly cutting through each layer. DO NOT try and cut through the entire thickness in one stroke, the blade could kickback and slice your finger. As you cut, angle your blade as perpendicular to the binder’s board as you can, this will make a nice straight cut. Sand the slots smooth.

    PunchingCradle5-ErinFletcher

    read more >


  3. Tutorial: Top Secret Belgian Binding

    November 19, 2013 by Erin Fletcher

    secretbelgian1-erinfletcher

    The Secret Belgian binding is just one of many structures on my long list models to make. With the aid of a tutorial posted on the BookArtsWeb tutorial and references page, I was on my way to checking this structure off my list. Unfortunately the link seems to be broken now. However, within this post you’ll find my instructions, which are very comprehensive and any skill level can complete this simple structure in a matter of hours. So let’s get started*:

    *This tutorial is for a modified version I’m calling the Top Secret Belgian. This version of the structure is sewn differently and extra steps are taken to hide the interior thread. If you are looking for more instructional content, I have a growing list of tutorials and I also teach live workshops in-person and online. Check out my list of Upcoming Workshops.

    MATERIALS: 
    – binder’s board for 2 covers and 1 spine piece
    – decorative paper
    – paper to line covers and spine piece (aka paste downs)
    – colored thread
    – text block (3-5 signatures, about 3-4 folios each)
    – PVA
    – wax

    TOOLS: 
    – needle
    – bone folder
    – glue brush
    – scalpel (preferably with curved blade)
    – x-acto
    – scissors
    – pencil
    – triangle
    – awl
    – dividers (optional)

    STEP ONE: 
    For this tutorial I bound a copy of The Yellow Wallpaper by Charlotte Perkins Gilman. My inspiration for the covers came at the moment in the story when the main character begins to tear away the maddening yellow wallpaper in a desperate attempt to relieve her agony and pain. Whatever you choose as your text block, whether it be a short story, poetry or blank pages, prepare those now and fold to their final size.

    From the text block, measure the height of the signature and add about 5-7mm. Measure the width of the folded signature and add about 3-4mm. This will determine the dimension of the covers with added squares.

    The height of the spine piece will be the same as the covers. The width is determined by the thickness of your text block. Pinch the text block about 20mm from the spine, measure the flared out signatures. Add 2mm to this measure to find the width of the spine piece.

    MY MEASUREMENTS:
    text block height: 201mm
    text block width: 121mm
    text block thickness: 10mm

    cover height: 208mm
    cover width: 125mm

    spine piece height: 208mm
    spine piece width: 12mm

    Cut down the decorative paper to include excess for turn-ins (about 20mm, less for the spine piece). Cut down the paper for the paste downs, allowing a 3mm margin on all sides. Glue up the decorative paper and cover both boards and spine piece.

    secretbelgian2-erinfletcher

    Trim out the inside of the covers, so the turn-ins are even and straight. This can be done quickly with a set of dividers. Simple measure out the desired distance, lightly score a line along all four sides. Trim off excess along scored guideline with an x-acto or scalpel. Tear away the excess by pulling toward the edge of the cover.

    secretbelgian3-erinfletcher

    Glue down the paste down onto the spine piece and set aside under weight to dry.

    STEP TWO:
    Prepare a jig for punching holes into the covers. The holes should be evenly spaced along the height of the covers allowing for a fair amount of sewing stations. Using an awl punch the holes 16mm from the spine edge. The needle on the awl should have a continuous gauge and not be graduated. This way all of the holes are the same size.

    secretbelgian4-erinfletcher read more >


  • My name is Erin Fletcher, owner and bookbinder of Herringbone Bindery in Boston. Flash of the Hand is a space where I share my process and inspirations.
    The StudioNewsletterInstagramEmail me
  • Archives