At the beginning of November, I spent two and a half weeks living under the gloomy, grey skies of London. But having lived in Boston for the past six years, I felt quite at home with the overcast days and long train rides. After getting settled in my flat just outside of Tufnell Park, I spent my first day wandering around the Victoria and Albert Museum. An exhibit on Medieval English embroidery occupied most of my time during the visit. The exhibit surveyed religious garments and coverings dating from the 13th – 15th centuries. The quality of the stitchwort was breathtakingly beautiful and in such immaculate condition for their age.
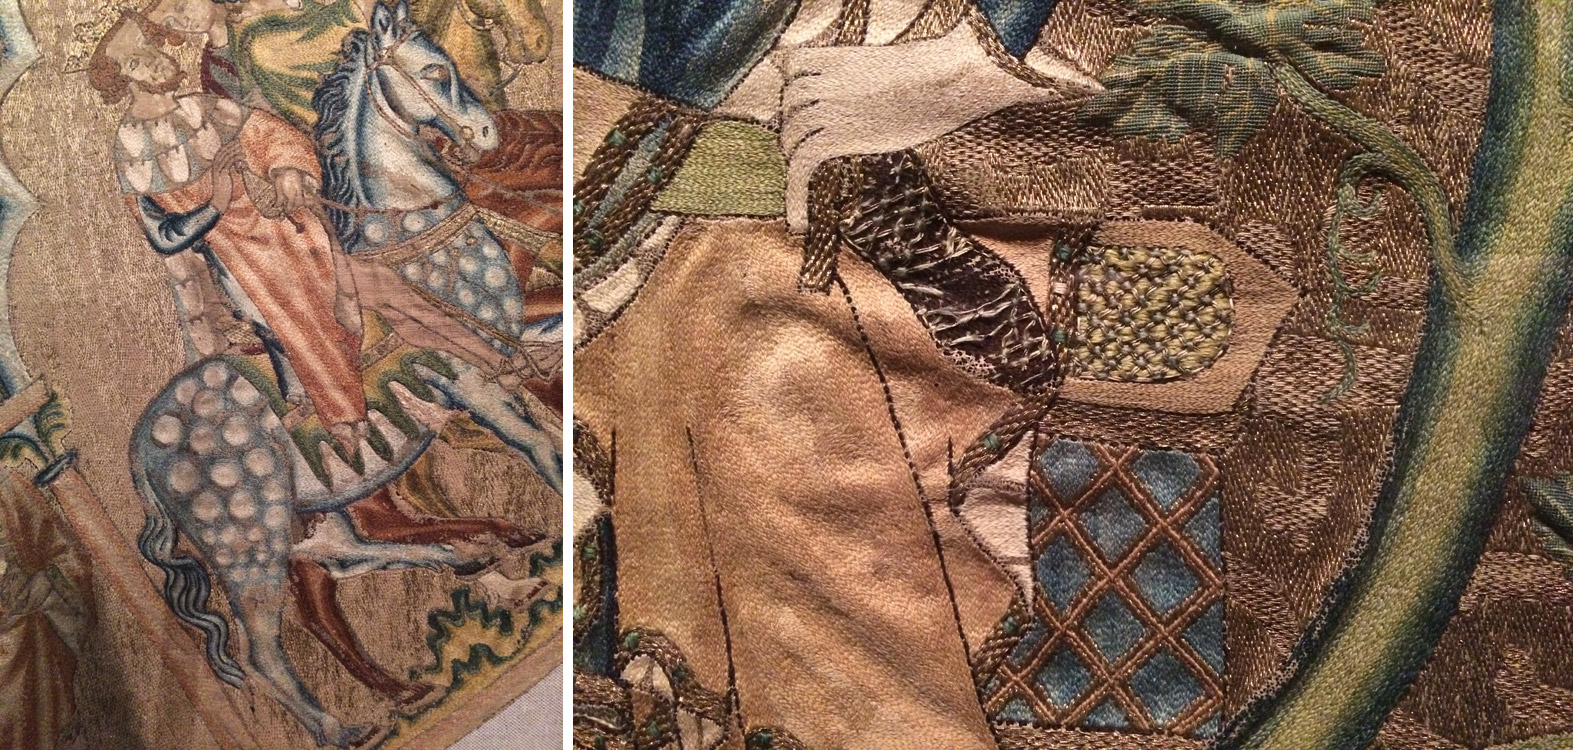
right: Panel depicting the Tree of Jesse (1310-20)
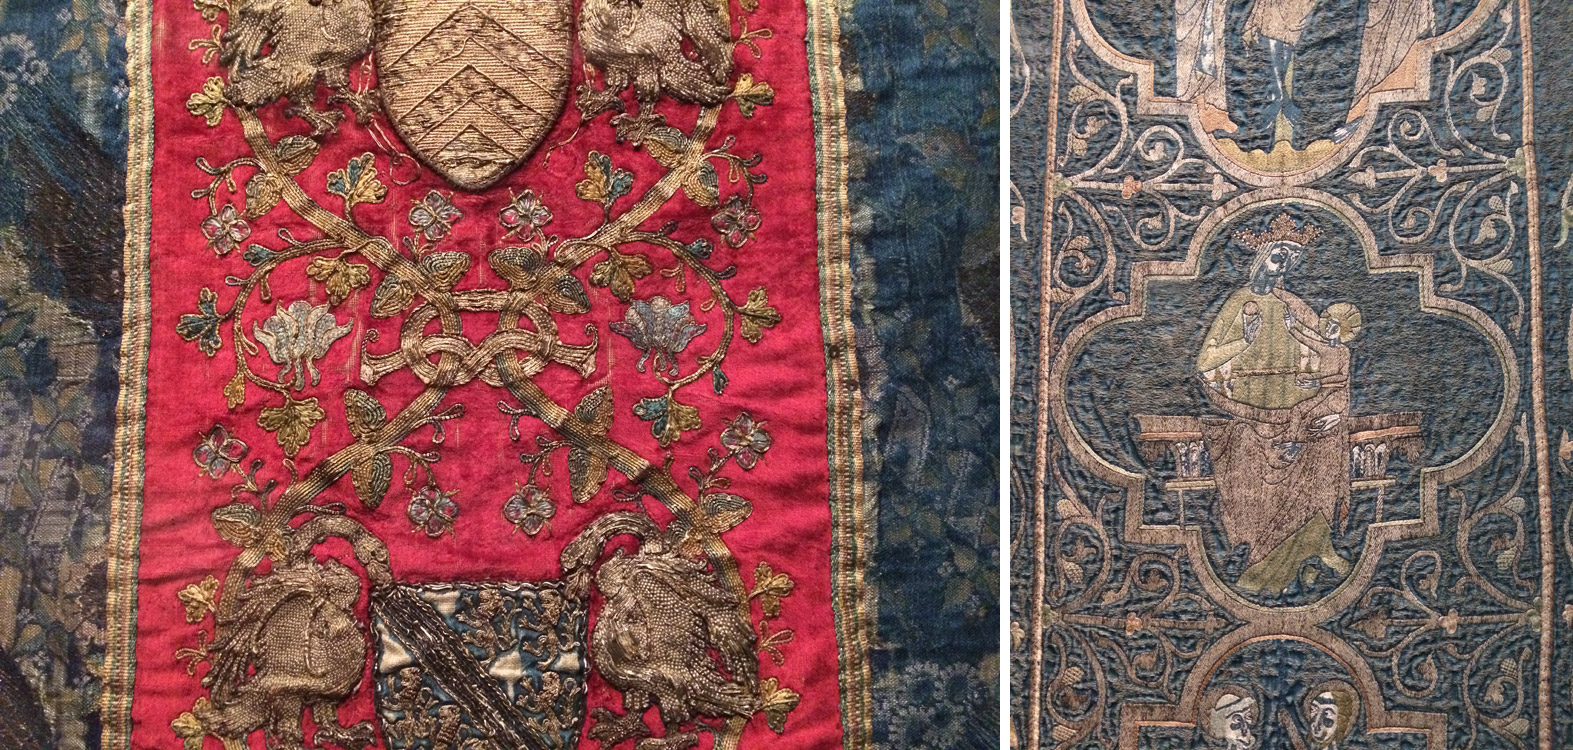
right: The Clare Chasuble (1272-94)
After my jaunt at the V&A (plus a quick bite at the cafe), I wandered around Soho, popping into a few shops before ending up at Mother Mash for dinner (so delicious and highly recommended). But let me get to the real reason why you are reading this post.
DAY ONE
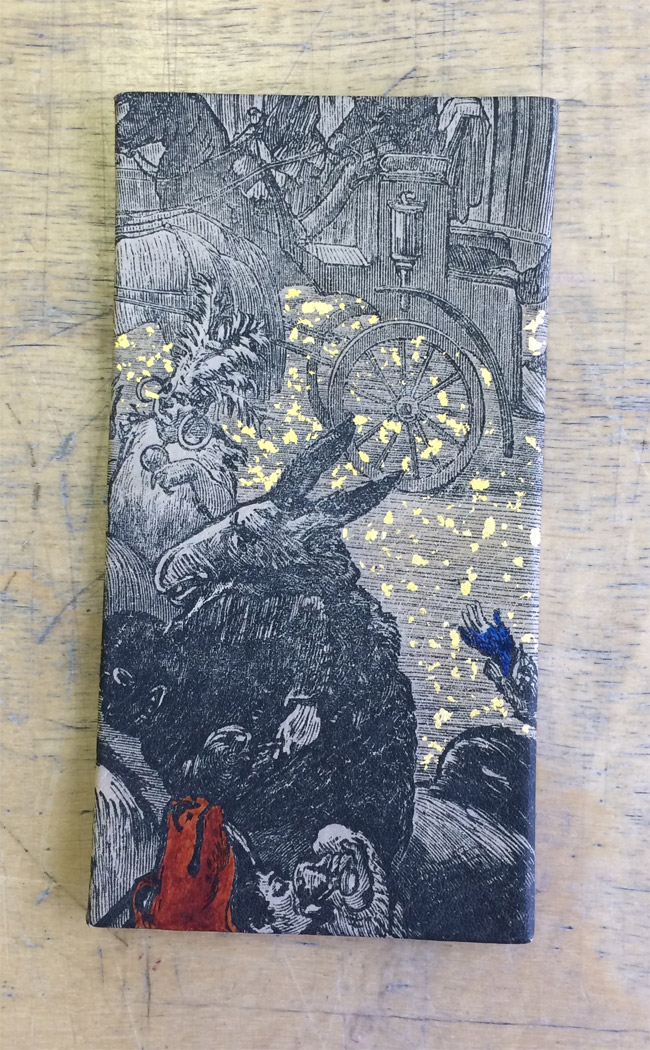
The next day I traveled from my flat in Tufnell Park to Barnes for the first of nine days with Mark Cockram. I arrived promptly at 10:00 in the morning, not a minute too early or too late (as were the rules). On the first day, we focused on paring with a Schärffix (which I did standing up, a bit unusual for me) and using a French paring knife. All of the pared leather was used to create “swiss rolls”, which is a term used by Mark to describe this technique but has also been described by Philip Smith as “maril”. Mark also shared reverse cellulose printing with me, which is the process of transferring a printed image onto leather.

DAY TWO
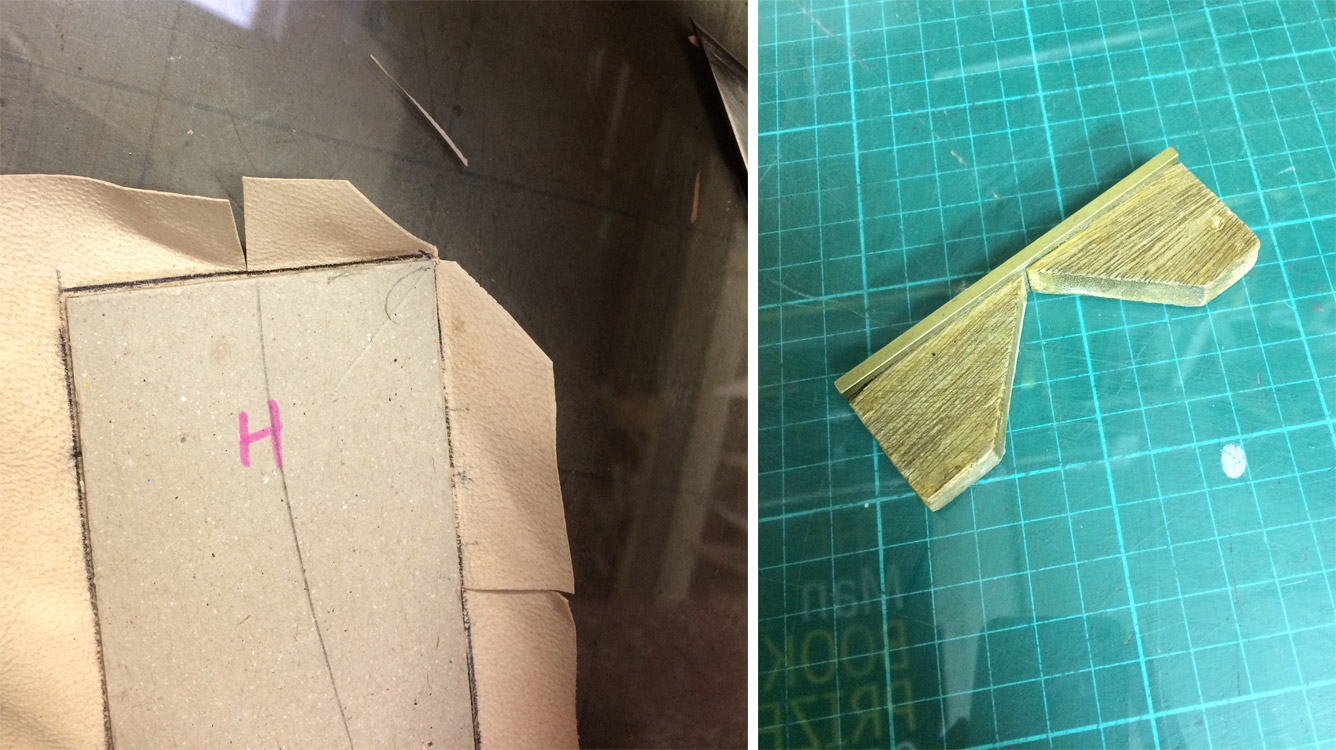
On the second day, I continued to play with my creations from the previous day. I took the shavings from the swiss rolls and created an assemblage. I took my printed leather and pared it down in preparation for board attachment using Mark’s method of edge paring. The day’s final demonstration centered on laying down leather corners using a nifty tool called a tensai. The tensai is shown in the image below on the right and is used to mark the leather before trimming. Its name translates from the Japanese word for genius. And I certainly felt quite like one with this technique for finishing off corners.
DAY THREE
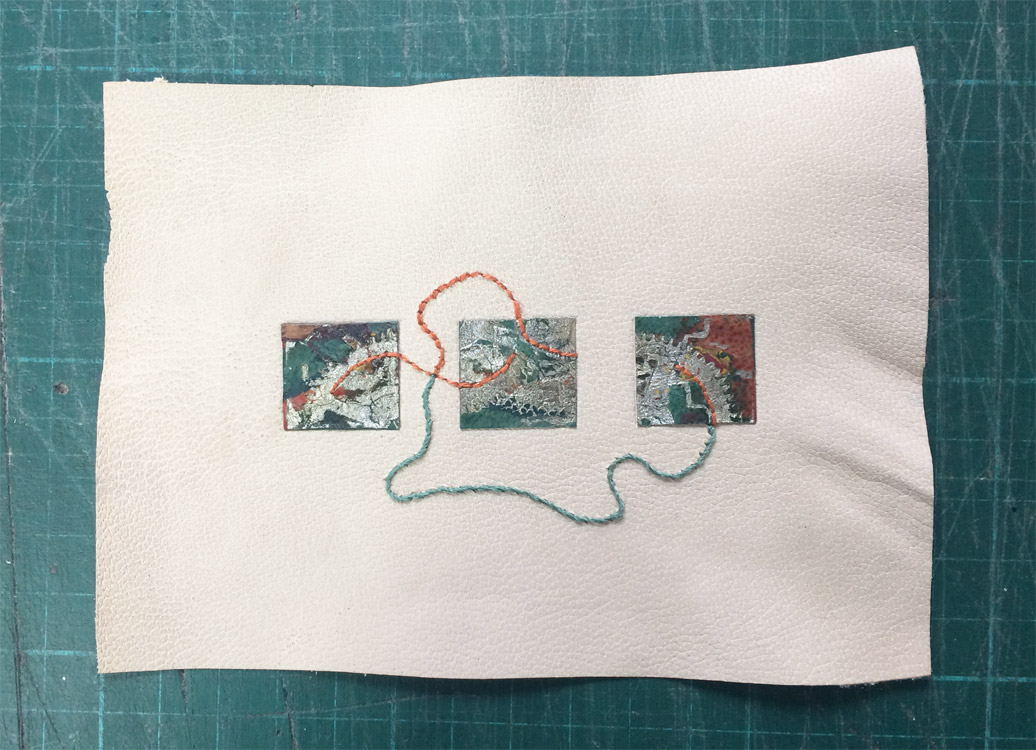
Today was the beginning of leather dying, starting with the craquelle technique (see more in Day Four). While waiting for the thick layer of paste to dry before the dye could be applied, I began working on a technique that was unnamed at the beginning of the demonstration but was eventually dubbed “dicated surface” (this name was randomly chosen from the dictionary by Mark, but is in fact the second half of a hyphenated word). This technique is implemented by creating multiple layers of leather. These layers are then manipulated in a variety of ways to alter the aesthetic and texture of the surface. After feeling satisfied with its look, I distorted the plaquette further by cutting it down into square tiles.

By Mark’s encouragement, I continued to play with the aesthetic of the tiles by using embroidery floss to enhance the texture more. I took three of the embroidered tiles and pasted them to a piece of fair goatskin. After back-paring by hand, I continued to tinker with the design by adding additional embroidery around the tiles. I continued to work on this piece throughout my time at Mark’s studio (below is the piece in progress, I have yet to finish it).
DAY FOUR & FIVE & SIX
Over the next few days, the focus was primarily on dye techniques with free time to collage multiple techniques onto one plaquette. I was able to finish my craquelle sample piece, which dried on Mark’s lovely tea towel patterned with steins.
The next sample piece I created was unevenly dabbed with orange leather dye before being pressed with a leaf. The impression created by the leaf was then highlighted with gold leaf and palladium at the midrib (main vein). In the area around the leaf, Mark had me test out Sunago, the Japanese term used to describe sprinkling with leaf.
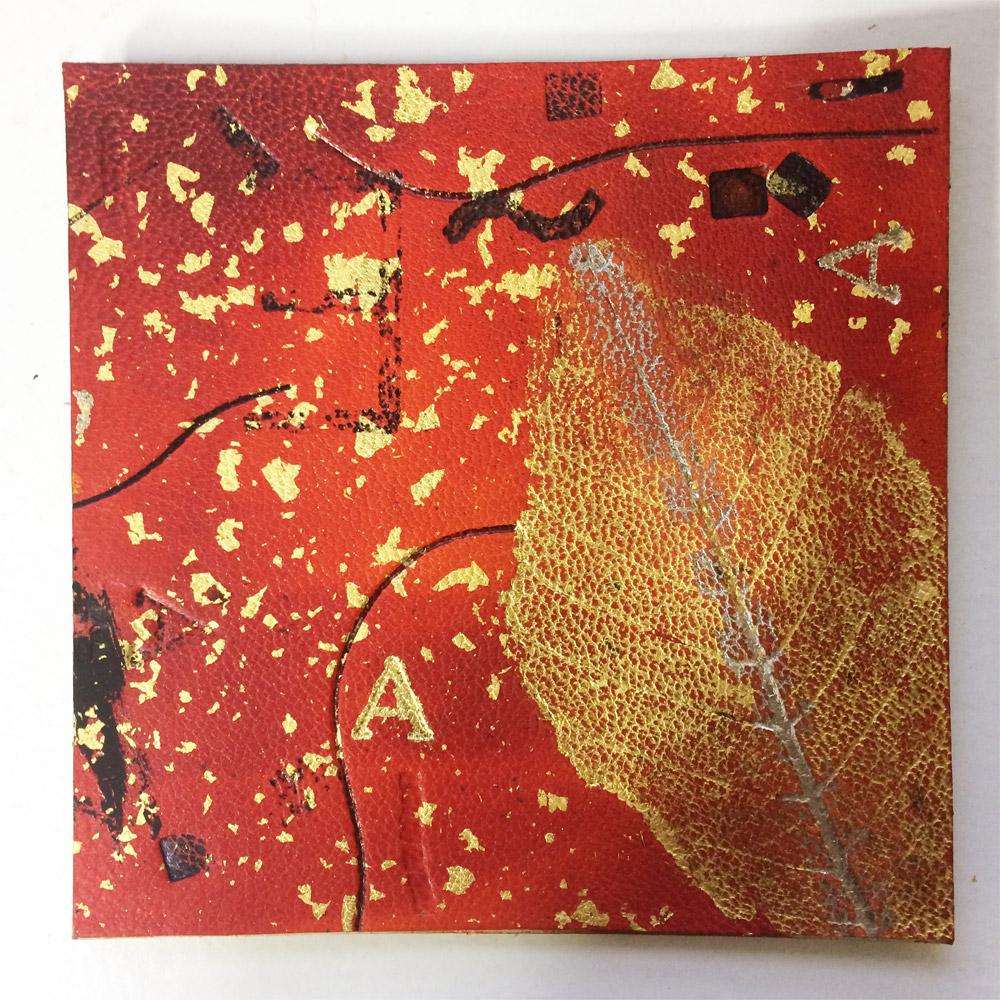
I continued to manipulate the plaquette by employing different types of black line work using carbon paper, acrylic paint, ink and foils. The tool also changed depending on the look I wanted; I used a variety of pens, small brushes, PVA, brass finishing tools and a heat spatula.
DAY SEVEN
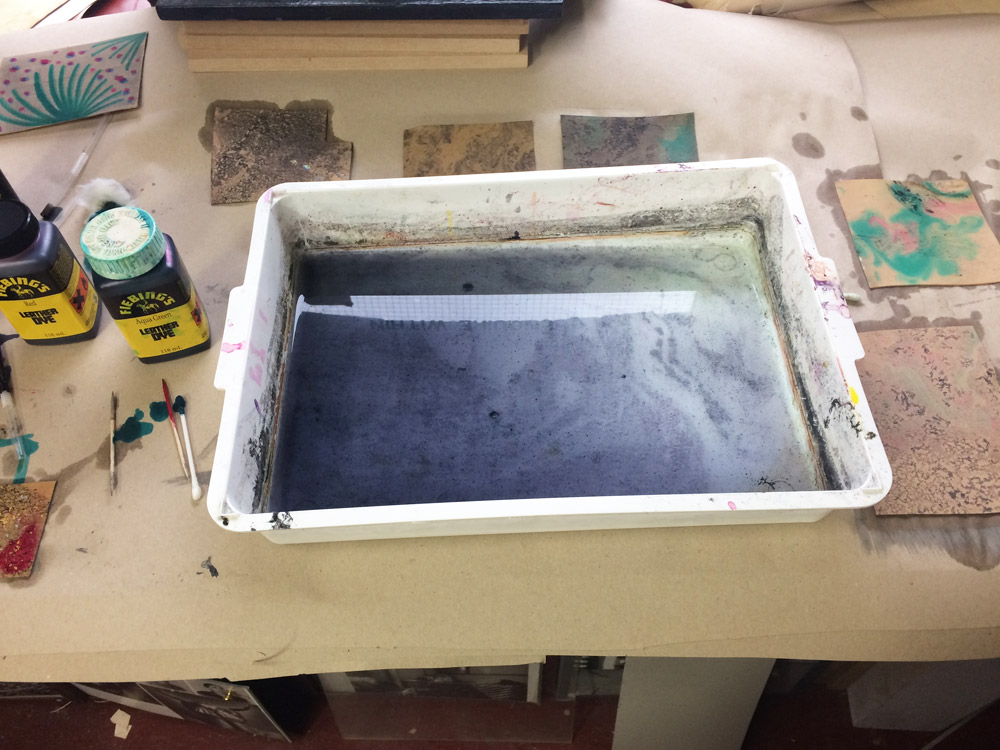
Even more dye techniques were demonstrated to me on day seven, at this stage the dye was mostly painted on with cotton swabs, toothpicks and brushes. But the most interesting type of dye application was flottage (simply put: marbling). I played around with different colors and ways of dropping the dye into the bath.
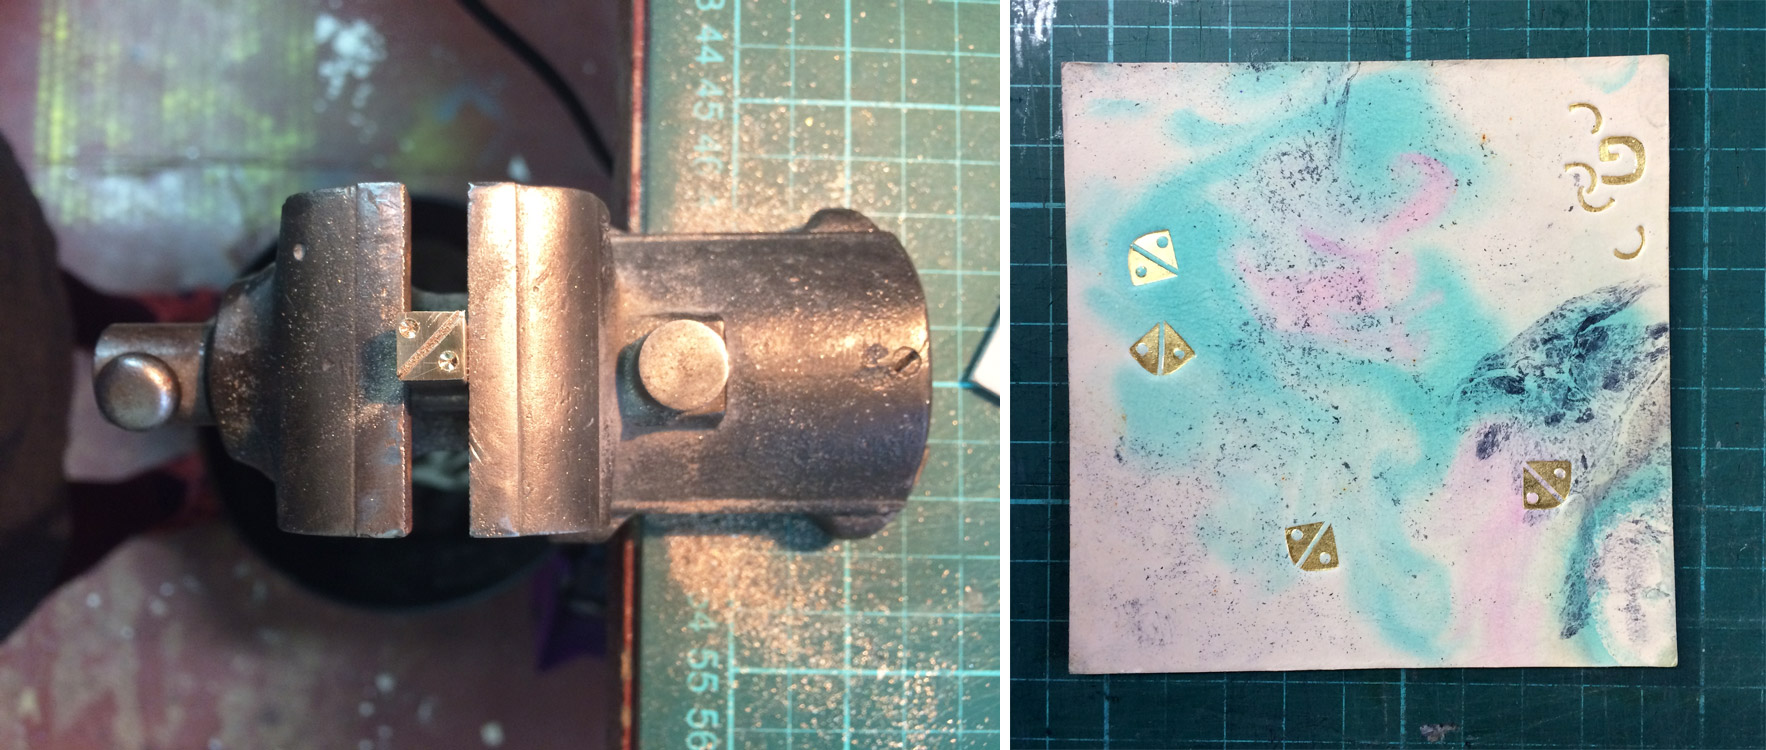
Below is my personal favorite. One the final days I tooled some of my dyed pieces with brass tools that I made using quick tooling making techniques. You can see the tool in progress in the image below on the left. Mark also had me make a capital letter G, which was quite difficult. If you don’t believe me, then try it yourself.
DAY EIGHT & NINE:
The last two days were focused on tooling the various plaquettes I had. I played around with different applications of size and the order of when I made the impressions.
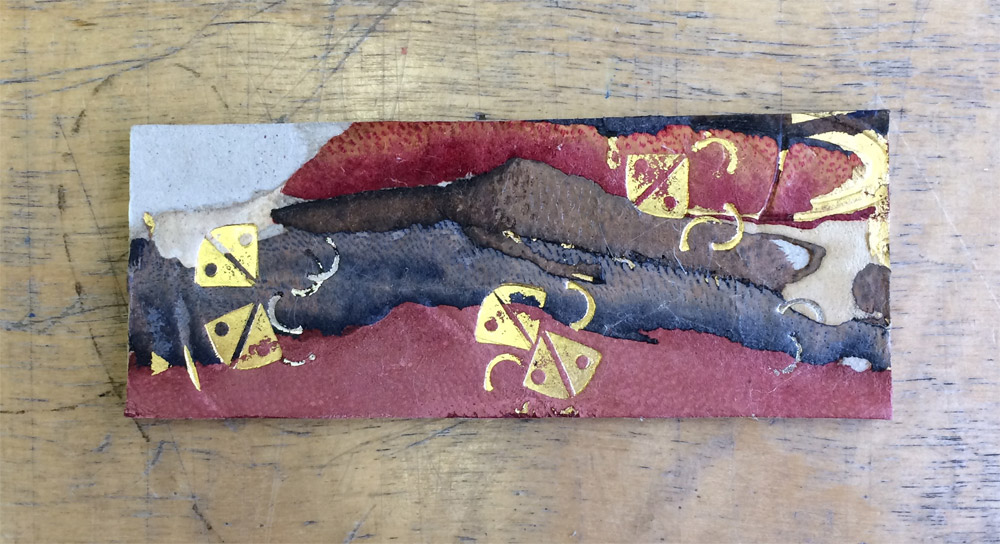
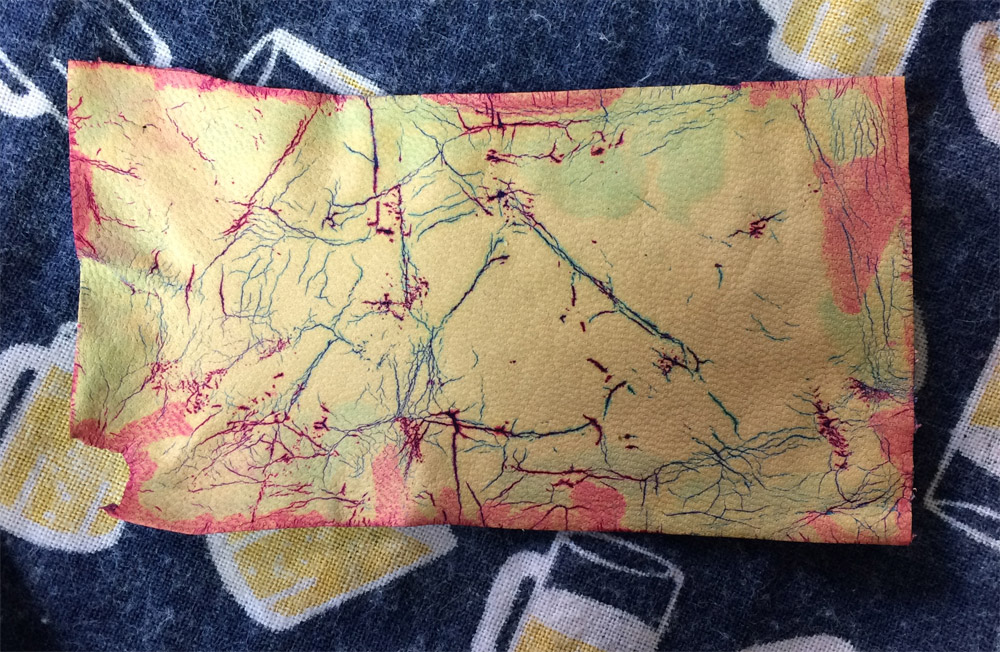
The final technique we reviewed was Sunago on paper. I continued to play with dyeing and the sunago technique on the piece of leather that I printed on the very first day. Here’s where that experimentation went:
After a few days off, I got on a bus that took me across London to Tracey Rowledge‘s studio just west of Regent’s Park. I spent two days with Tracey, learning her technique for tooling. A unique style she learned from Ivor Robinson. I chose to learn how to employ this technique on paper rather than leather. Below are some of my favorite examples from the collection of pieces Tracey laid out for me to view.
DAY ONE
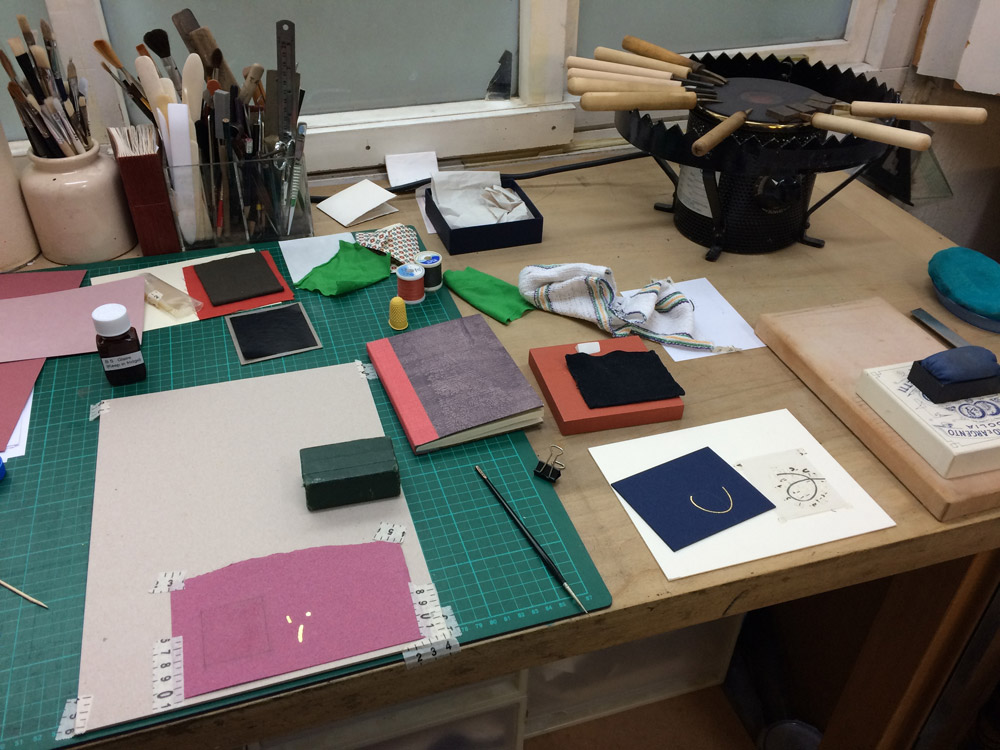
Working with a simple swirl design, Tracey walked me through her process. We discussed laying out a design, choosing the right tools to build up the design (which may require making custom tools) then transferring the design to the plaquette. We blind tooled the design through a lightweight handmade paper before painting the impressions with glaire. Tracey pushed me to focus on my posture, making sure I approached the plaquette with accurate precision to place the tool in the right impression.
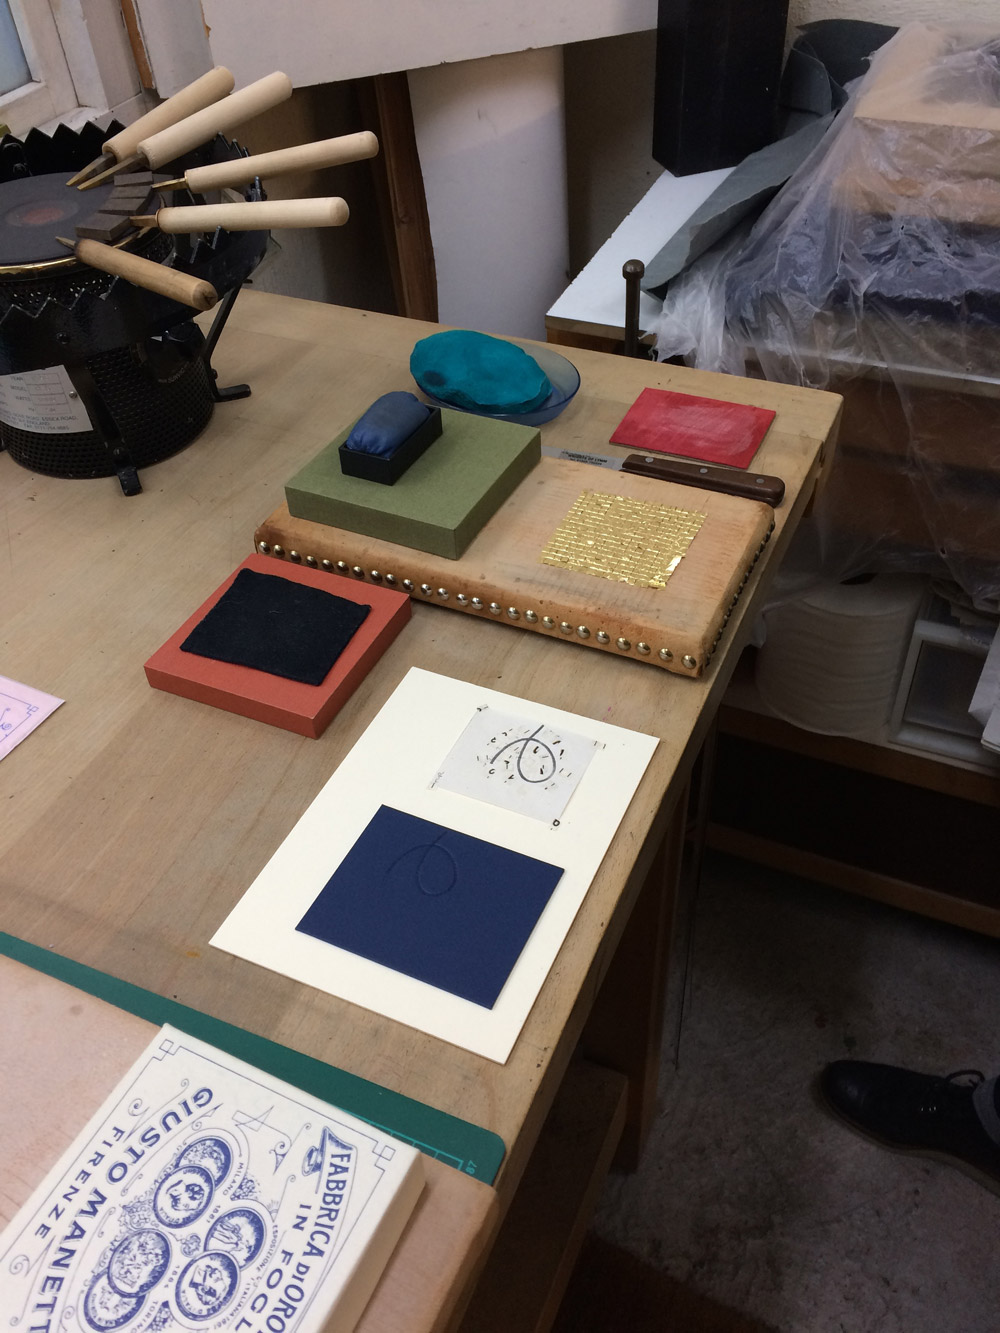
Below is an image of how the bench was set up to streamline the tooling process (at this point the plaquette has been blind tooled and painted with glaire and my leaf of gold has been cut into very small square pieces). I continued to work on this design the entire day, taking snack and water breaks from time to time.
DAY TWO
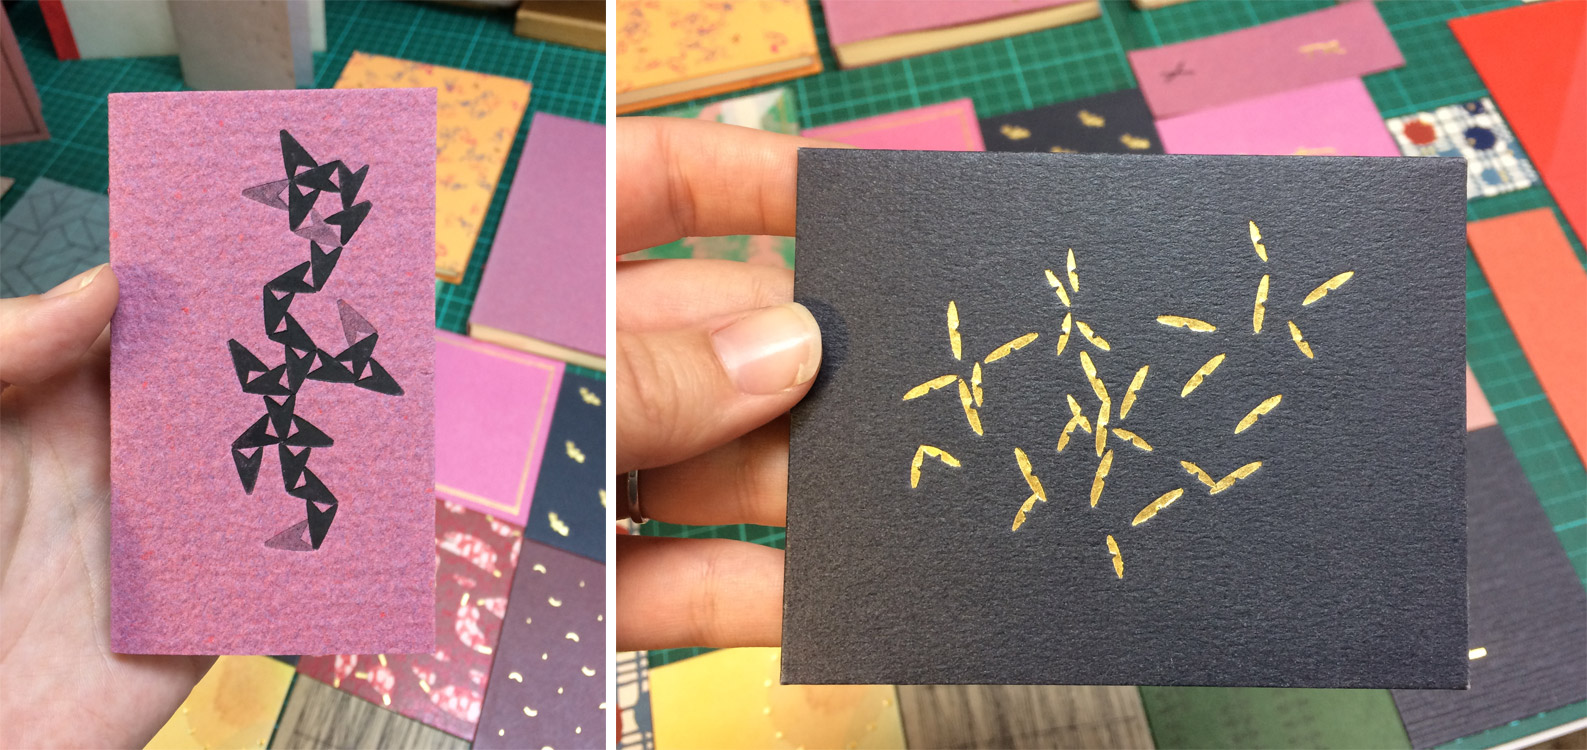
On my final day, I continued to perfect my posture and technique under Tracey’s guidance. In addition to the initial plaquette, I also brought a variety of handmade papers from home that I began to play around with by testing direct tooling (seeing how the glaire would alter the appearance of the paper) versus blinding first. We also got into carbon tooling (direct versus blinding first).
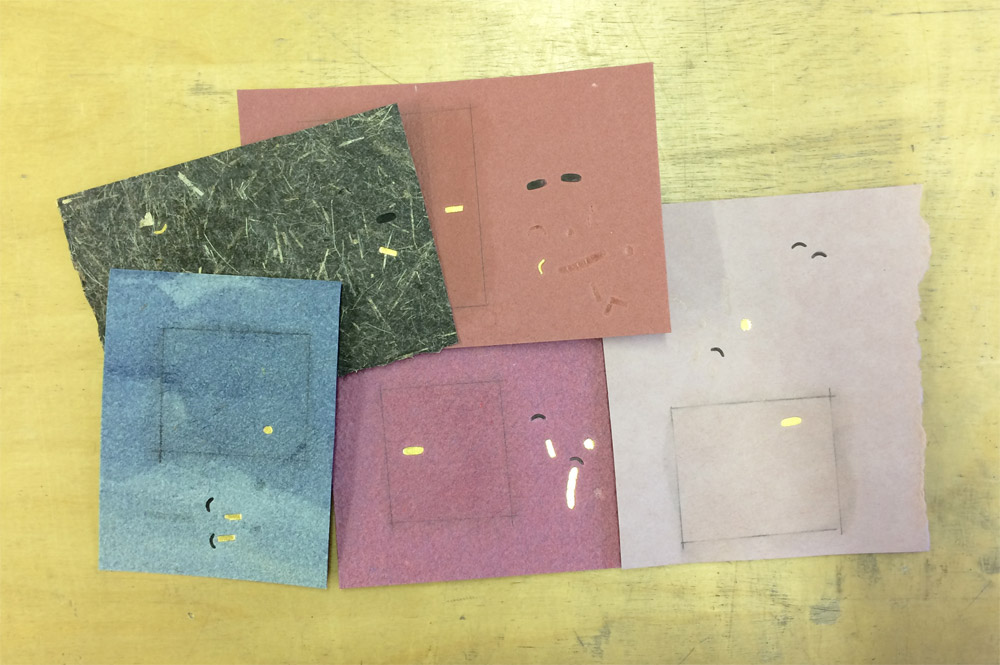
Here are the selection of papers I brought from home (and one that Tracey gave me). From left to right in the top row: Wheatstraw (black) from Hook Pottery Paper and paper from Katie MacGregor. From left to right in the bottom row: Indigo Day Cave Paper, Zaansch Bord (redbrown) from De Schoolmeester and Bugra.
My time in London was unforgettable, Mark and Tracey are incredible tutors. There was such a stark contrast to their styles of instruction, but each were able to push and challenge me in a way that enhanced my understanding of these techniques (some familiar and some new). I am so grateful to Mark’s pushback every time I asked a question, he has instilled within me the drive to experiment more and not to play it safe with my designs. But I am also grateful to Tracey’s controlled and thoughtful way of working, she taught me how to feel the motion of tooling within my entire body and to work in a meditative way. I left feeling beholden to Mark and Tracey, I hope for the opportunity to study with them again in the future.

erin, this is fascinating, way beyond my understanding, but oh, so inspirational. i love how your writing reflects each tutor, and how you honor them. you did some great work there!
Dear Erin, thank you for sharing your experience with Mark and Tracy. Wishing you a very good 2017 filled with wonderful projects.
Thanks so very much for sharing this incredible experience!!!
Thank you so much for sharing your experience. Love the transfer onto leather!
Terrific post! What a marvelous time you must have had. I love the experimentation. Thanks for sharing!
What is carbon tooling? You say it is direct, not requiring blind tooling first?
Carbon tooling can be done either as direct tooling or blinding the design in first. The quickest way to collect carbon on the tool is by taken a hot tool to carbon paper and dabbing it a few times. You can also collect carbon the old-fashioned way by greasing up the tool (I use petroleum jelly) and hover it over a flame. Then you bring the tool down on your material, either directly or in a pre-impressed area. Hope that makes sense and answers your question.
Hi Erin, thanks for your answer. Does it mean that carbon tooling is a decorative finish in its own right, and not an alternative method of fixing gold leaf?
Yes, carbon tooling is a decorative finish. I have never used it adhere gold leaf, but I imagine you might be able to. The carbon would alter the appearance of the gold, possibly making it less vibrant. That would make for an interesting test.
Thanks once again – very informative!