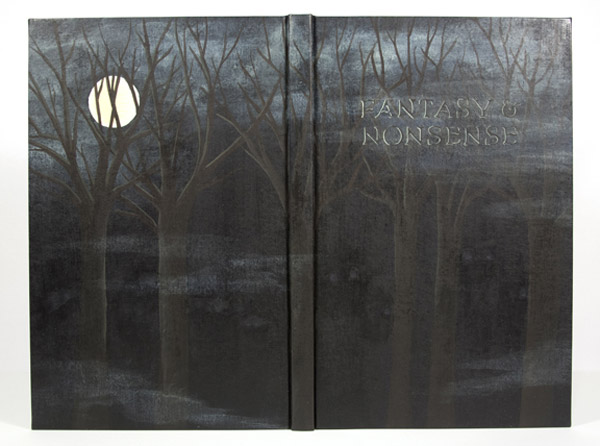
 In 2012, the Rocky Mountain Chapter of the Guild of Book Workers held an juried exhibit of design bindings based on a book of James Whitcomb Riley poetry called Fantasy & Nonsense. The text block was beautifully letterpress printed by Tryst Press and includes wonderful and whimsical wood engravings by Berrot Hubrecht.
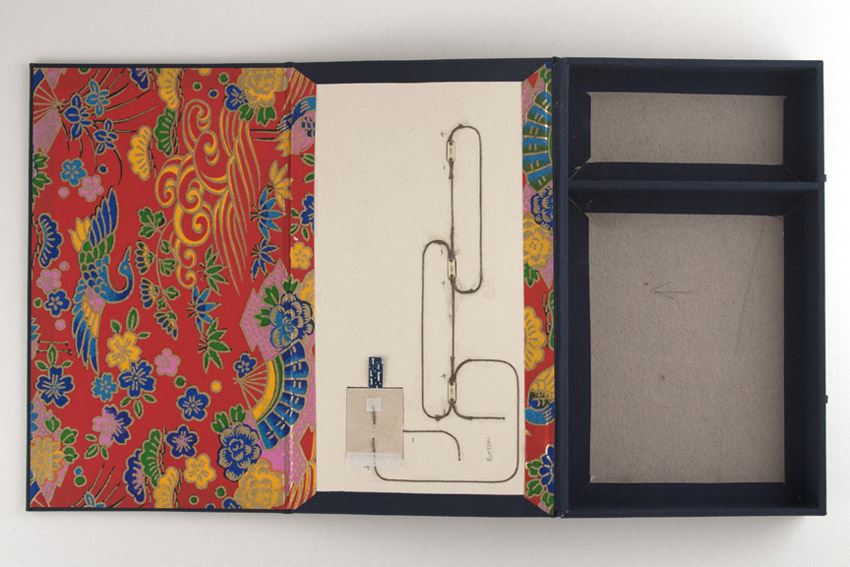
Mary Uthuppuru’s binding of Fantasy & Nonsense is covered in a thin hand-painted tissue, which allows the scattered LED lights embedded in the covers to shine through. These lights glow at alternating intervals and represent the goblin’s “green glass eyes” as described in the poem Nine Little Goblins. The book is housed in a cloth covered clamshell box, which contains a compartment holding three spare batteries. Watch the video below to see the LED lights in action.
The exhibition was held in conjunction with the 2012 Standards of Excellence conference in Salt Lake City, Utah. At the time the books were on display at the University of Utah’s J. Willard Marriott Library, where Mary’s binding was awarded second place.
There are so many creative elements in this binding and so many design questions I have for you. Can you talk about your process for creating the painterly look of the cover?
While I usually use paste cloth (Mary will discuss her paste cloth technique in next week’s post) when I want total control over cover design for my bindings, this book had unusual needs. Paste cloth, while thin, would not allow me the translucency that I needed for the LED lights. Not only did I need the cover material to allow light through, but I needed it to look like the surrounding material when the light was off. For this reason, I turned to Japanese tissue mounted to cotton. The tissue could be painted exactly how I wanted, and in the areas where the LEDs would be placed, I could thin it even more. This way, when everything was painted, it would blend in, but when the lights were on, it would have the effect I wanted.
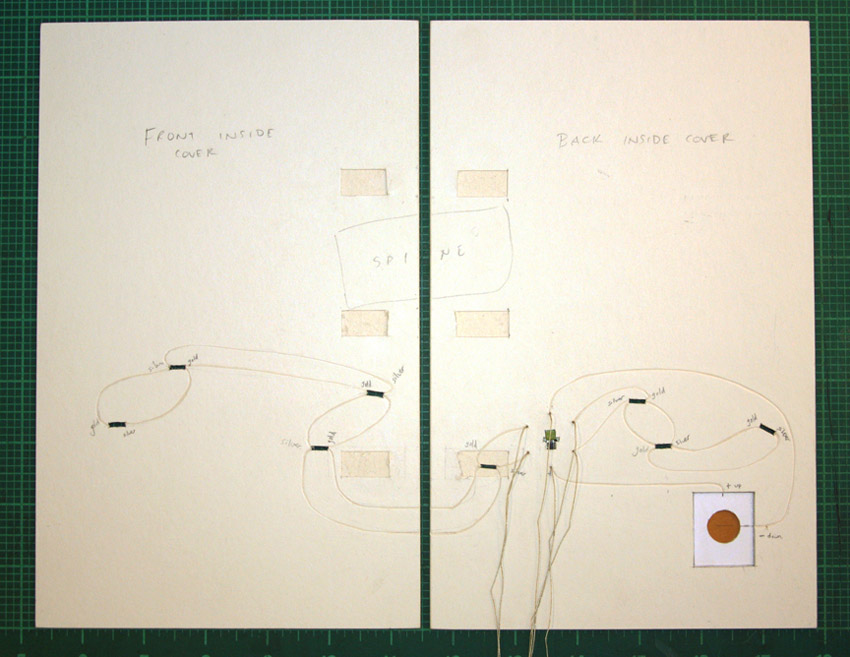
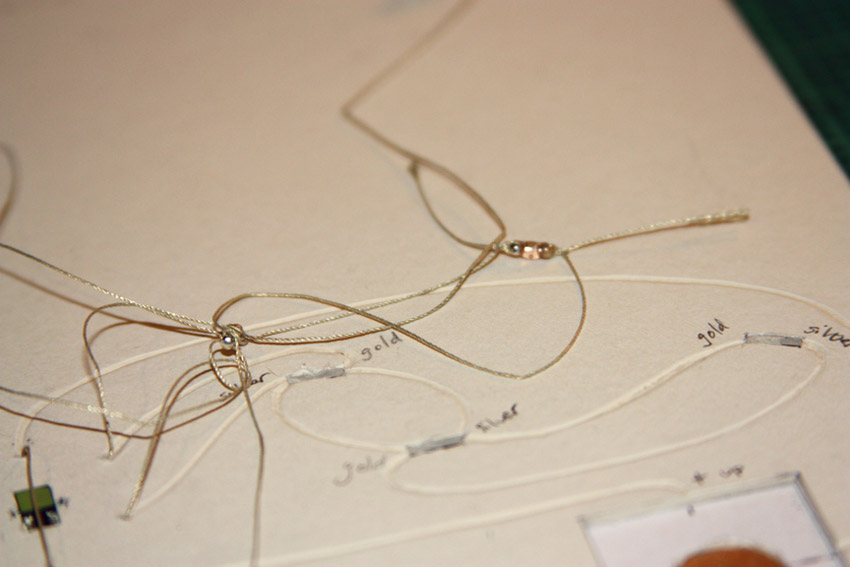
The steps for getting from plans to the final book are as follows: create the cover design on a piece of paper to scale, plan the circuitry and light placement, bind the book, add circuitry, work on the cover material. (You’ll find some in-progress images below: layout of design and circuitry, layout of circuitry on front cover boards and detail of wiring.)

The general design for the cover was painted on the tissue, predominately the midnight blue background and the trees. Next, the dry painted tissue was mounted to the cloth with PVA/Klucel G mixture. Once dry, the material was lined up with the paper design and holes were punched where the eyes in the design were to be. I then toned a thinner tissue to match the surrounding areas and put that in place. Finally, the painted design was completed and attached to the book being careful to line up the eyes over the LEDs.
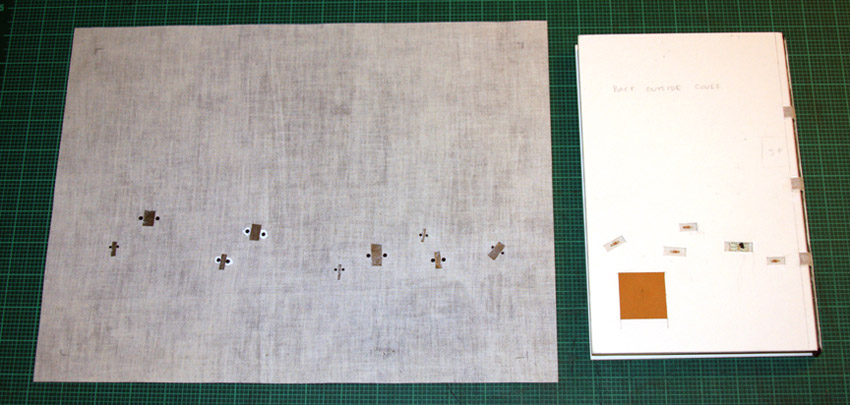
Back of covering material and back cover of binding.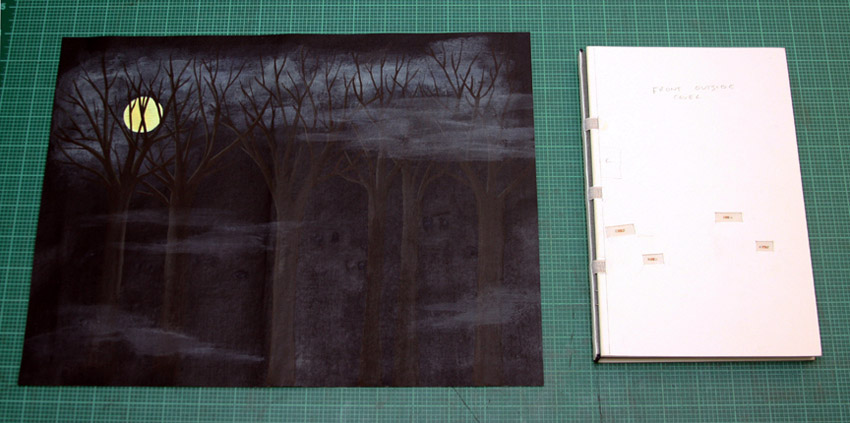 Covering material and front cover of binding.
Your use of soft circuitry is very exciting and I’m looking forward to seeing how your work progresses with this technique. When did you first experiment with combining this technology with your bookbinding work? What challenges have you experienced?
I first started using the soft circuitry when Leah Buechley came from MIT to Indiana University to give a lecture and workshop about the promotion of these materials. I lucked out because my friend was helping put the workshop together and was able to get me a seat. During the workshop, we each created our own soft circuit using conductive thread, a battery and an LED light. The workshop was given in hopes of putting this technology in the hands of people, specifically educators, who make things and have the potential to distribute these skills to kids, especially girls. During the lecture, Leah explained these goals further and showed some amazing applications of the circuitry.
After this exposure to the potential uses, I was really interested to try the technology in books too, but I wanted to wait until it actually fit the project at hand. It is easy to be excited about a technique or tool and use it just because you are excited about it. It is especially the case with lights and circuitry. It is my feeling that once you add lights to something, that you are trying to draw attention or add extra glitz. I wanted to be careful to reserve this eye catching element for a purpose, not just an adornment. It was this project that was perfect for the lights.
The challenge comes when you try to figure out how to hide all the electronic components that, while small, are tricky to keep from distracting from the overall design. I wanted to avoid sacrificing my aesthetic to allow the new components, so it can be tricky. With Fantasy & Nonsense, the biggest challenge was hiding the LEDs under the book cloth and trying to figure out how to wrap the conductive threads around the spine.
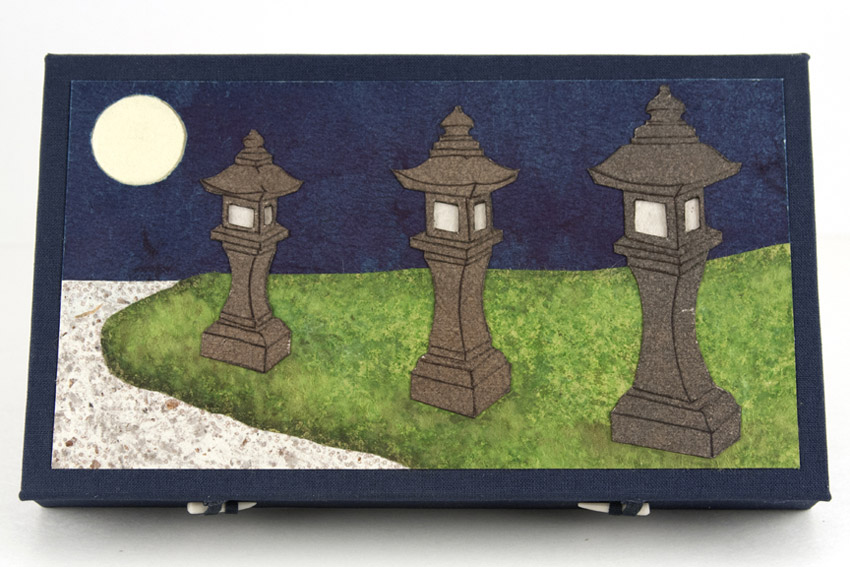
It also required some additional education on my part since the lights are timed with a microcontroller that had to be programmed. I applied these similar techniques to a box I made and donated to the Guild of Book Workers Standards of Excellence auction. The box has a moon (which is also a button) that when pressed, lights up three lanterns. It was built so that when the lid is lifted, there is a panel that folds out and reveals the circuitry. Also included were supplies for a small project and a tutorial for how to put something like that together. (All of this is available for download on my website.)